My Cape Cod Home Build

November 2023 - March 2024
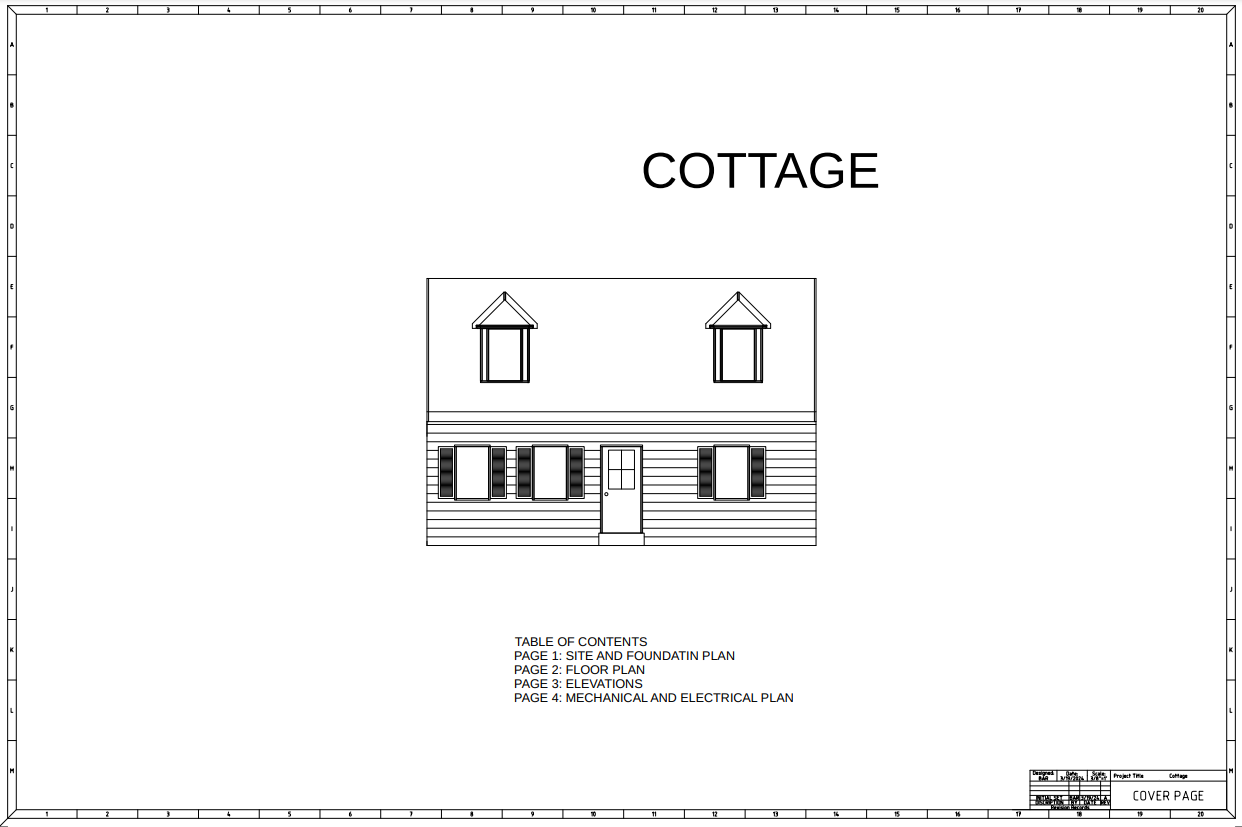
The original set of sheets that I produced in March 2024 (with some small things redacted). They were a bit rough around the edges but were a good start. Despite making plenty of changes throughout the building process, these plans are still pretty accurate.
June 2024
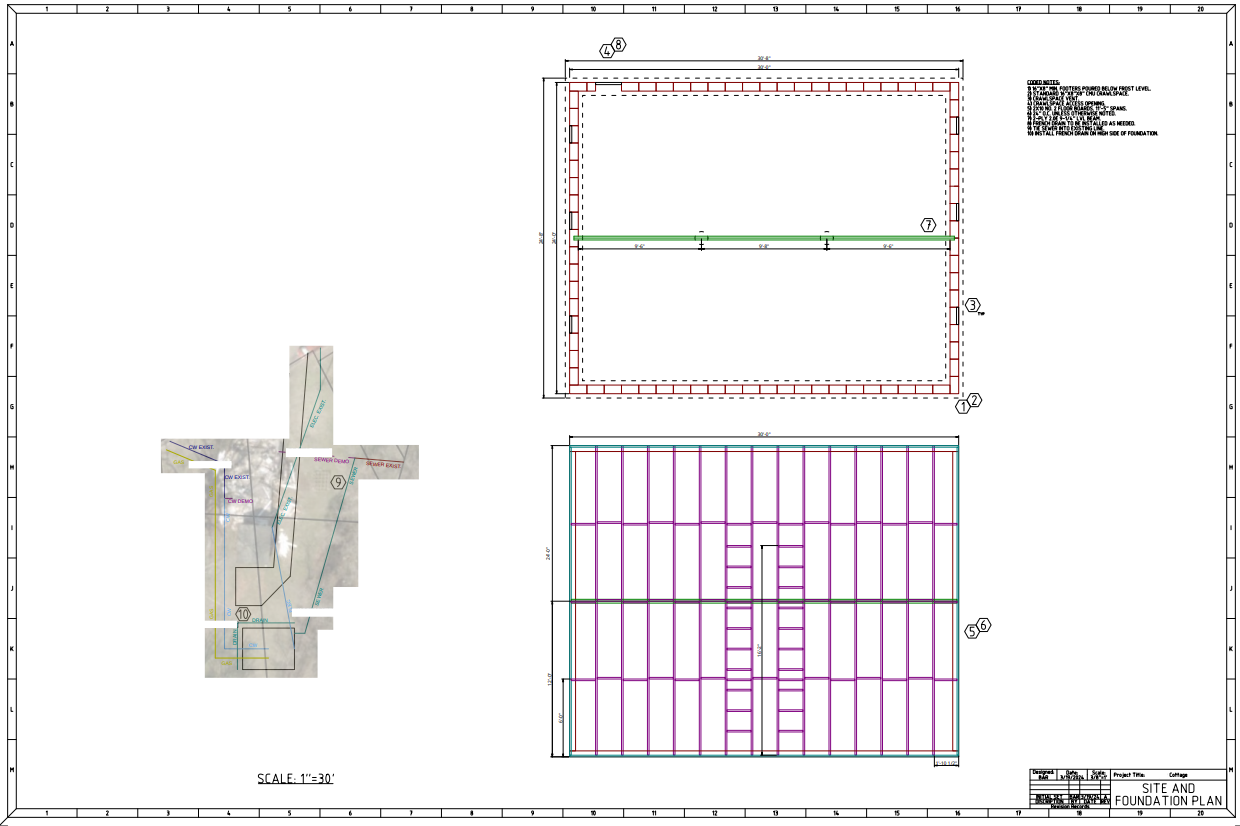
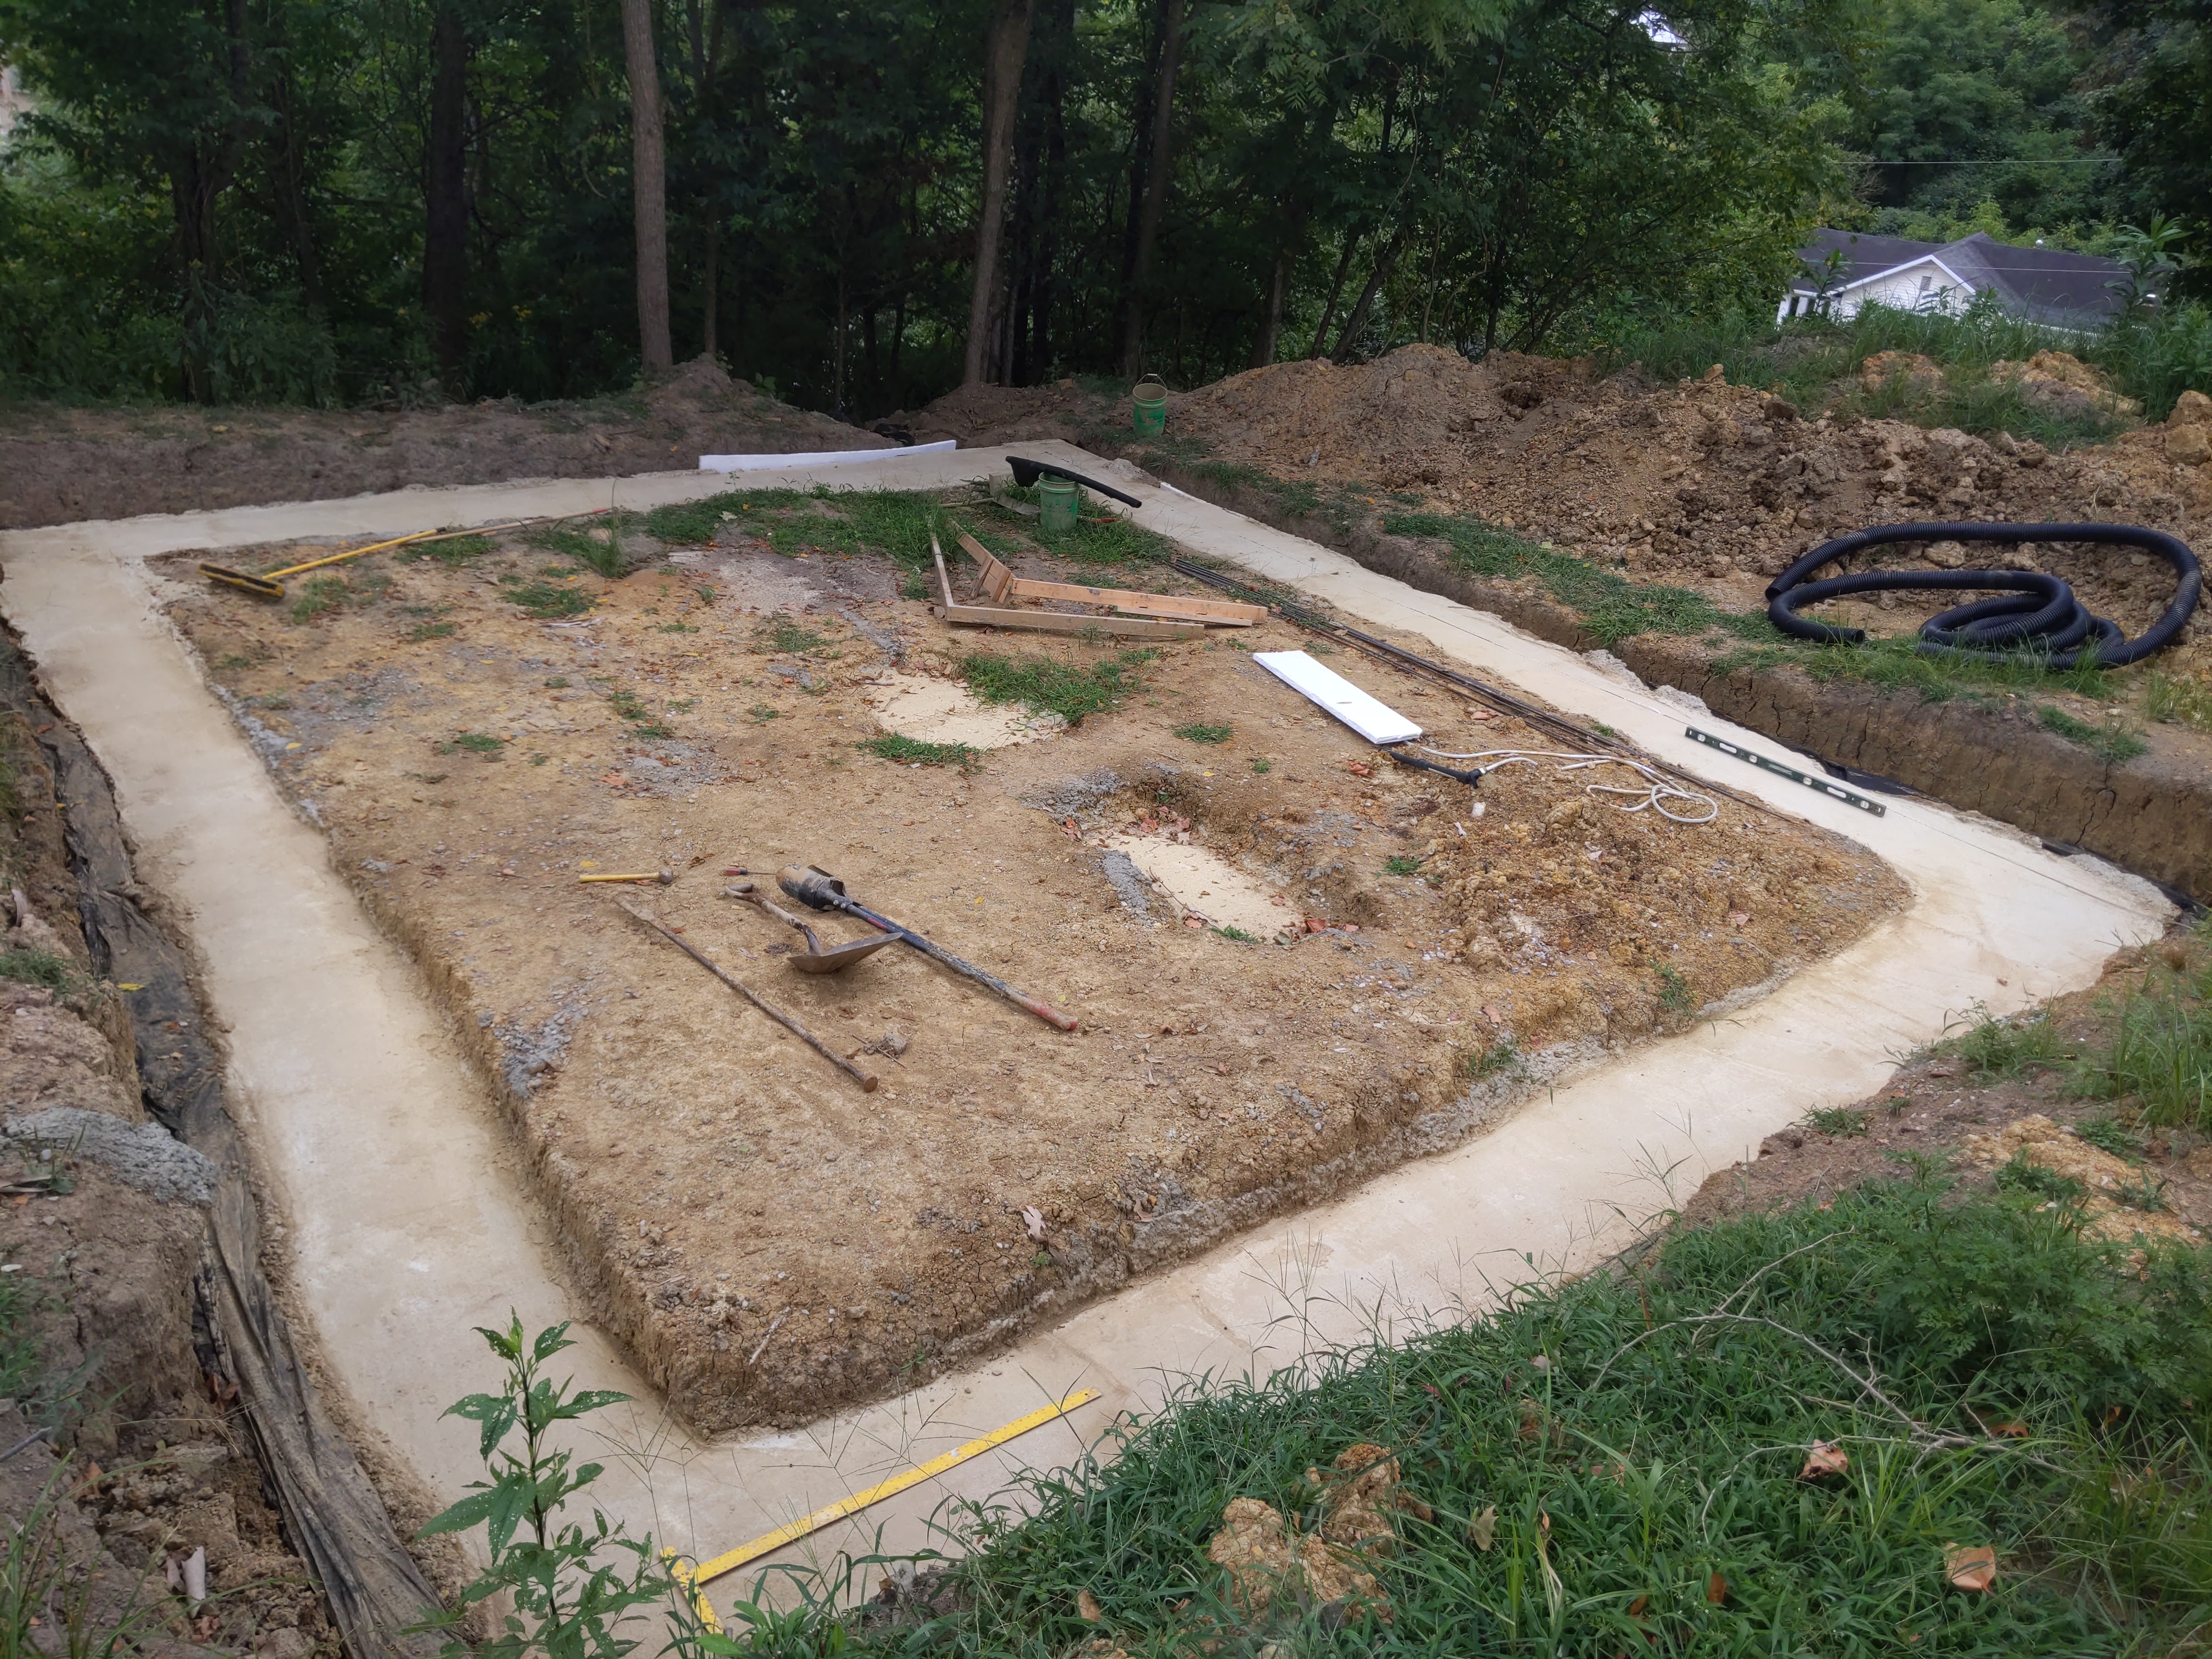
Excavation and footer pouring are the only parts of the build where I have paid a professional to do it for me. After digging the footers at the end of April, we experienced a lot of rain that would constantly fill in the trench and prevent us from being able to pour the concrete for about a month and a half. We were eventually we were able to pour the footers mid-June. Although a basement would have been nice, I decided on a crawlspace for cost reasons. Despite not being as deep as a basement, it still runs into some ground water in the front-right corner, so I installed a foundation drain around the footer.
August 2024 - September 2024
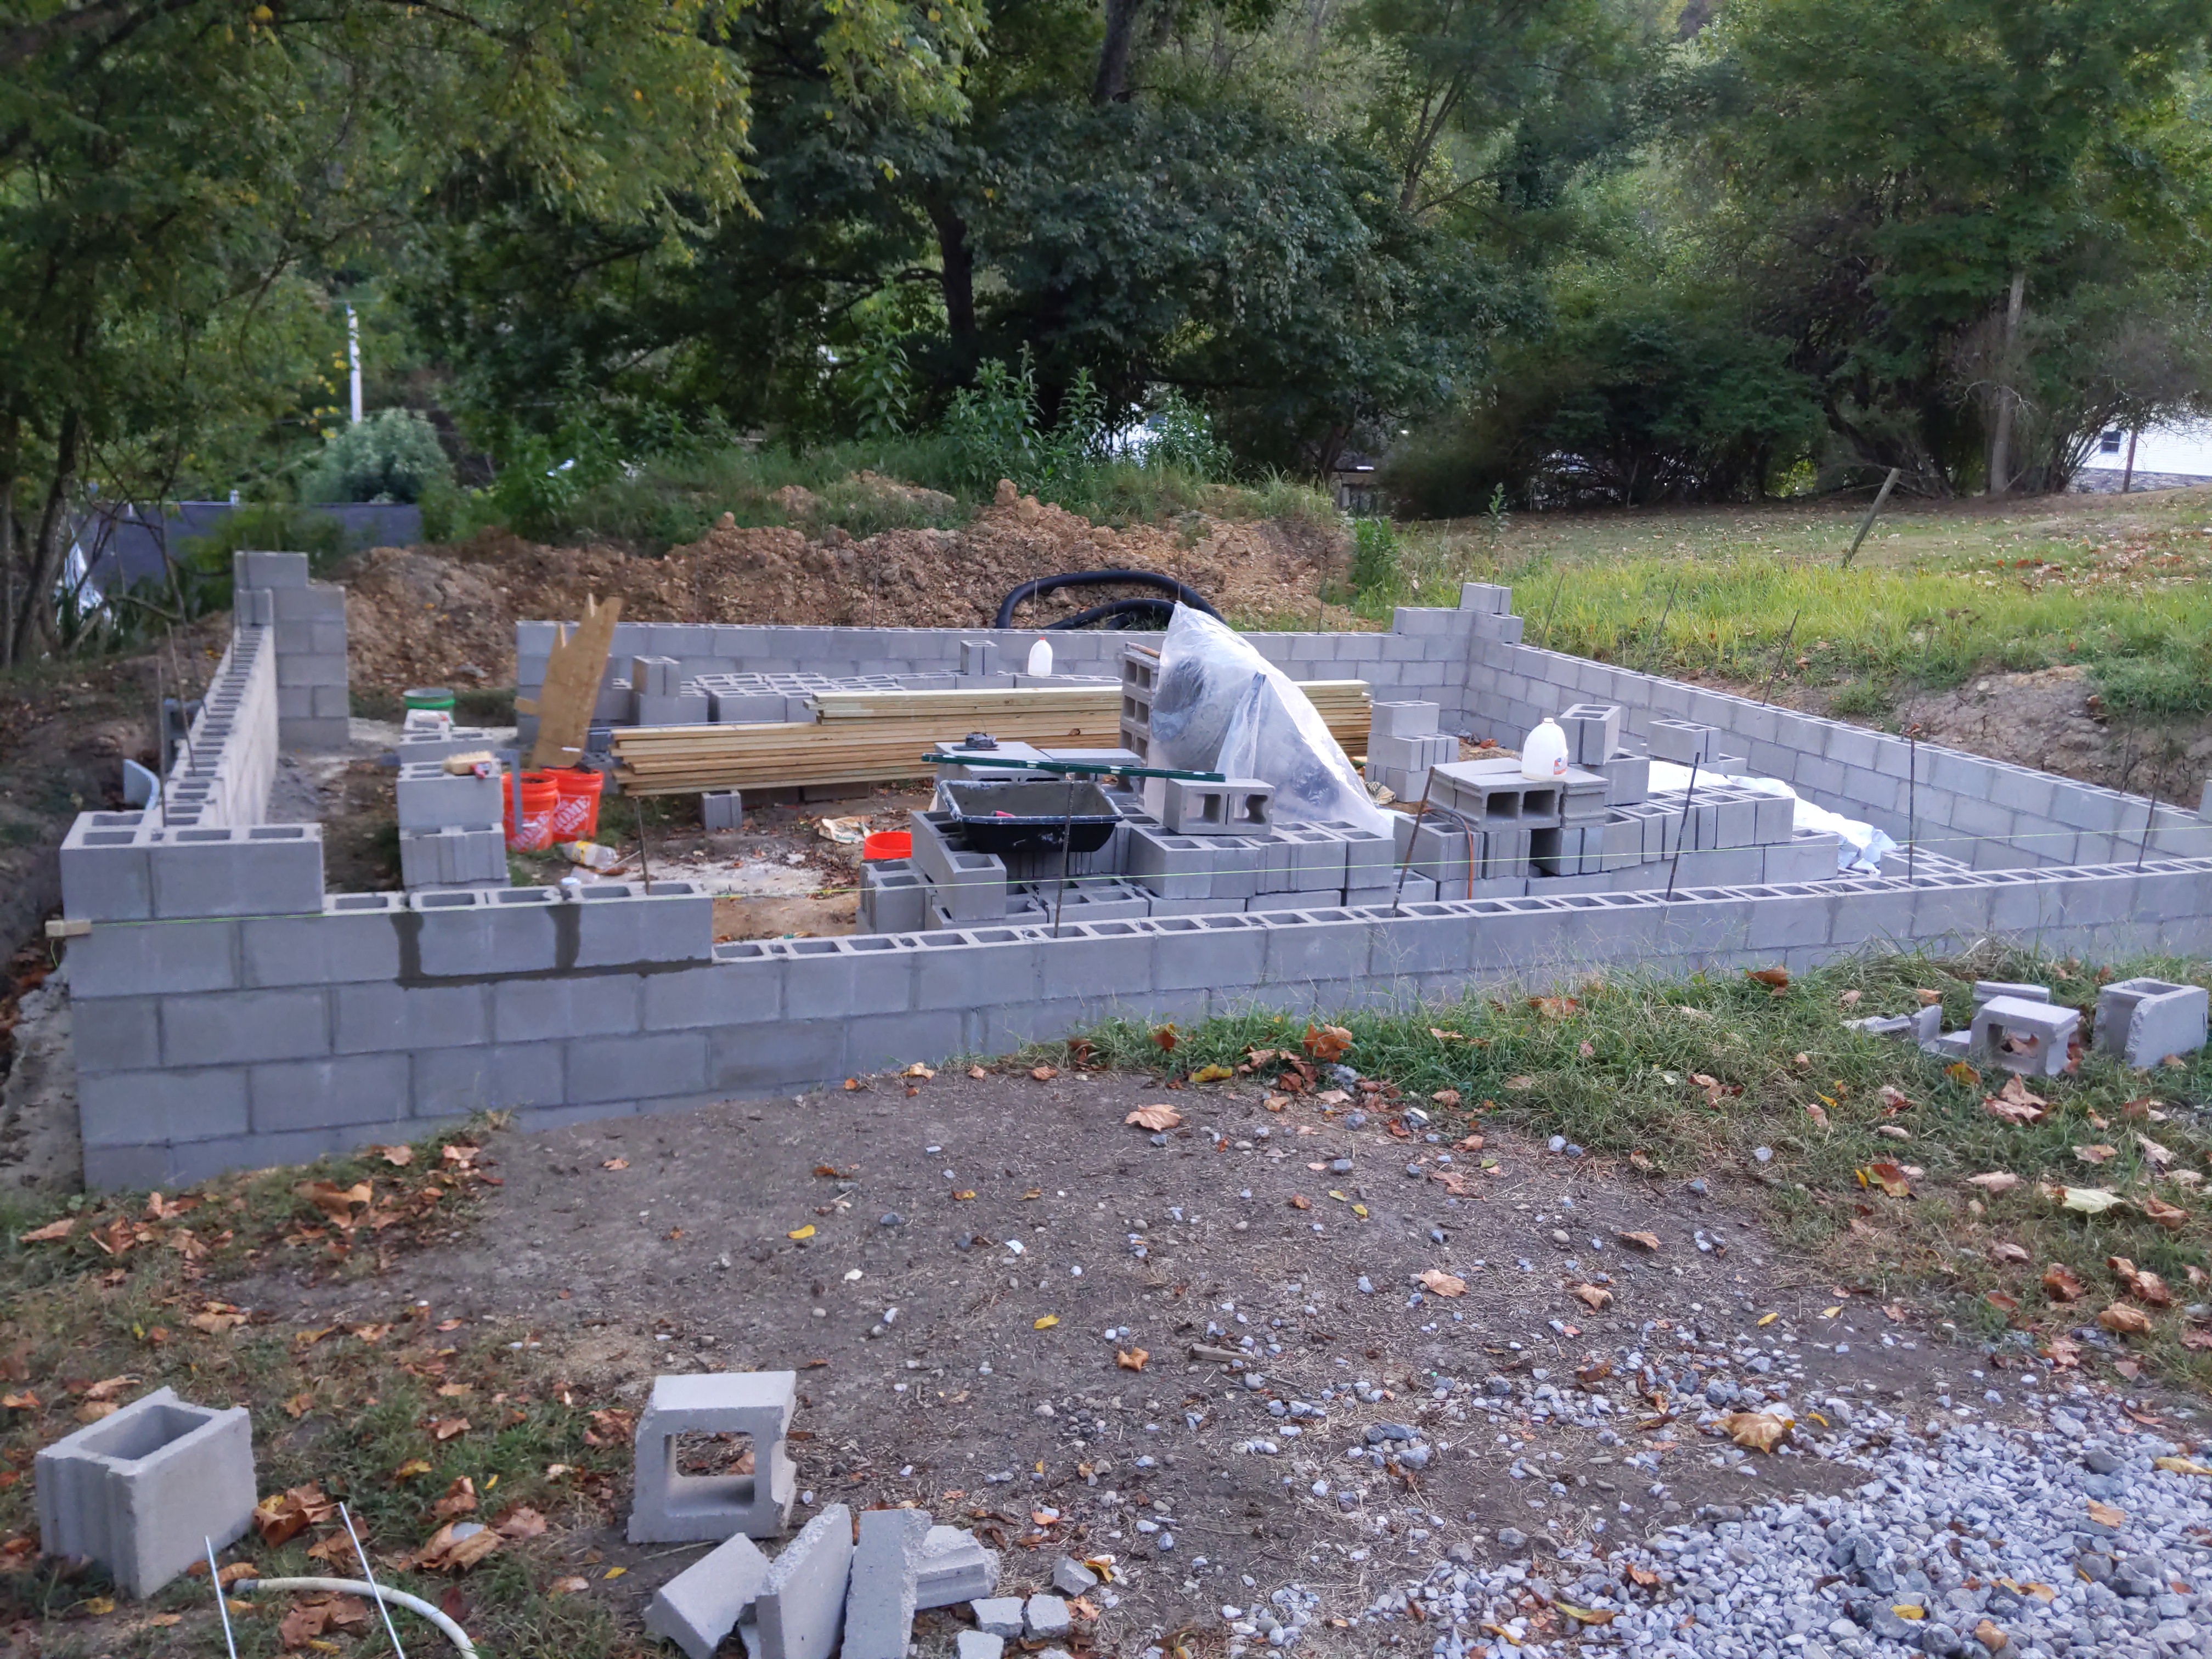
I was originally going to pay a mason to build the block wall for me, but ultimately decided to do it myself. I bought a used concrete mixer, which immediately broke, so I mixed most of the mortar by hand. The dimensions are 30'x24' and 7 courses high. Including the pillars for the girder in the center, it was slightly over 600 blocks. I combined sand and portland cement to create my own grout and poured it into the CMU cells containing rebar to add strength to the wall.
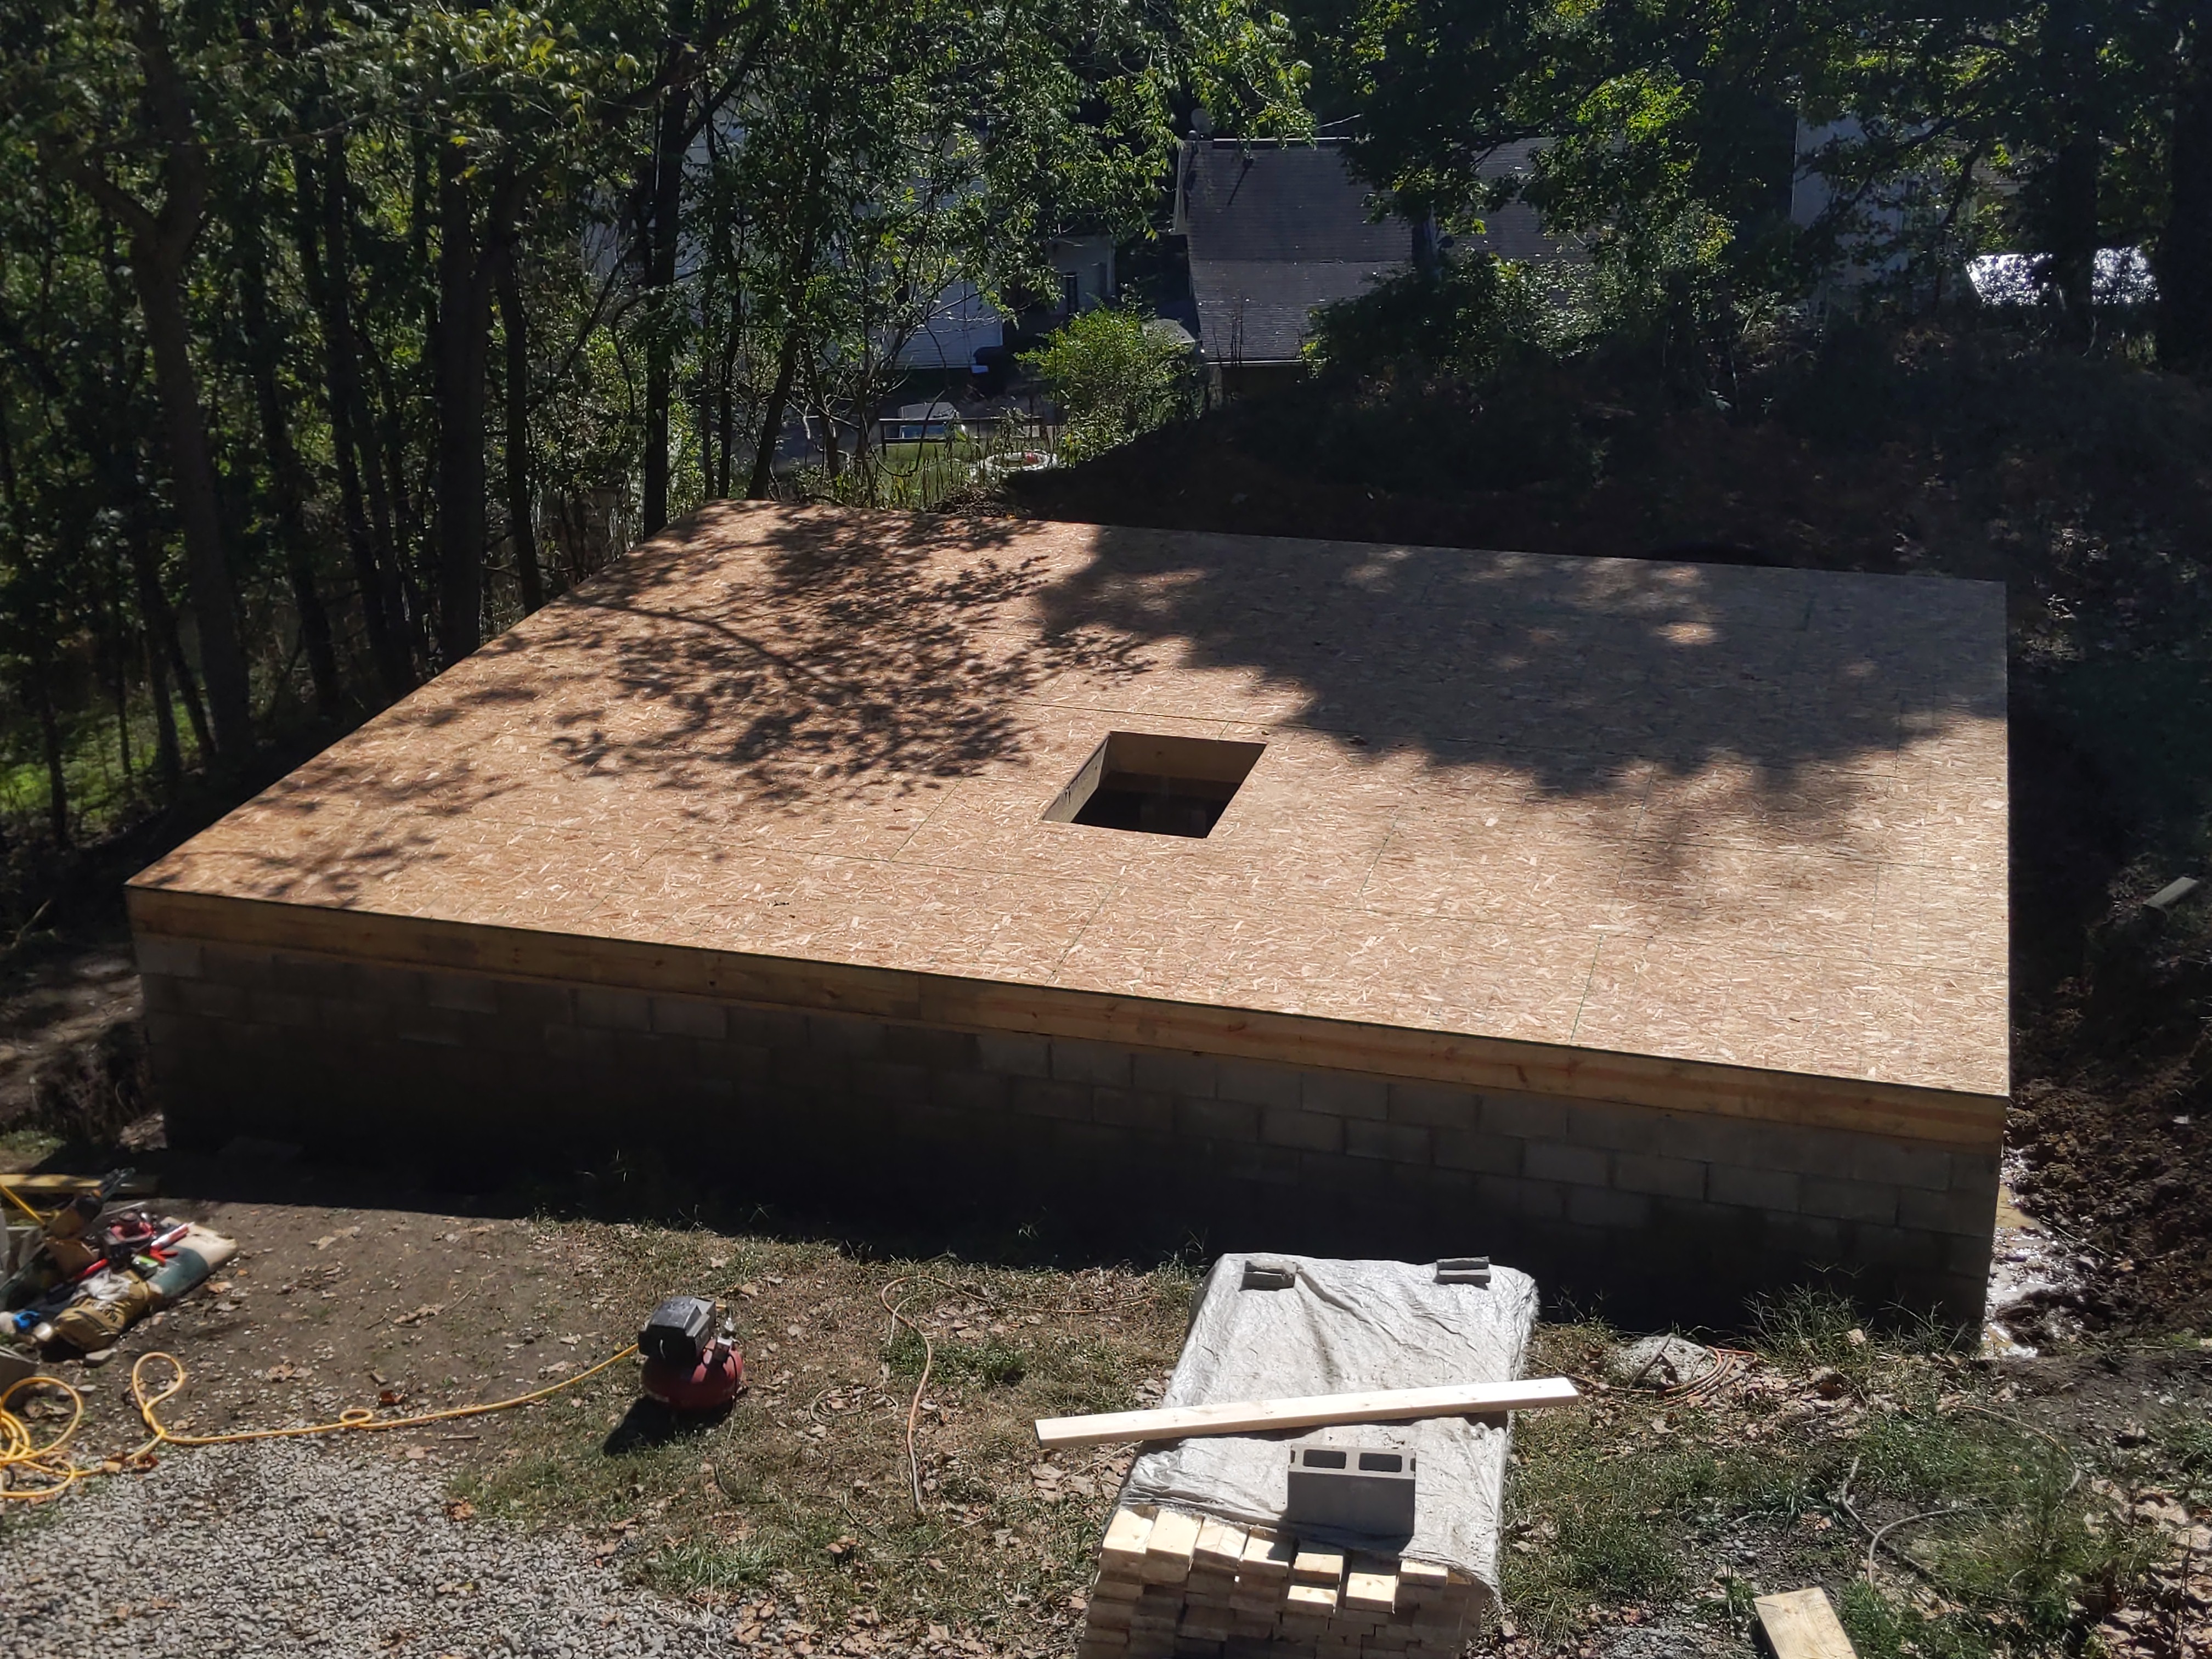
September 2024
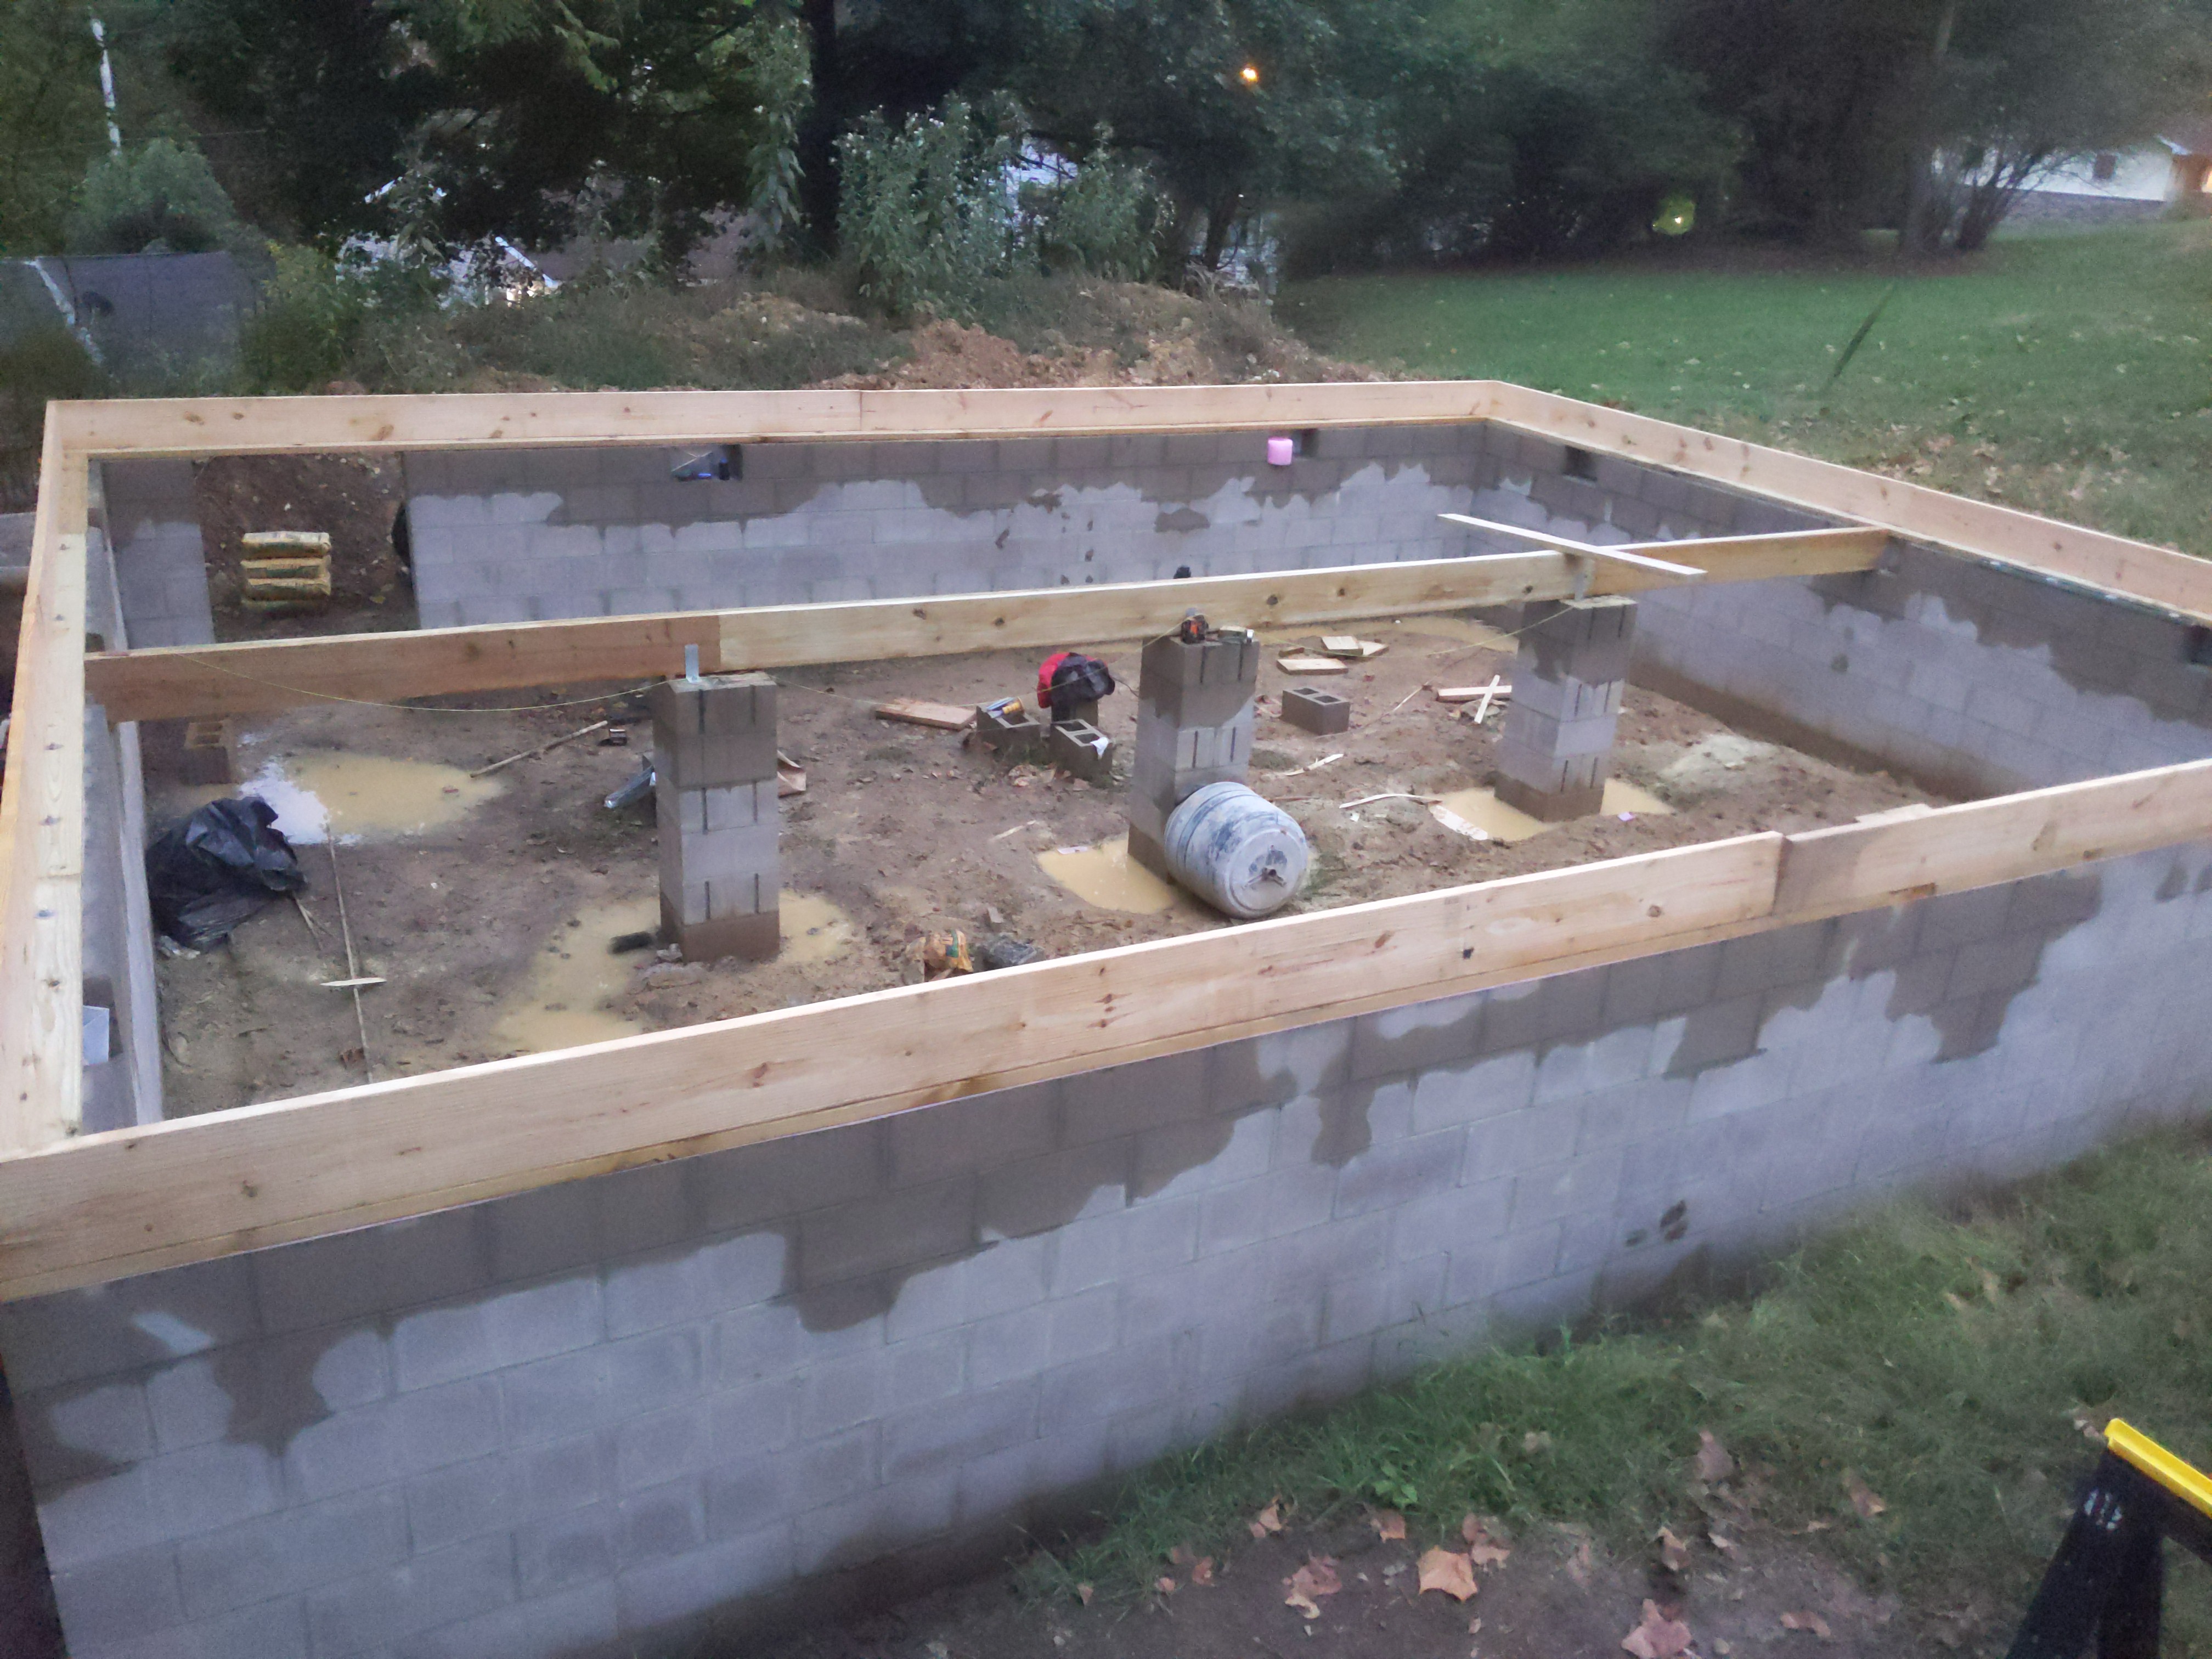
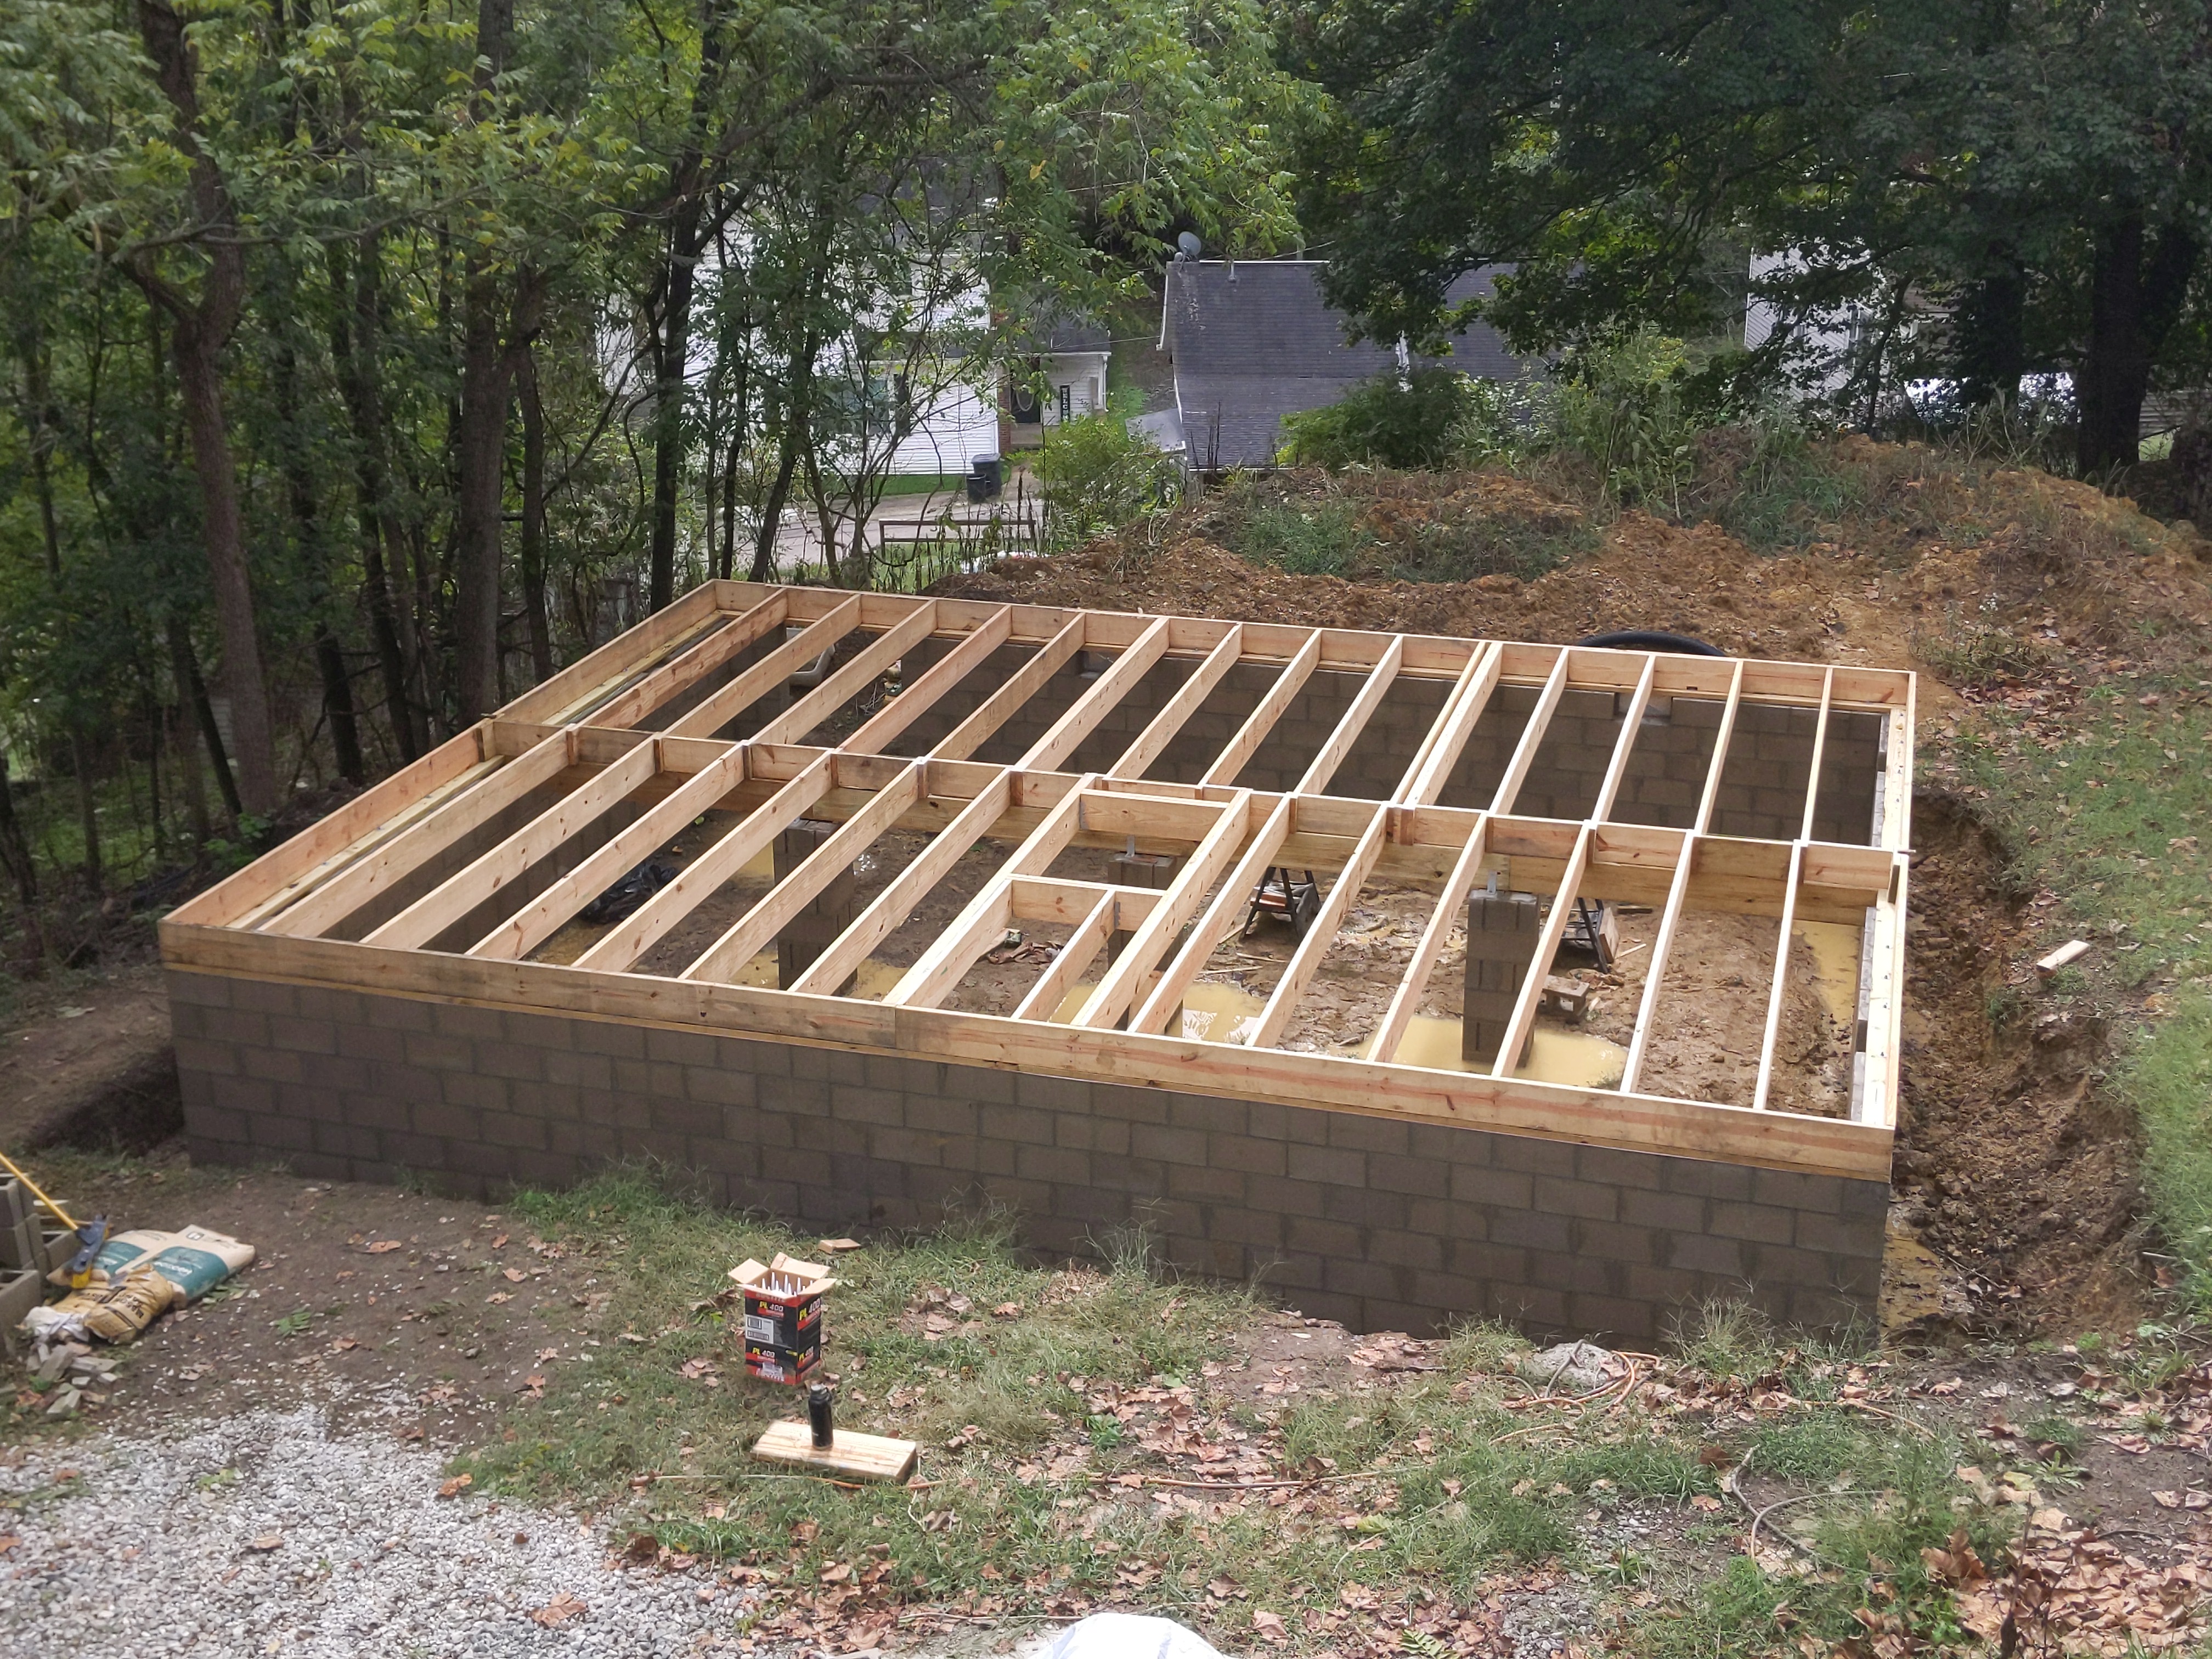
I built the floor joists with #1 Grade 2x10s 24" OC and then used 3/4" Tongue and Groove OSB for the subfloor. The hole in the middle was a last minute addition. It is situated under the stairs, so I figured, thanks to its improved headspace, it could be used to house any tall mechanical equipment that I want to place in the crawl space; such as a water heater. We'll see if I actually use it.
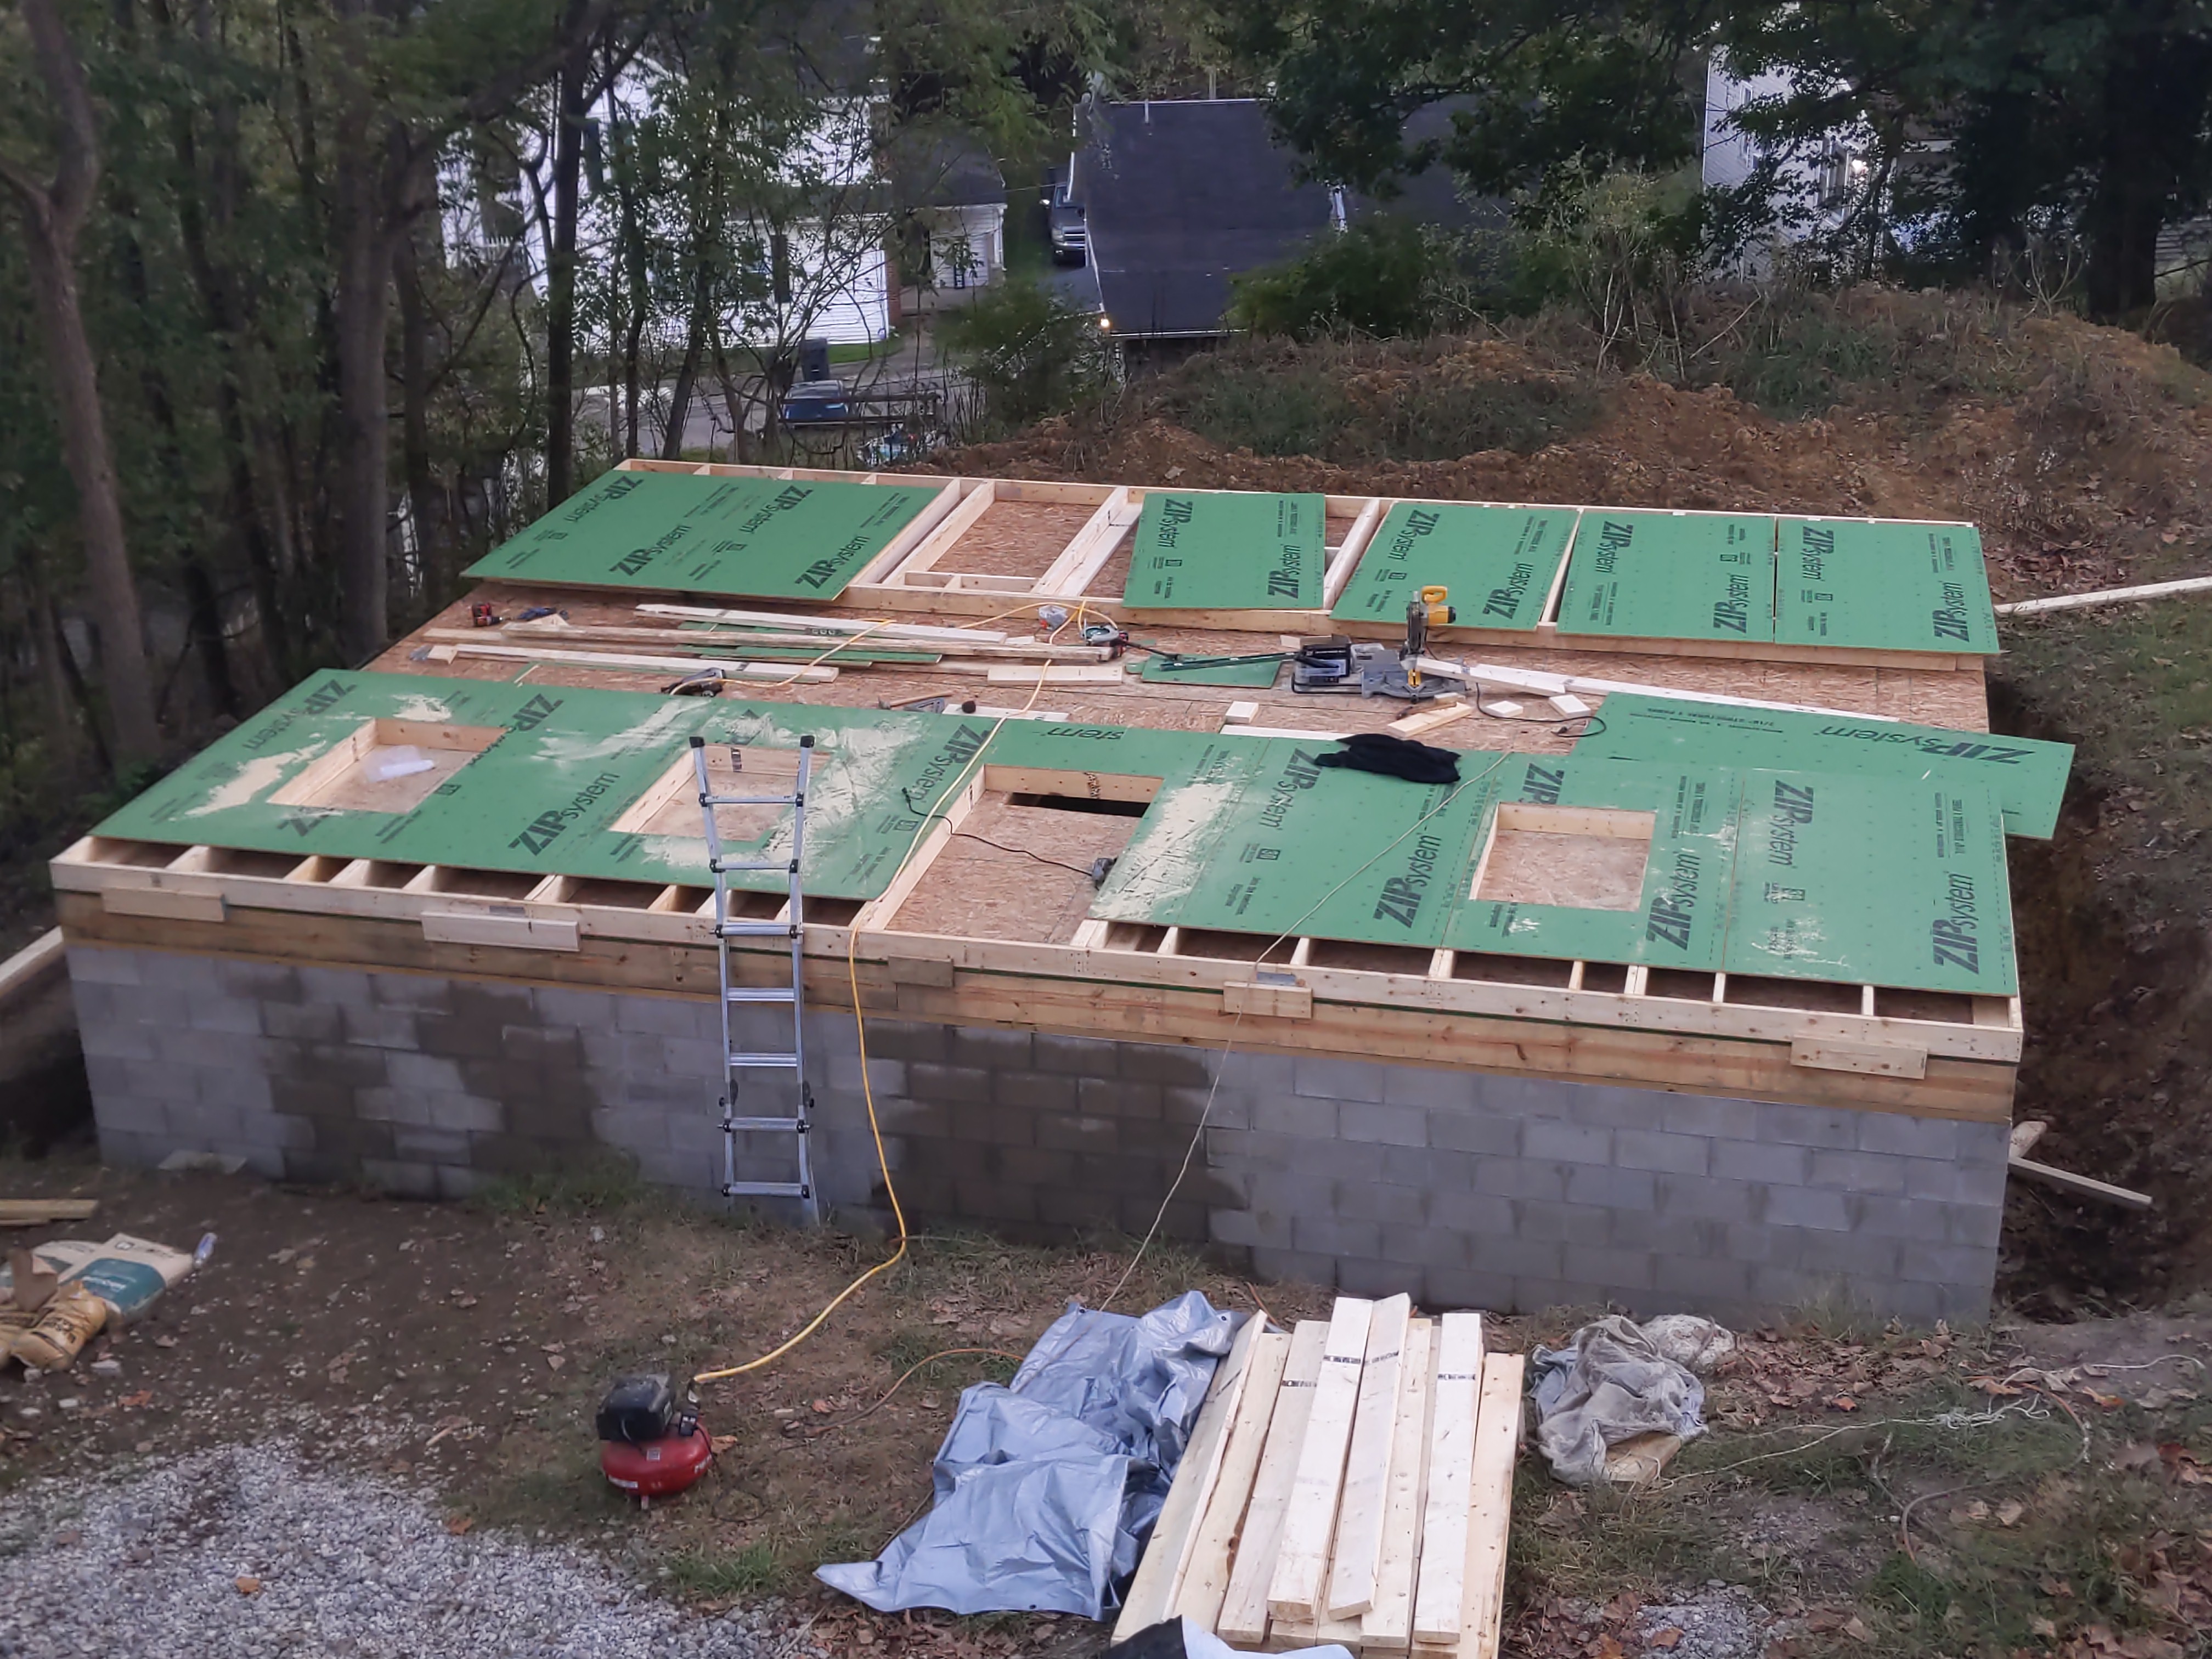
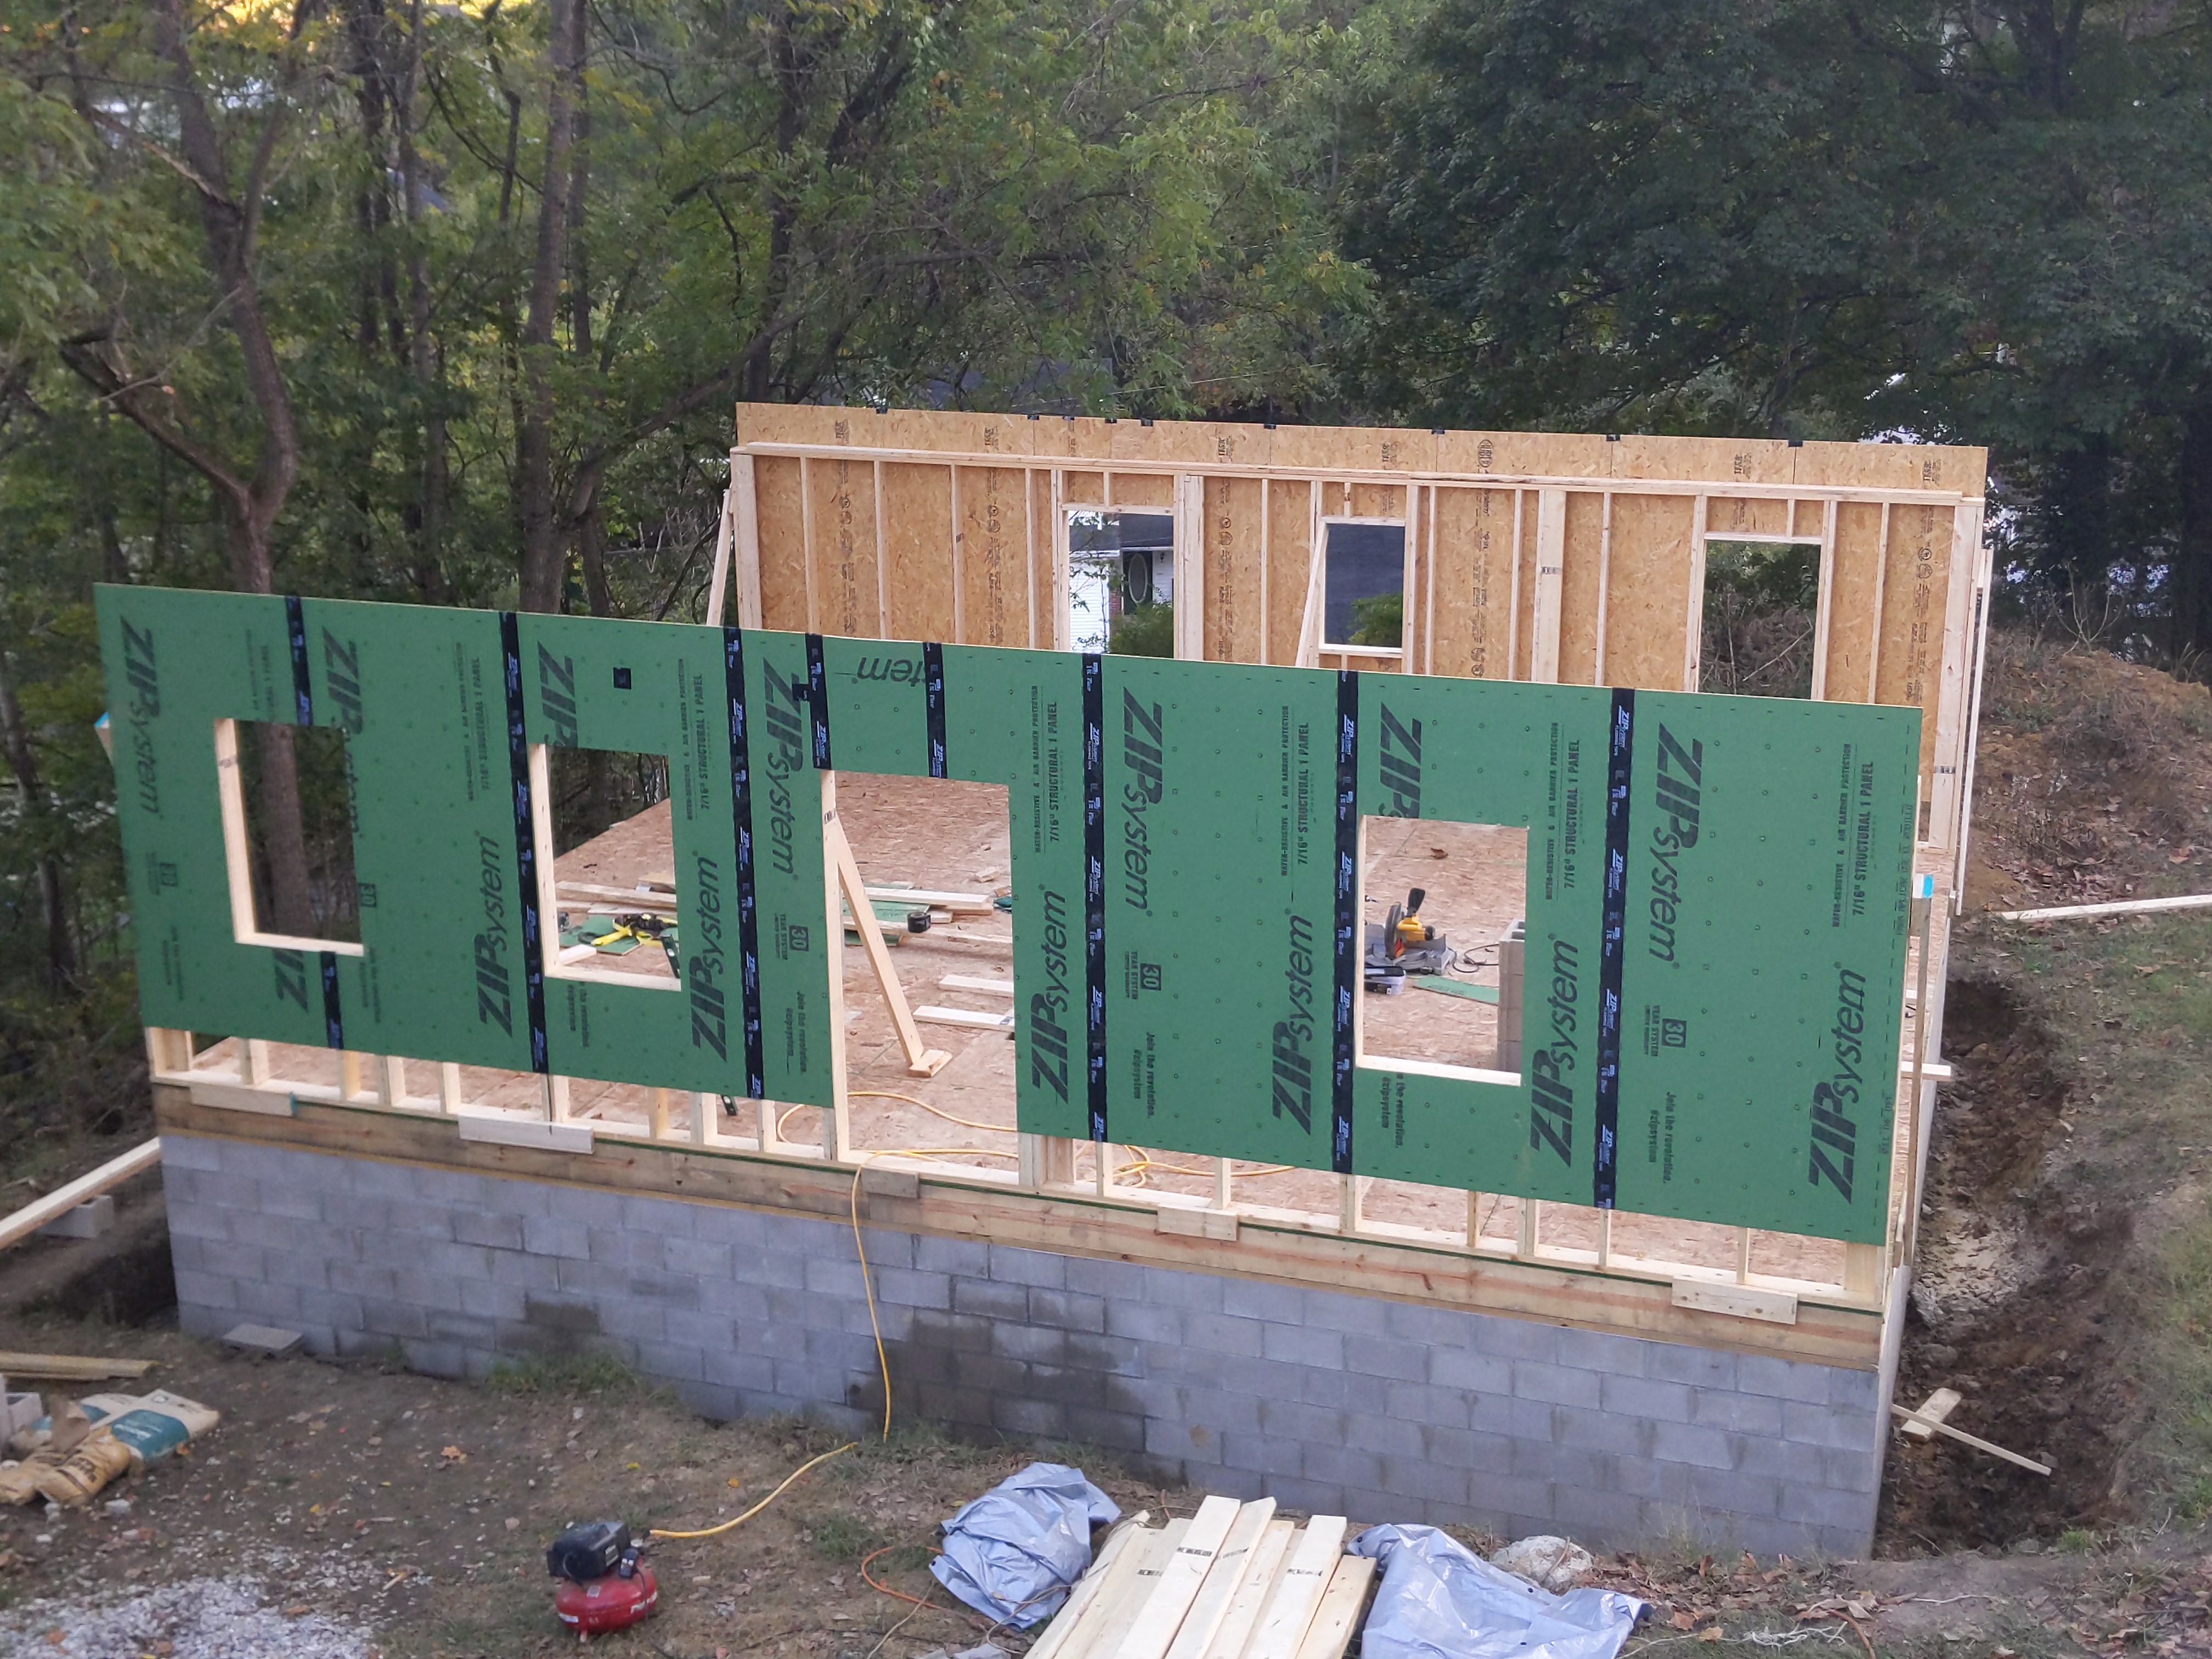
October 2024
The first walls being built. I framed using 2x6s 24" OC. The walls were sheathed before being raised with 7/16" ZIP OSB panels. I raised the sheathing up to cover the second floor rim joist, thinking it would make things easier in the long run, but it didn't. I won't do that again. With help from my dad and a friend, it was relatively easy to raise the 30' walls.
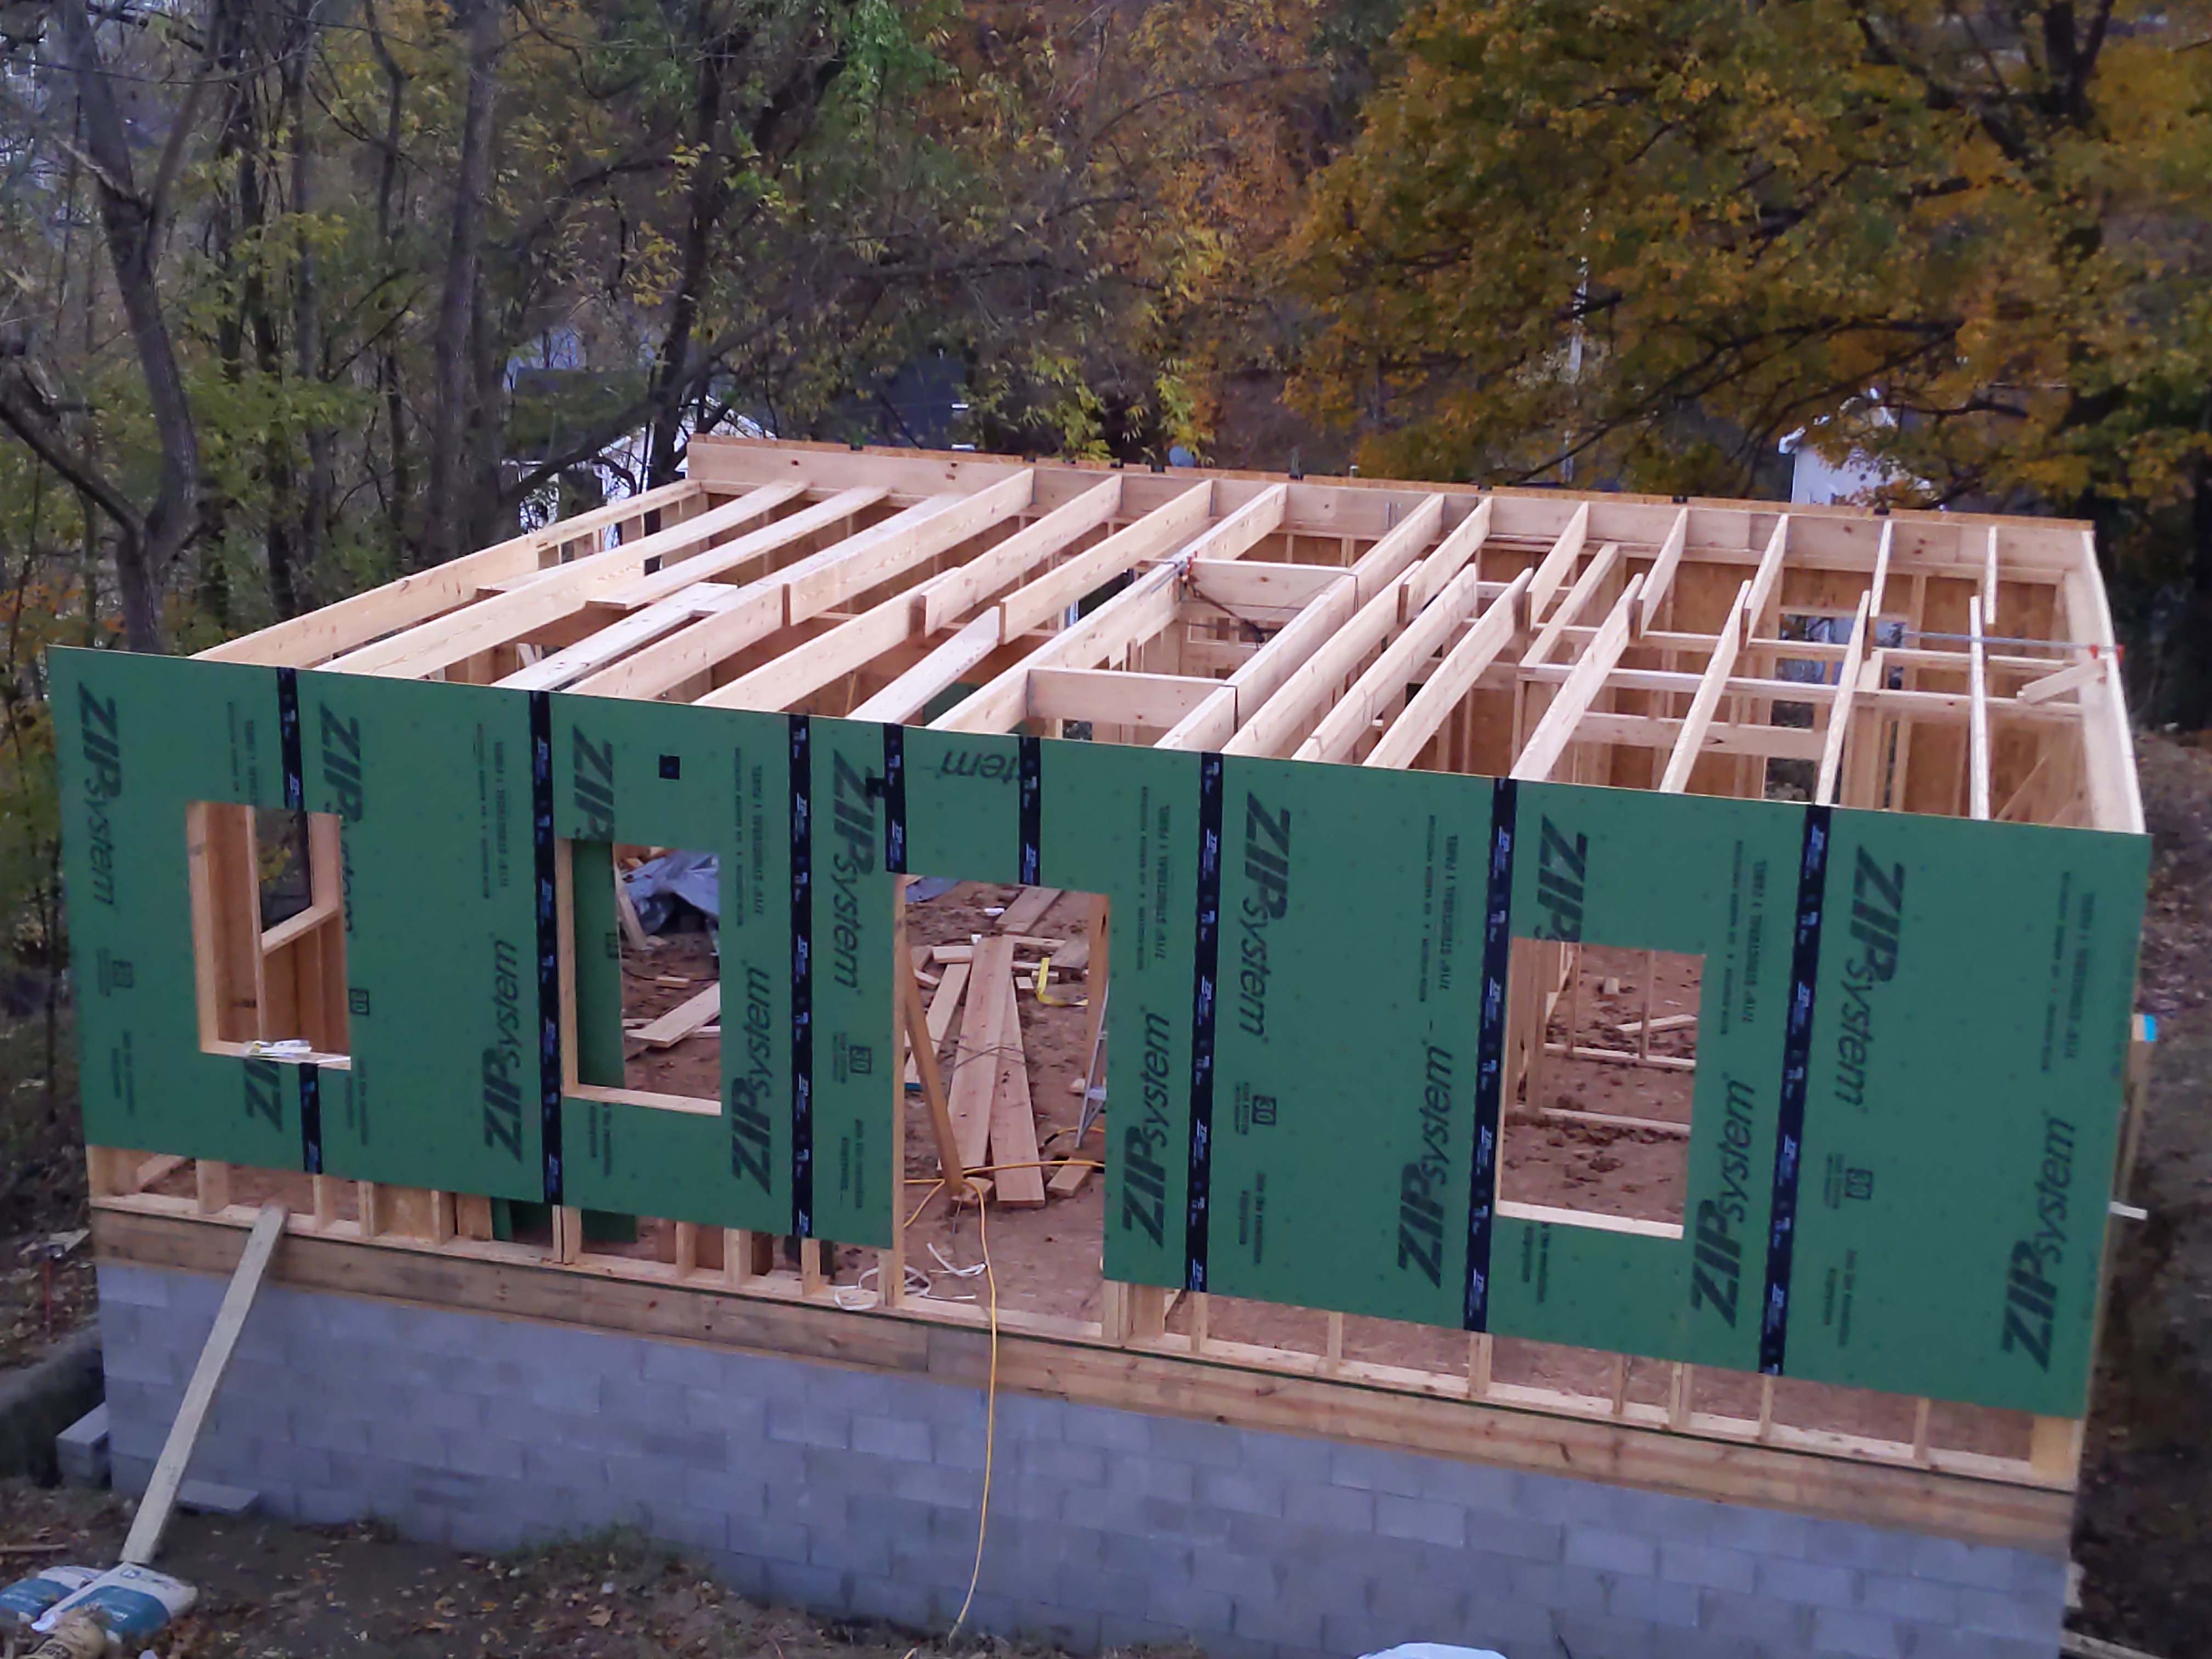
October 2024
The interior walls were built and the second floor joists were built. This is when Dolphin showed up to to inspect the progress.
November 2024
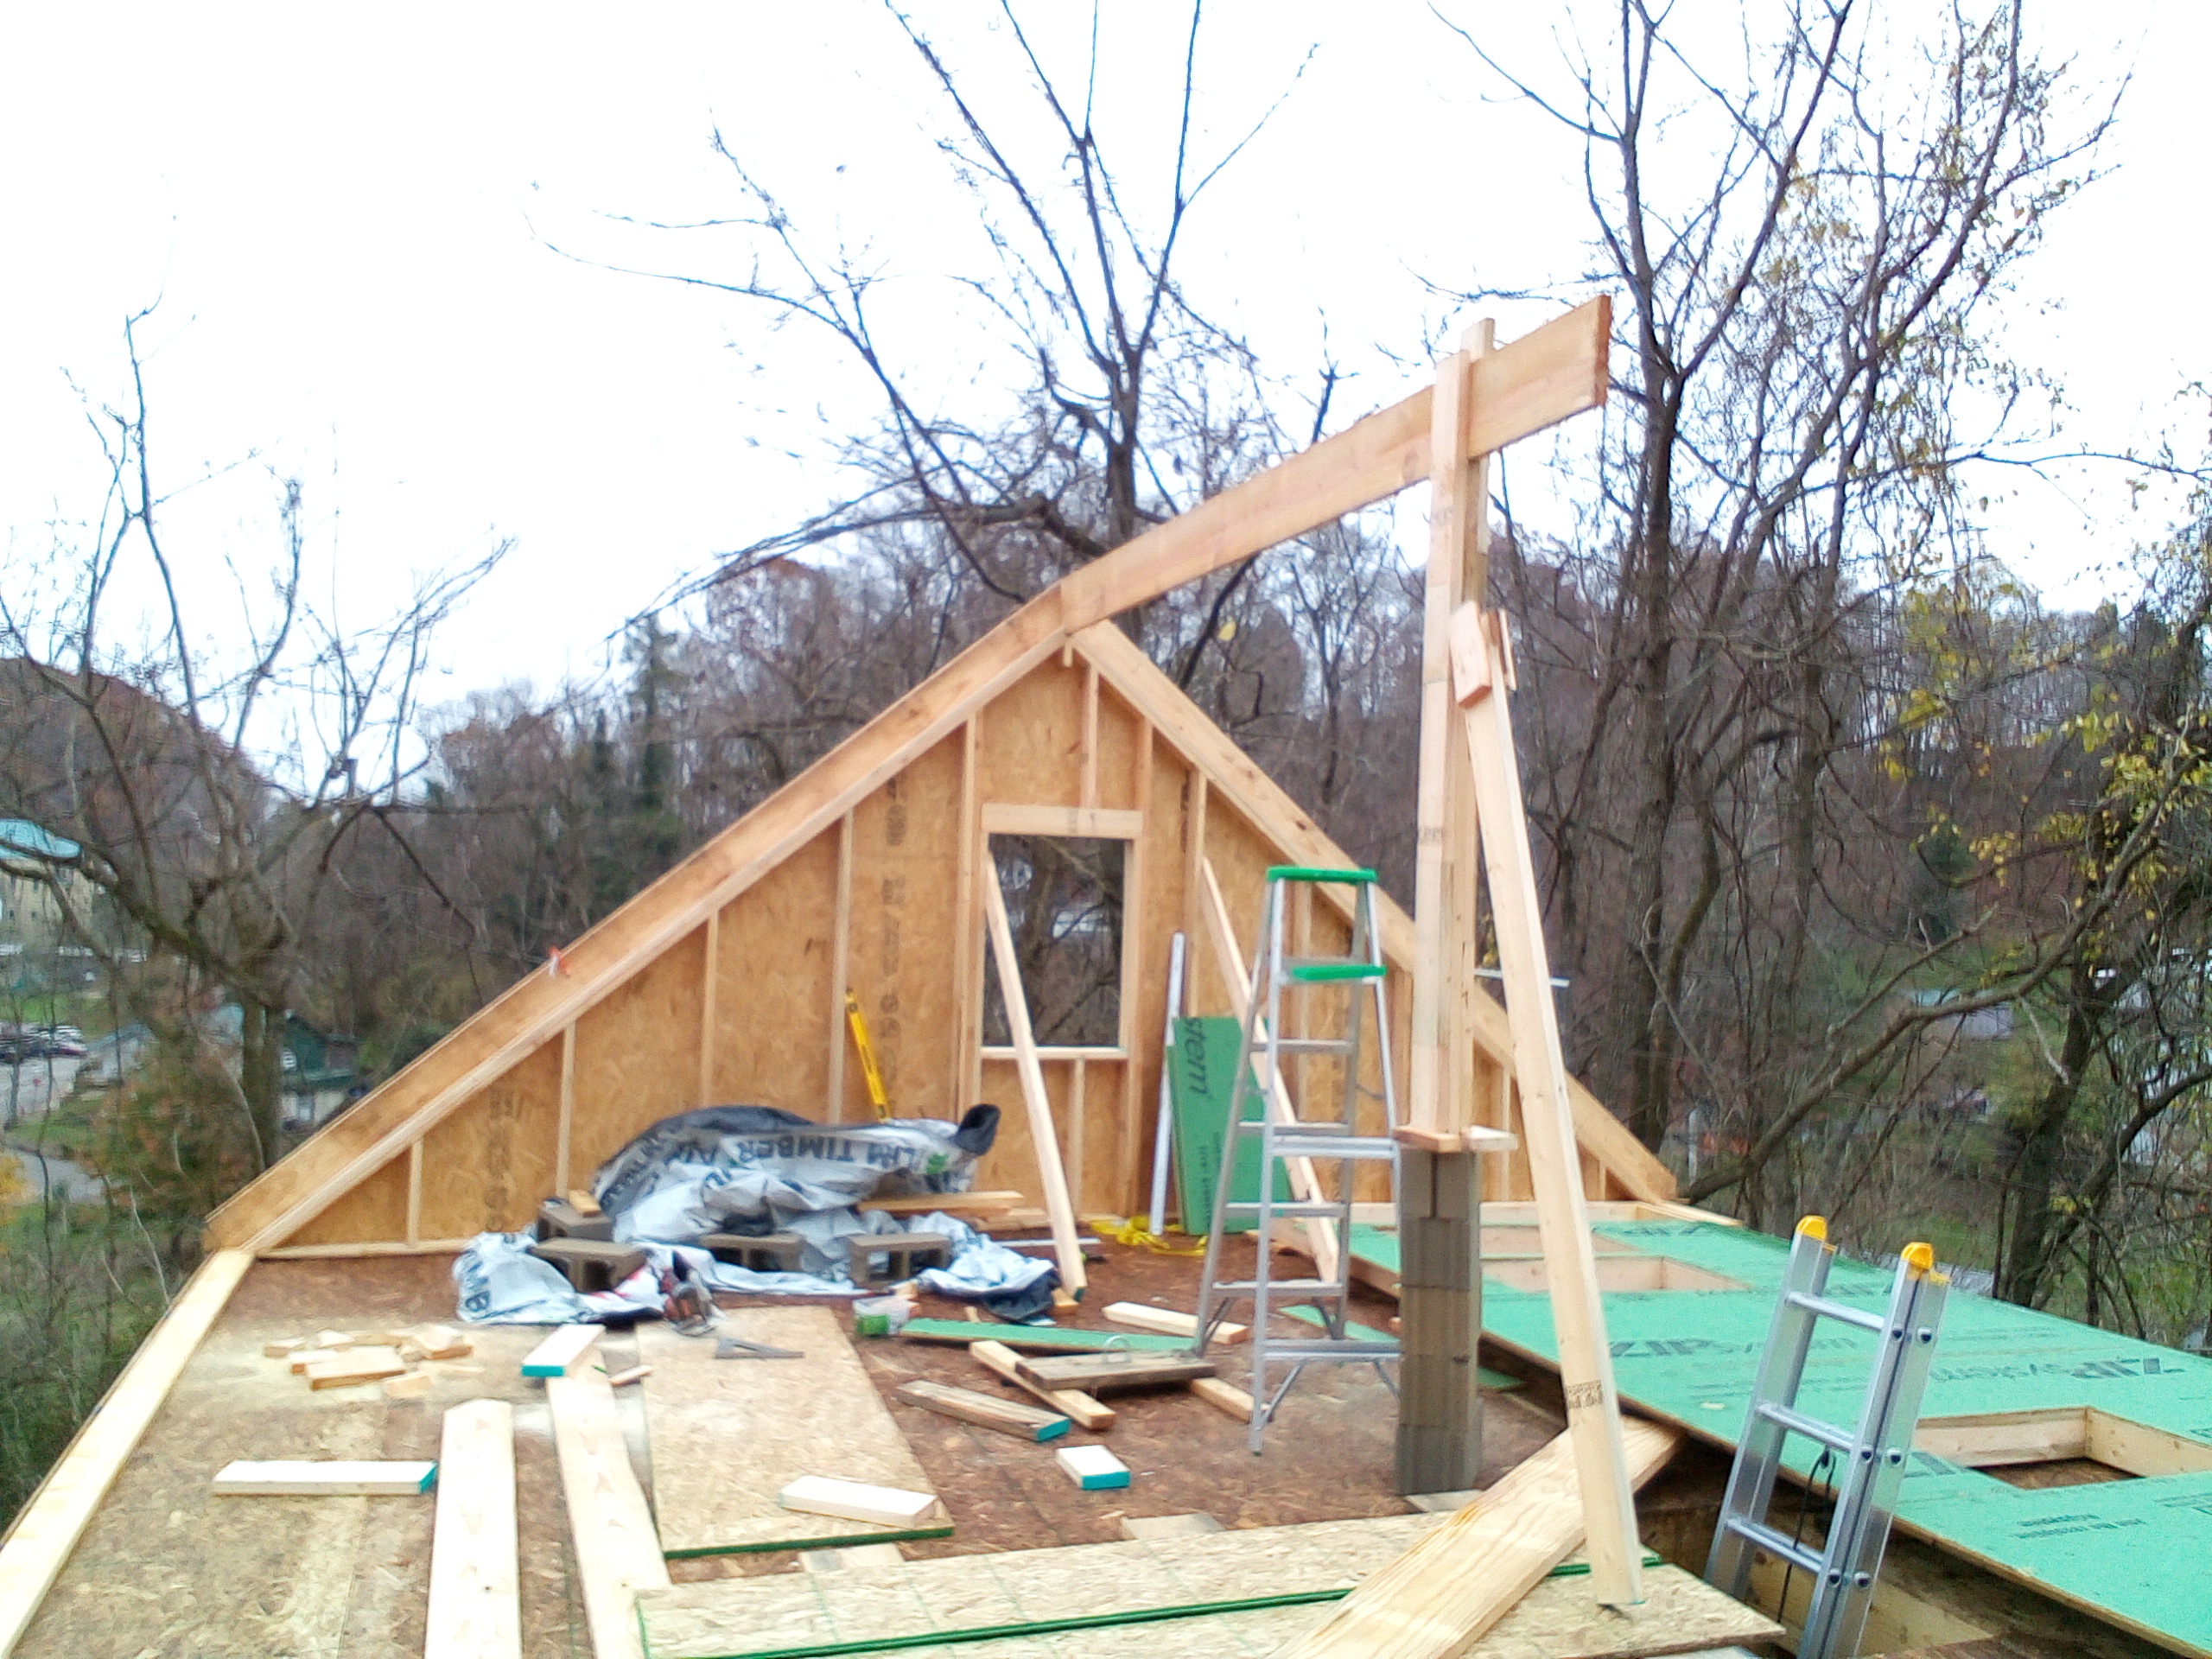
The gable walls were built. I used autoCAD to calculate how long each stud needed to be. The roof pitch is 10/12, so the studs needed to be cut with a 40 degree bevel at the top. I set the ridge board myself, which was not easy, but doable.
November 2024 - December 2024
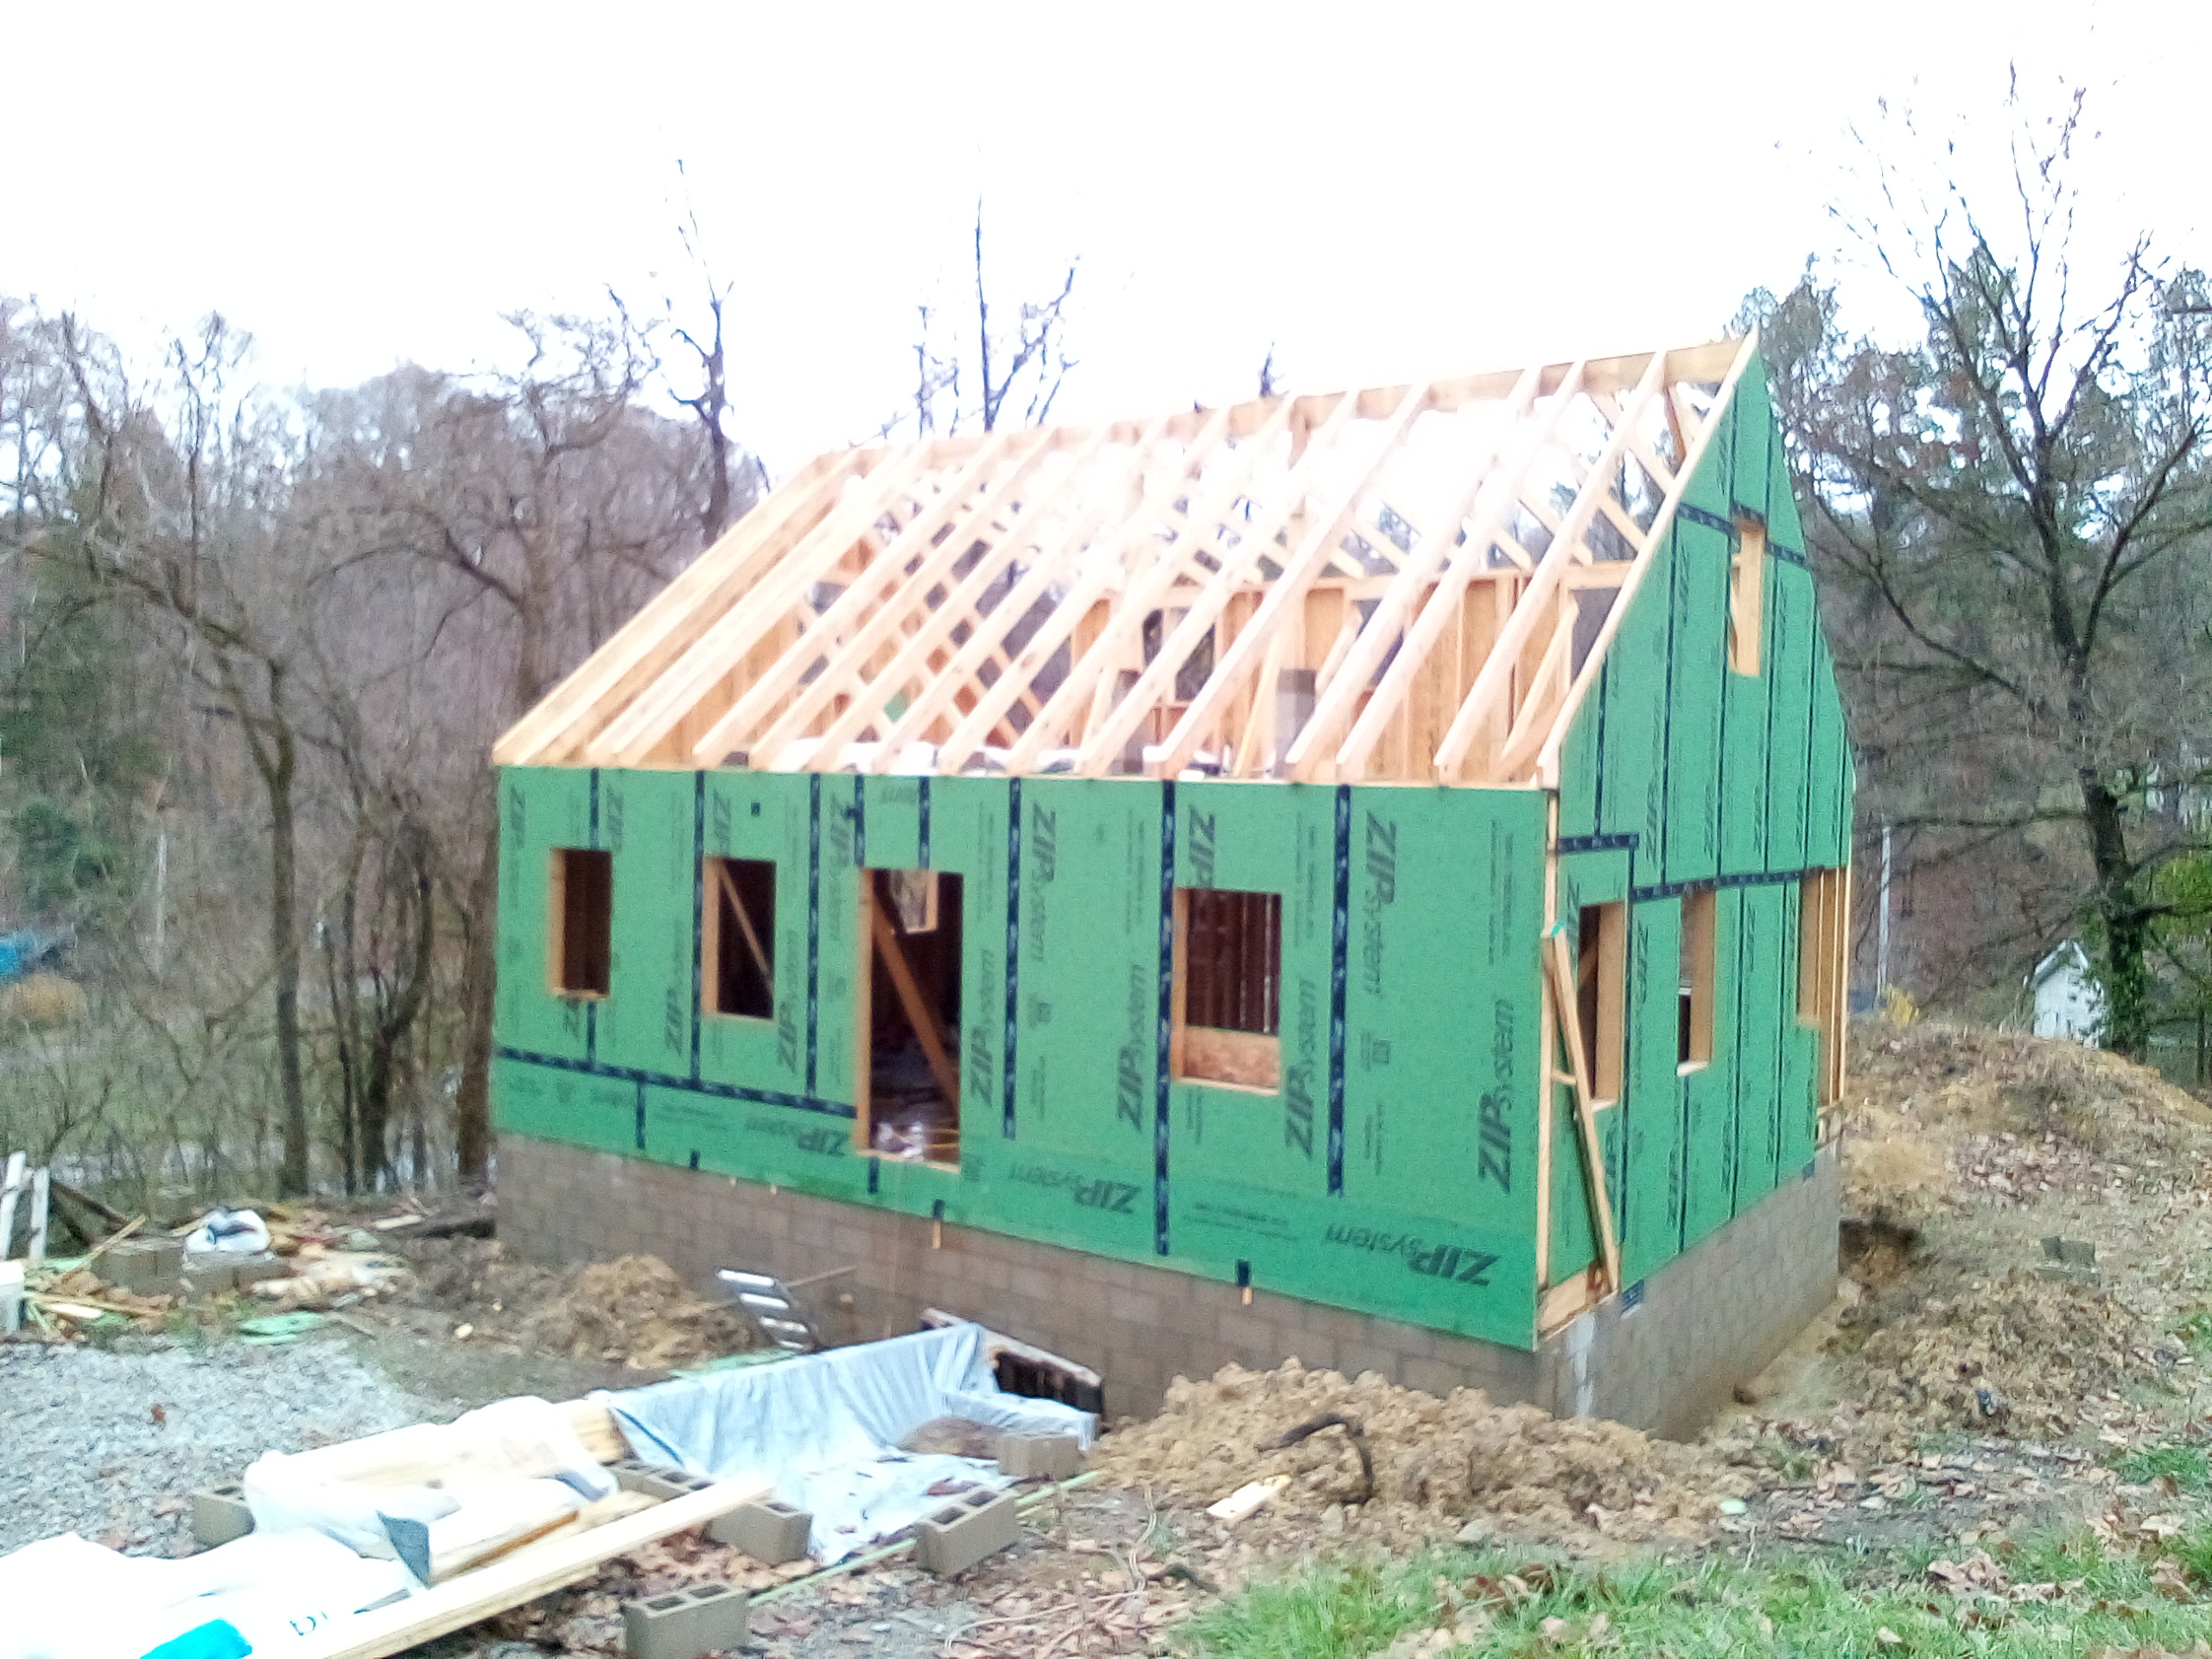
Being a Cape Cod, the second floor is actually the attic. In order to increase headroom, a 26' long shed dormer was built along the rear of the house. Once this wall was raised, the 2x8 roof rafters were set 24" OC. I decided to build the side-wall of the shed dormer on the ground, but what I did not anticipate was how hard it would be to set it in place. After being unsuccessful, I used a come-along and a rope thrown over the ridge board. Even with this, it still took about an hour to set the wall on my own.
December 2024 - January 2025
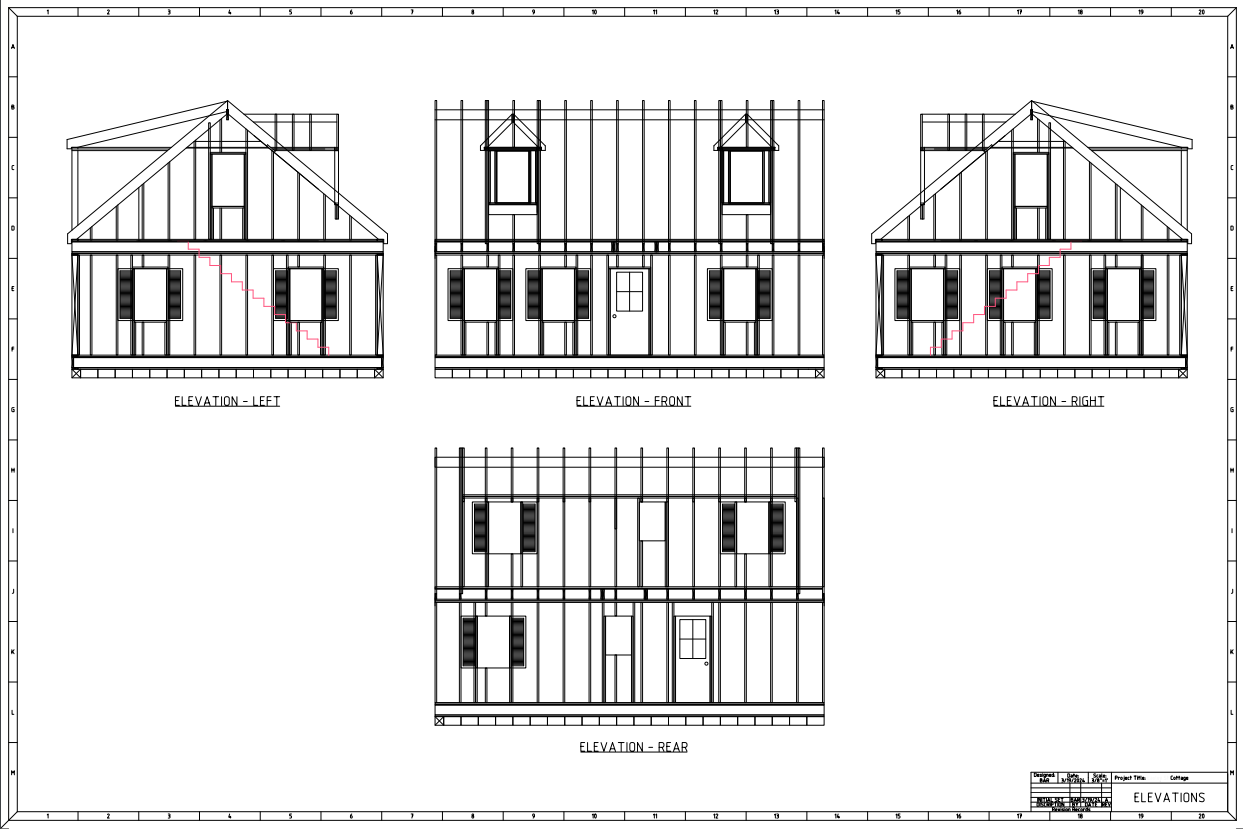
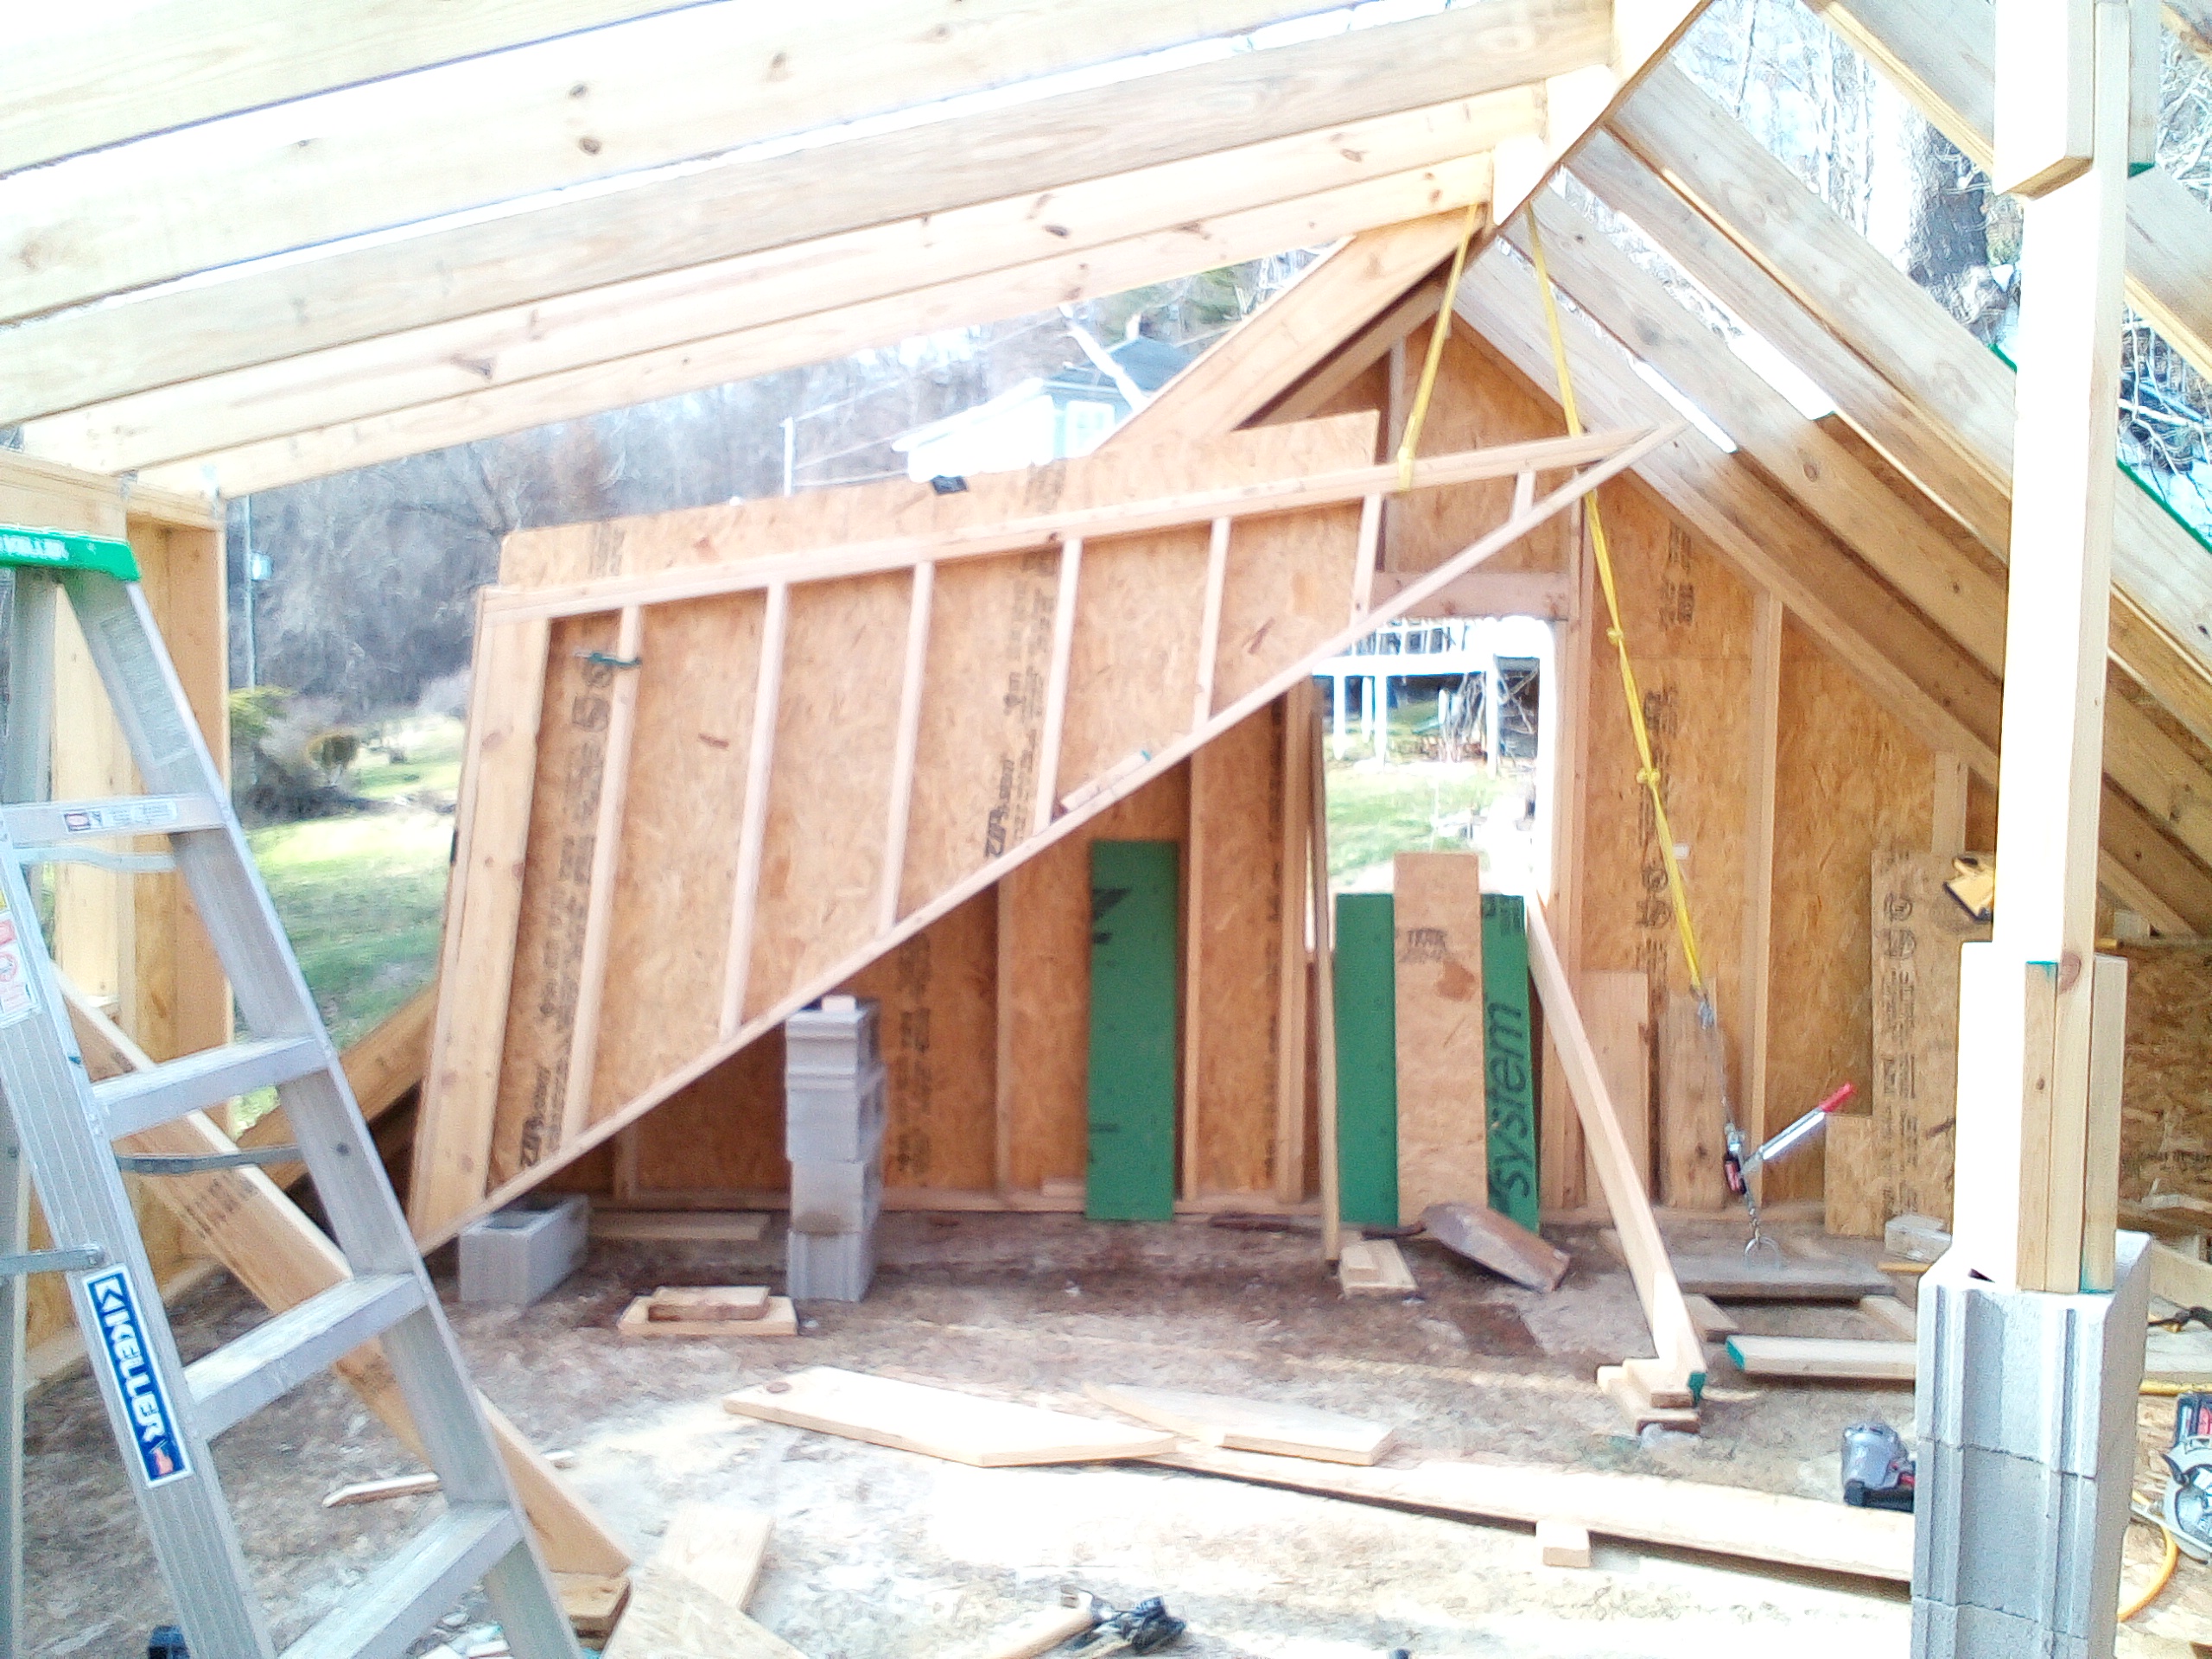
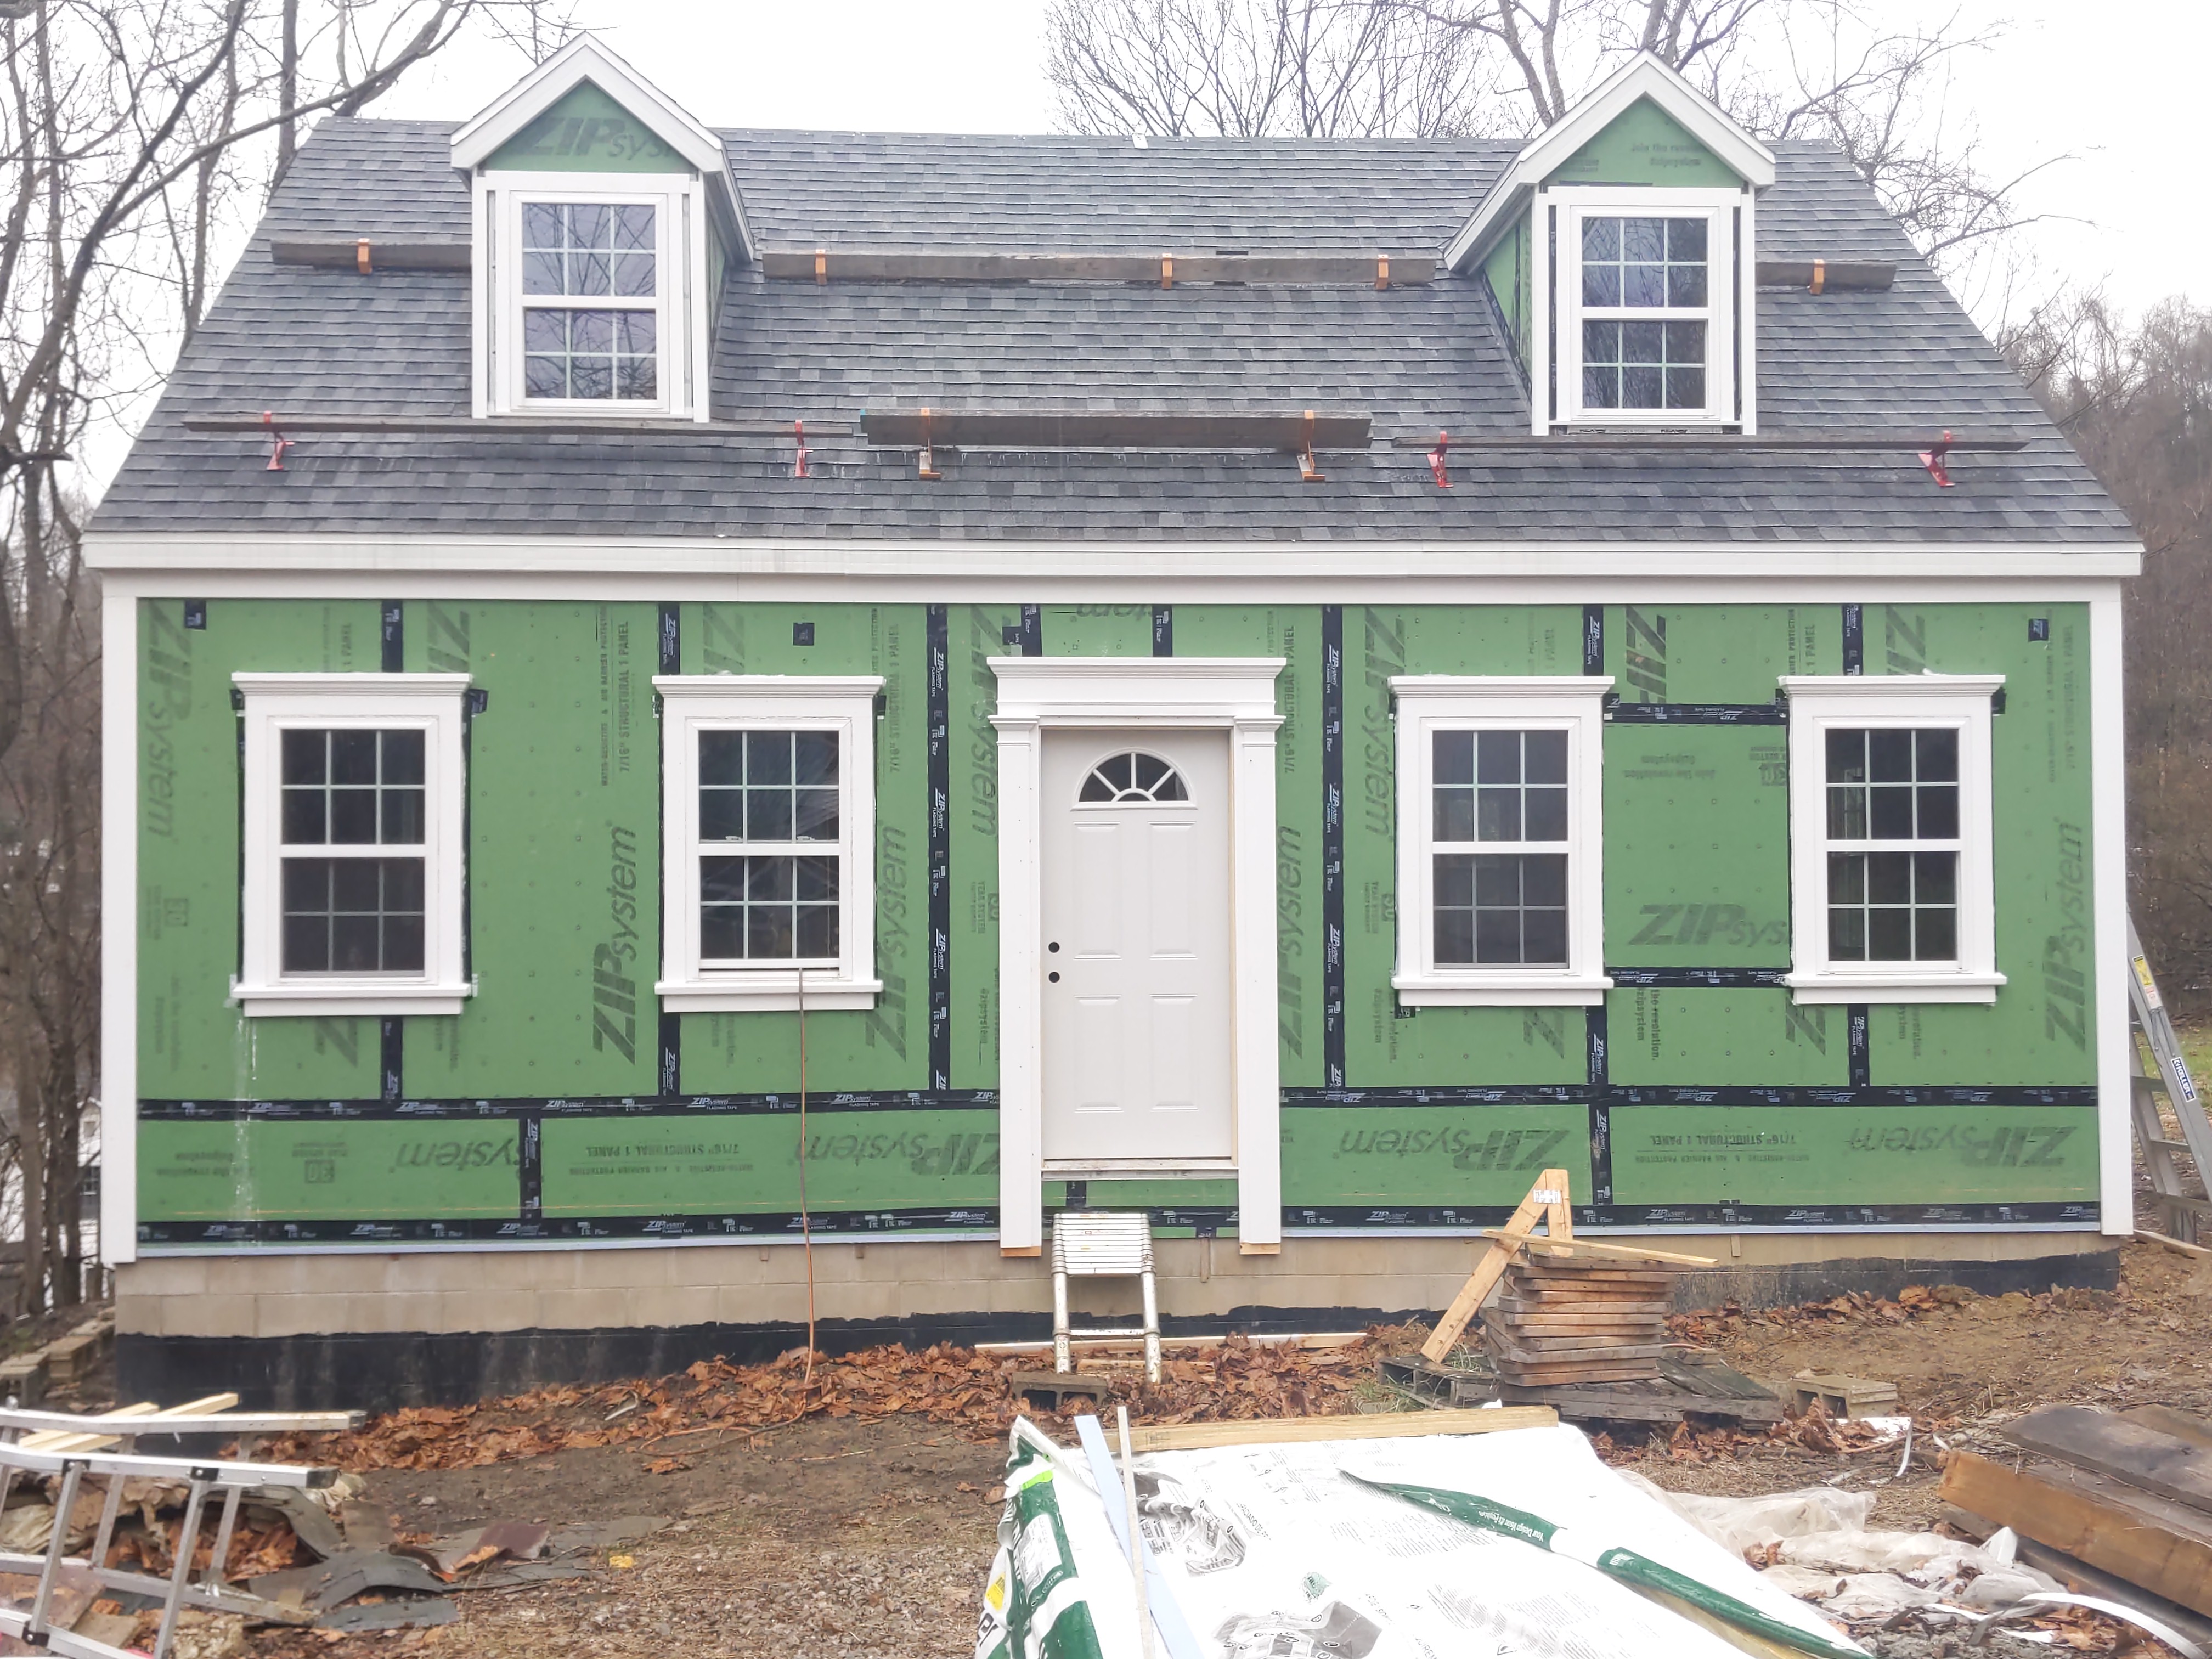
The roof was sheathed with 5/8" OSB and the front gable dormers were built. These dormers don't add headroom to a very large area, but they contribute greatly to the character of the home. I was not expecting them to add as much complexity to the project as they did, but I am very happy with how they look.
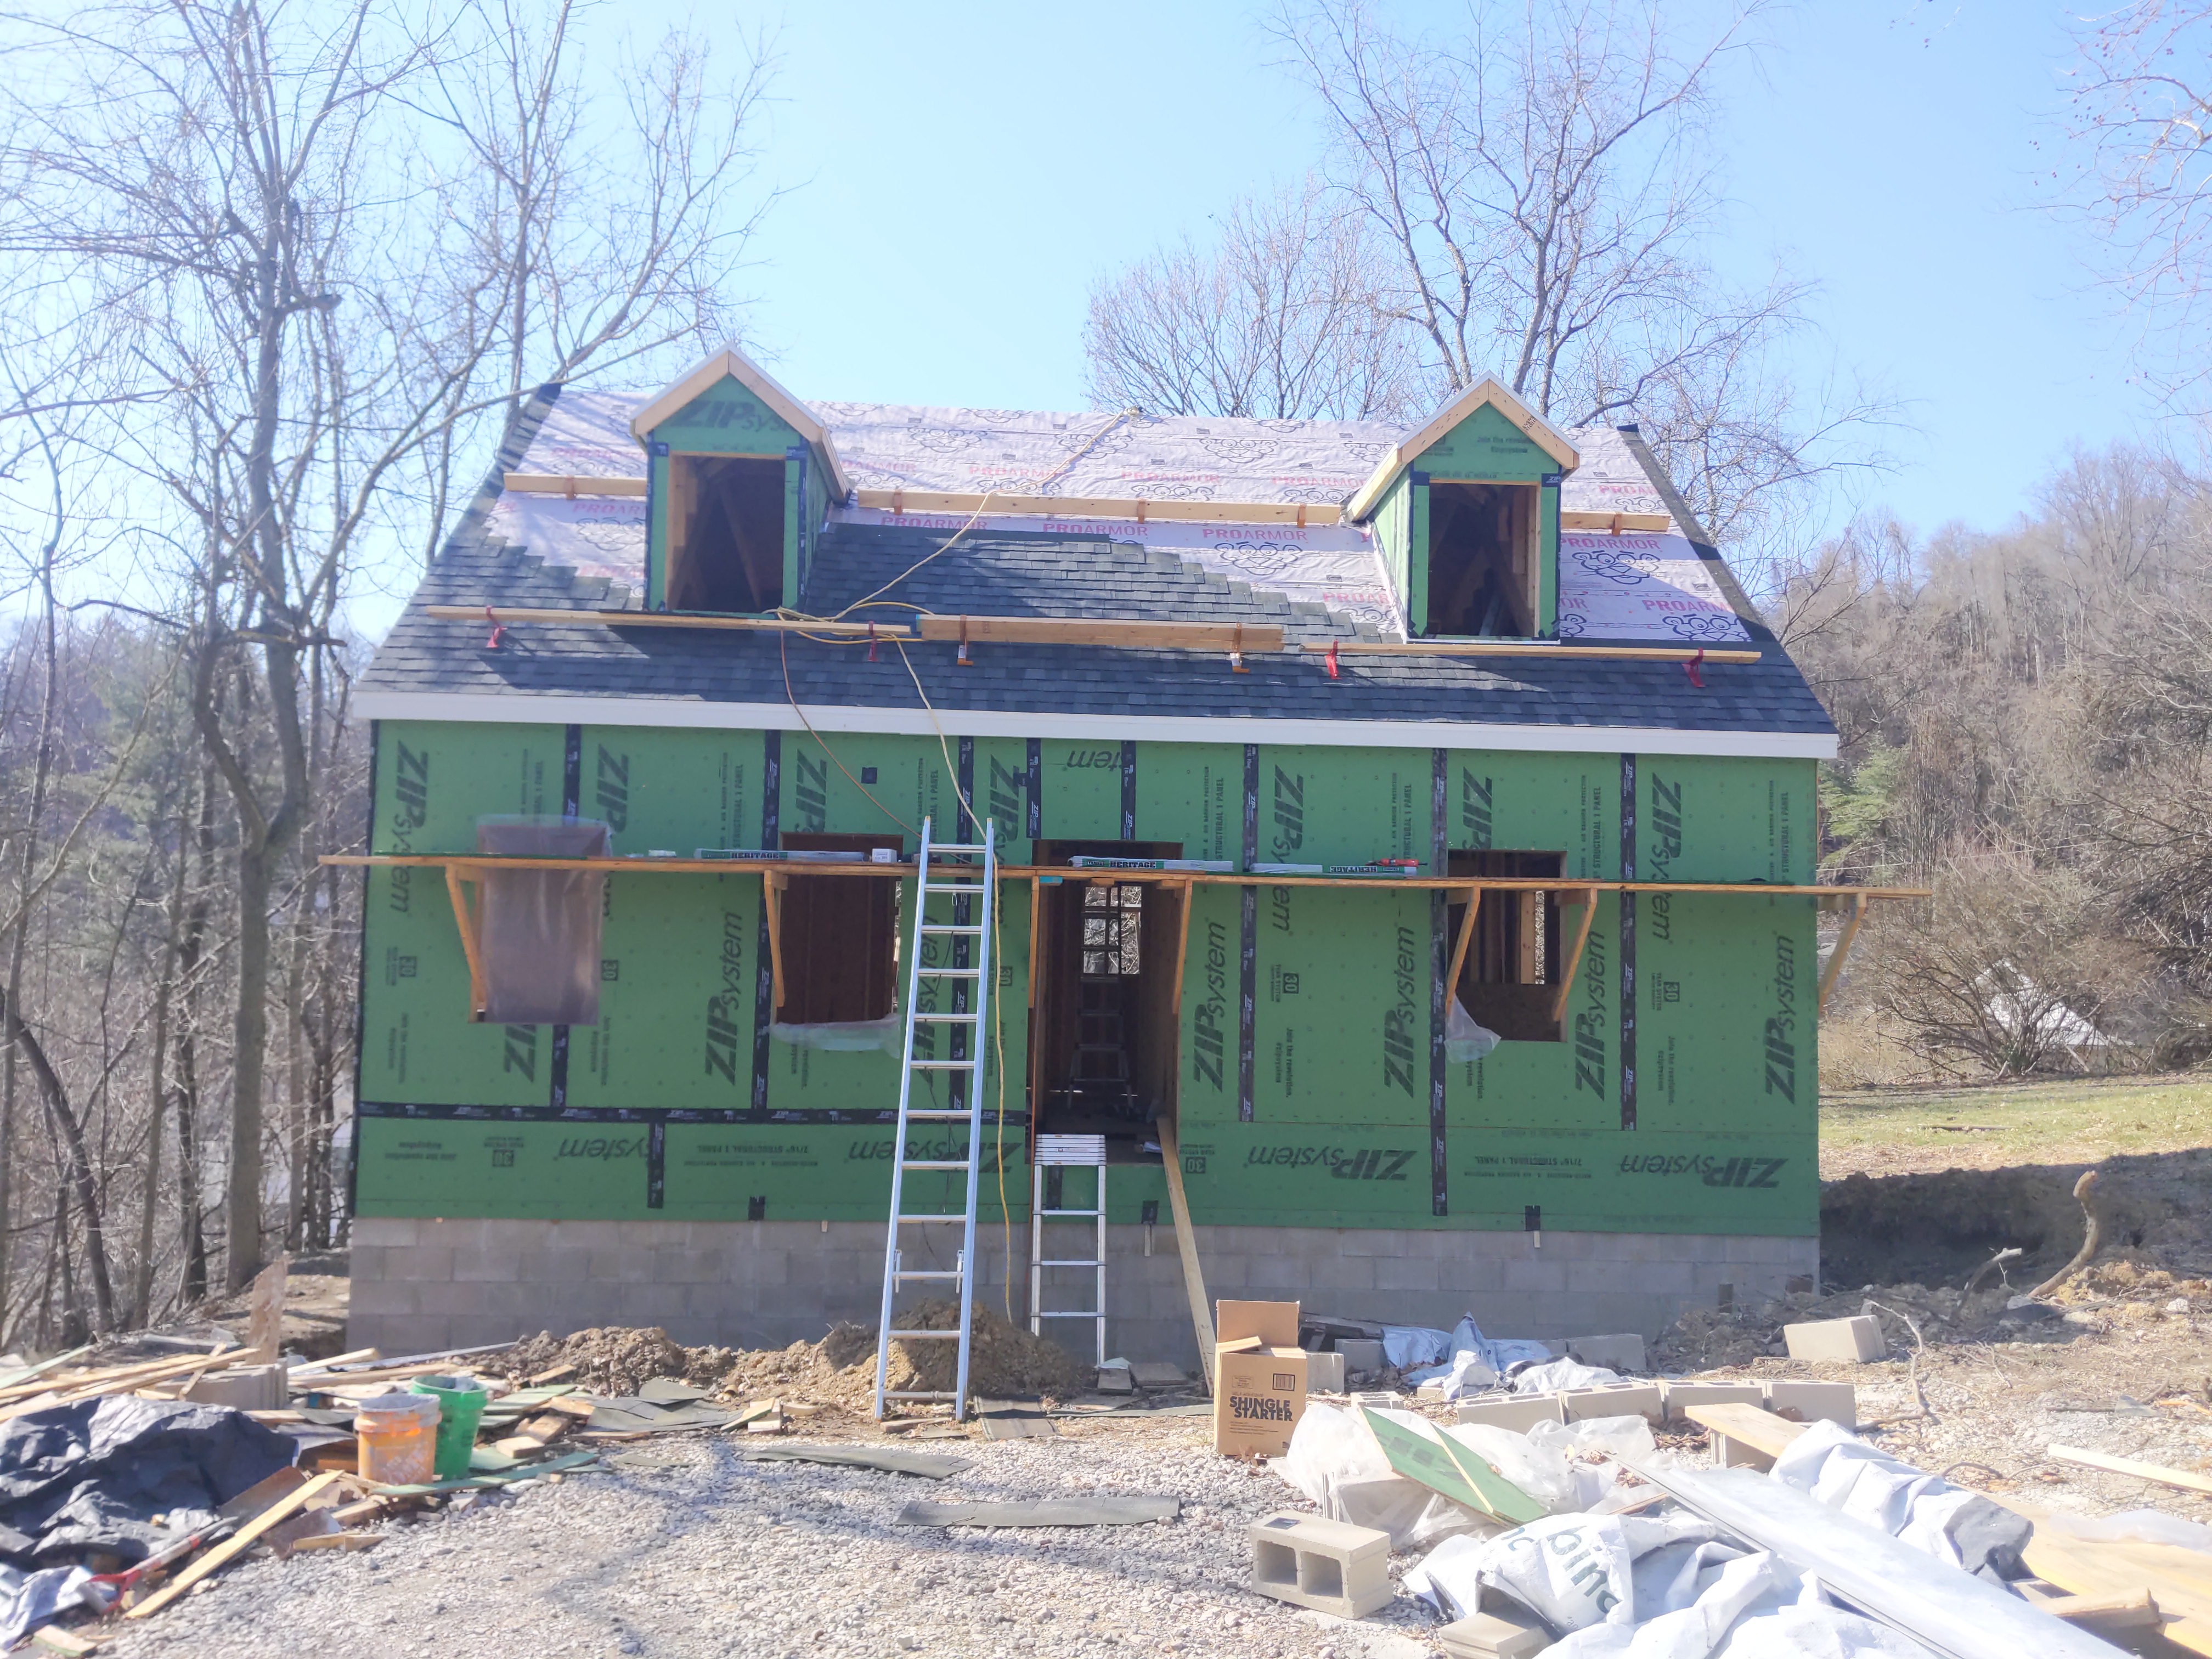

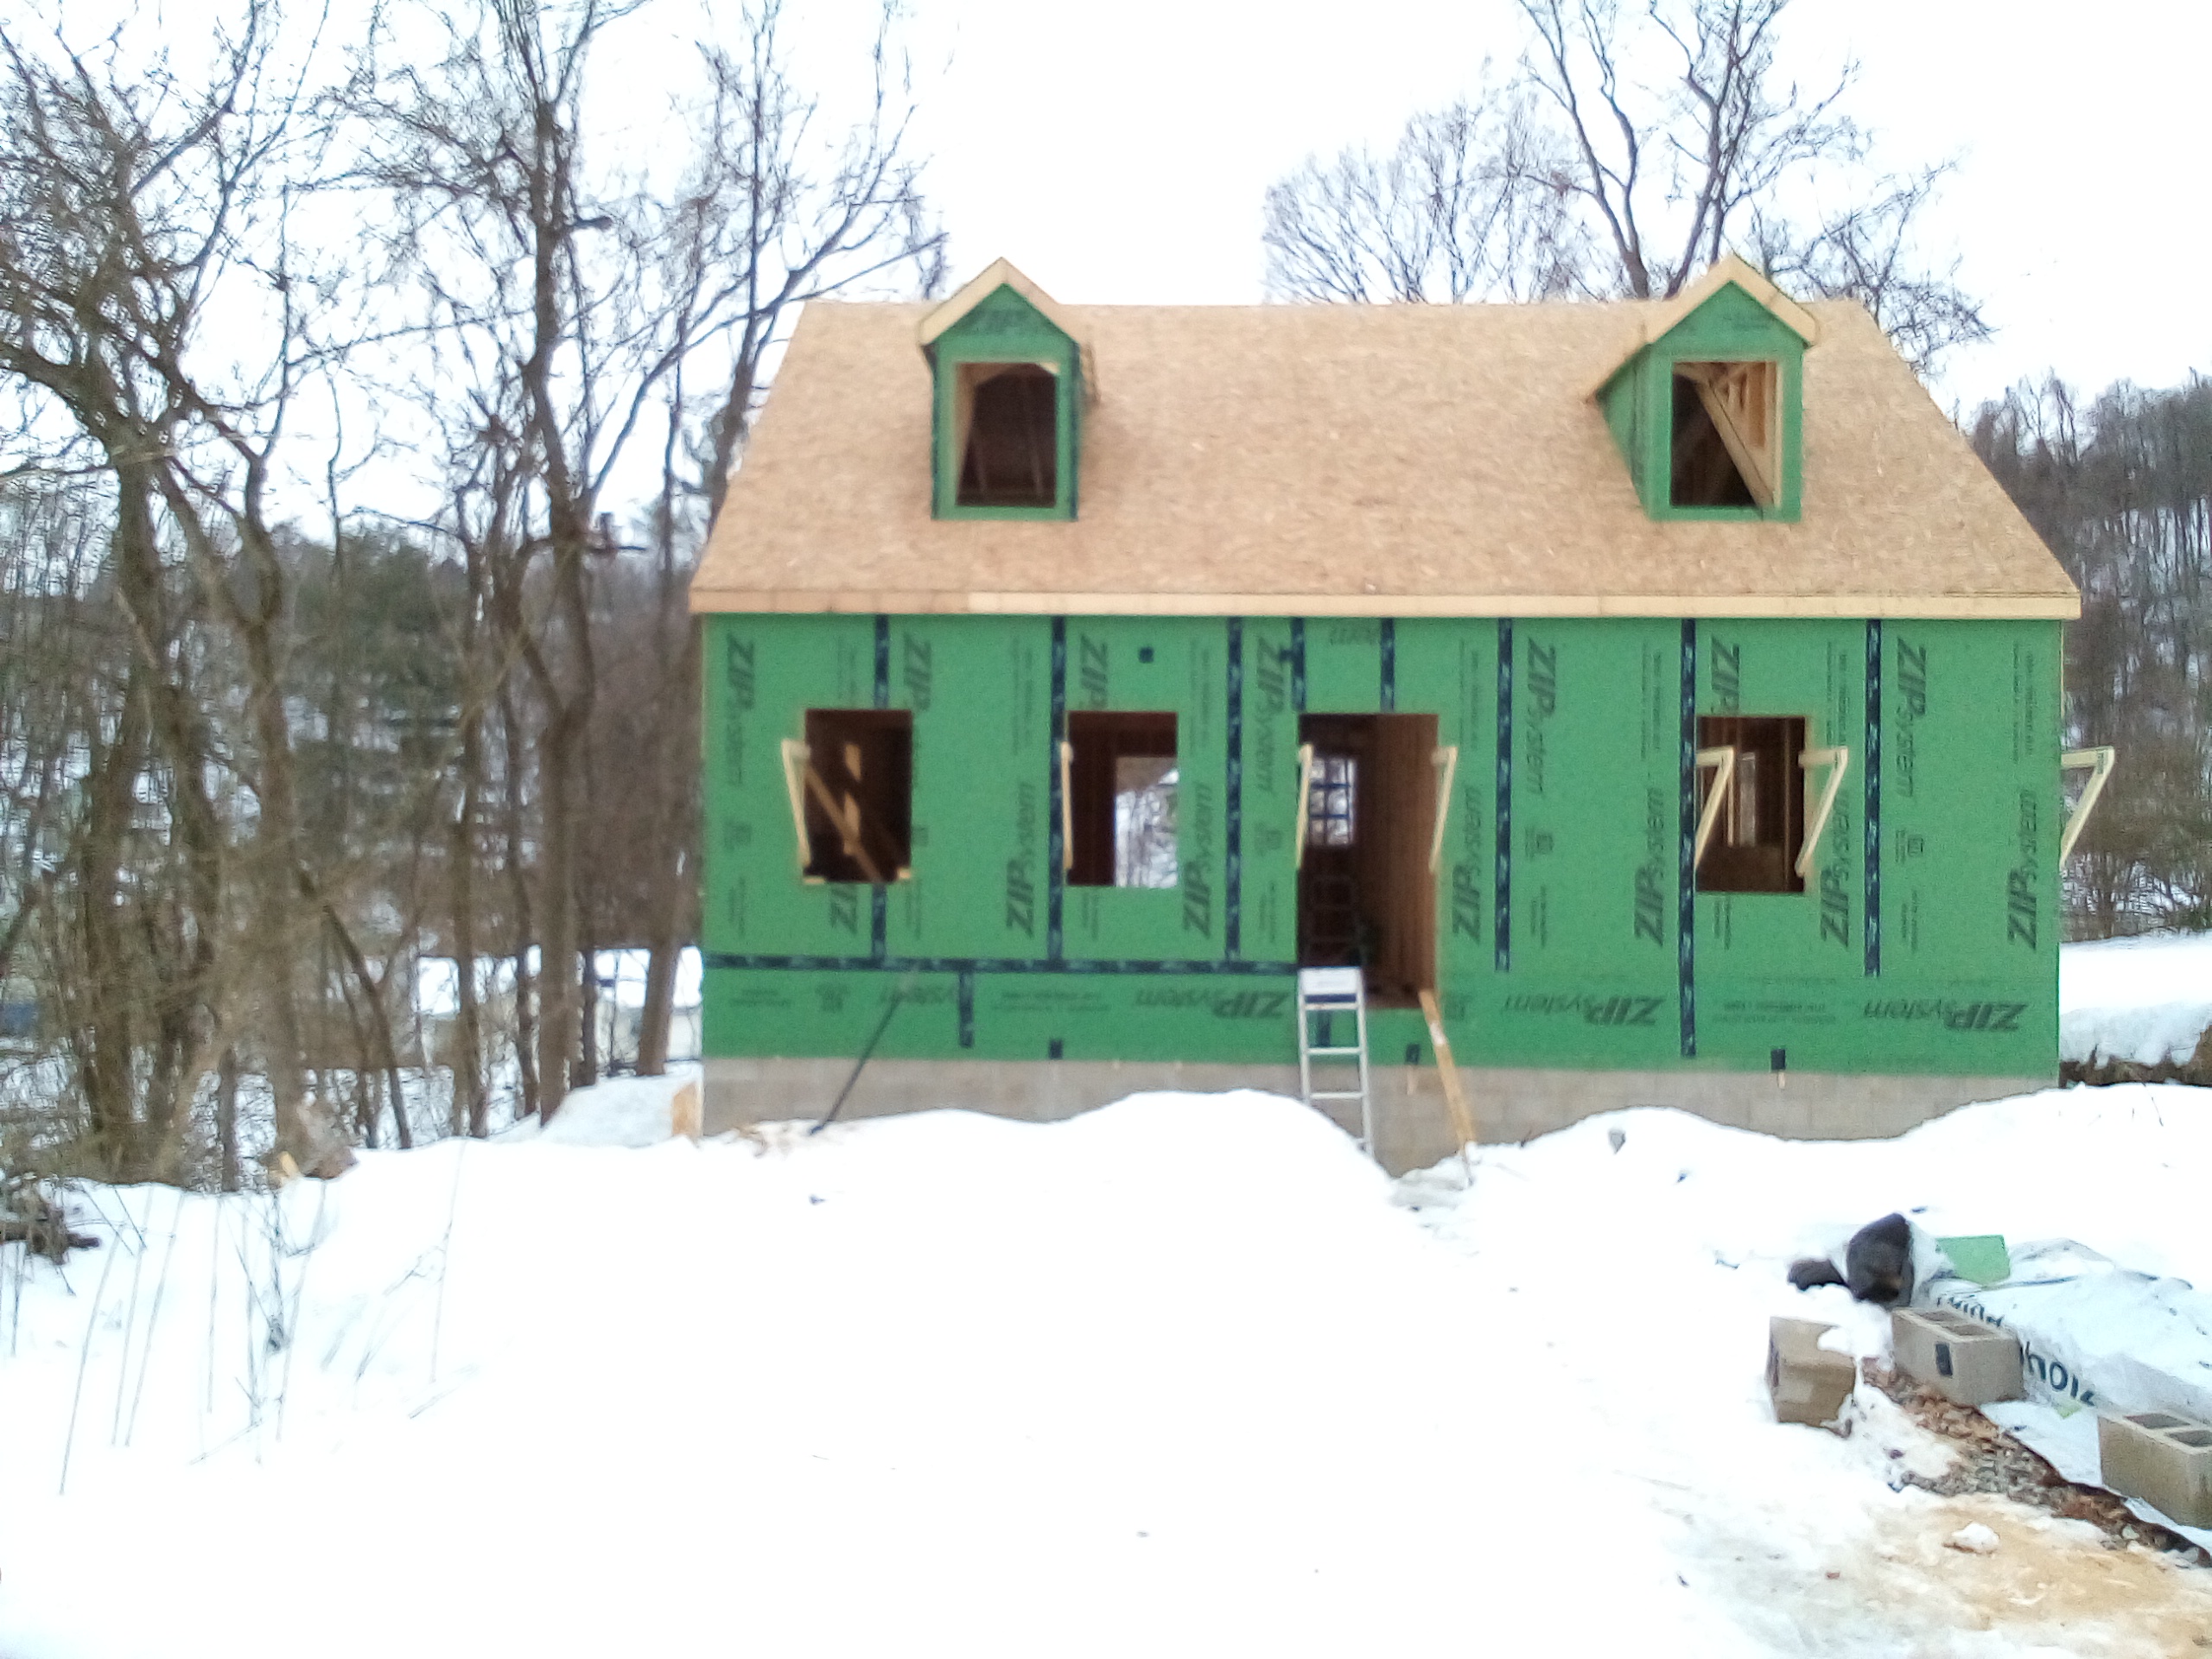
February 2025 - March 2025
I was able to sheathe the roof almost entirely from the inside using a ladder, but I knew I couldn't do this for the shingles. I have always had issues with heights, so some people close to me wanted me to hire this part out. This isn't something I seriously considered, because overcoming my fear was important to me (and the high cost to hire roofers, too). I built scaffolding so that I could easily access the bottom rows of roof and used roof jacks with 2x6s so that I always had something under my feet. I used a harness and rope so I that I would be ok if I did fall. With time, I started to become very comfortable on the roof. I, many times, would look at the rope and find that there was so much slack, it was doing essentially nothing to protect me, but I wasn't worried because I trusted that I wasn't going to fall.
April 2025
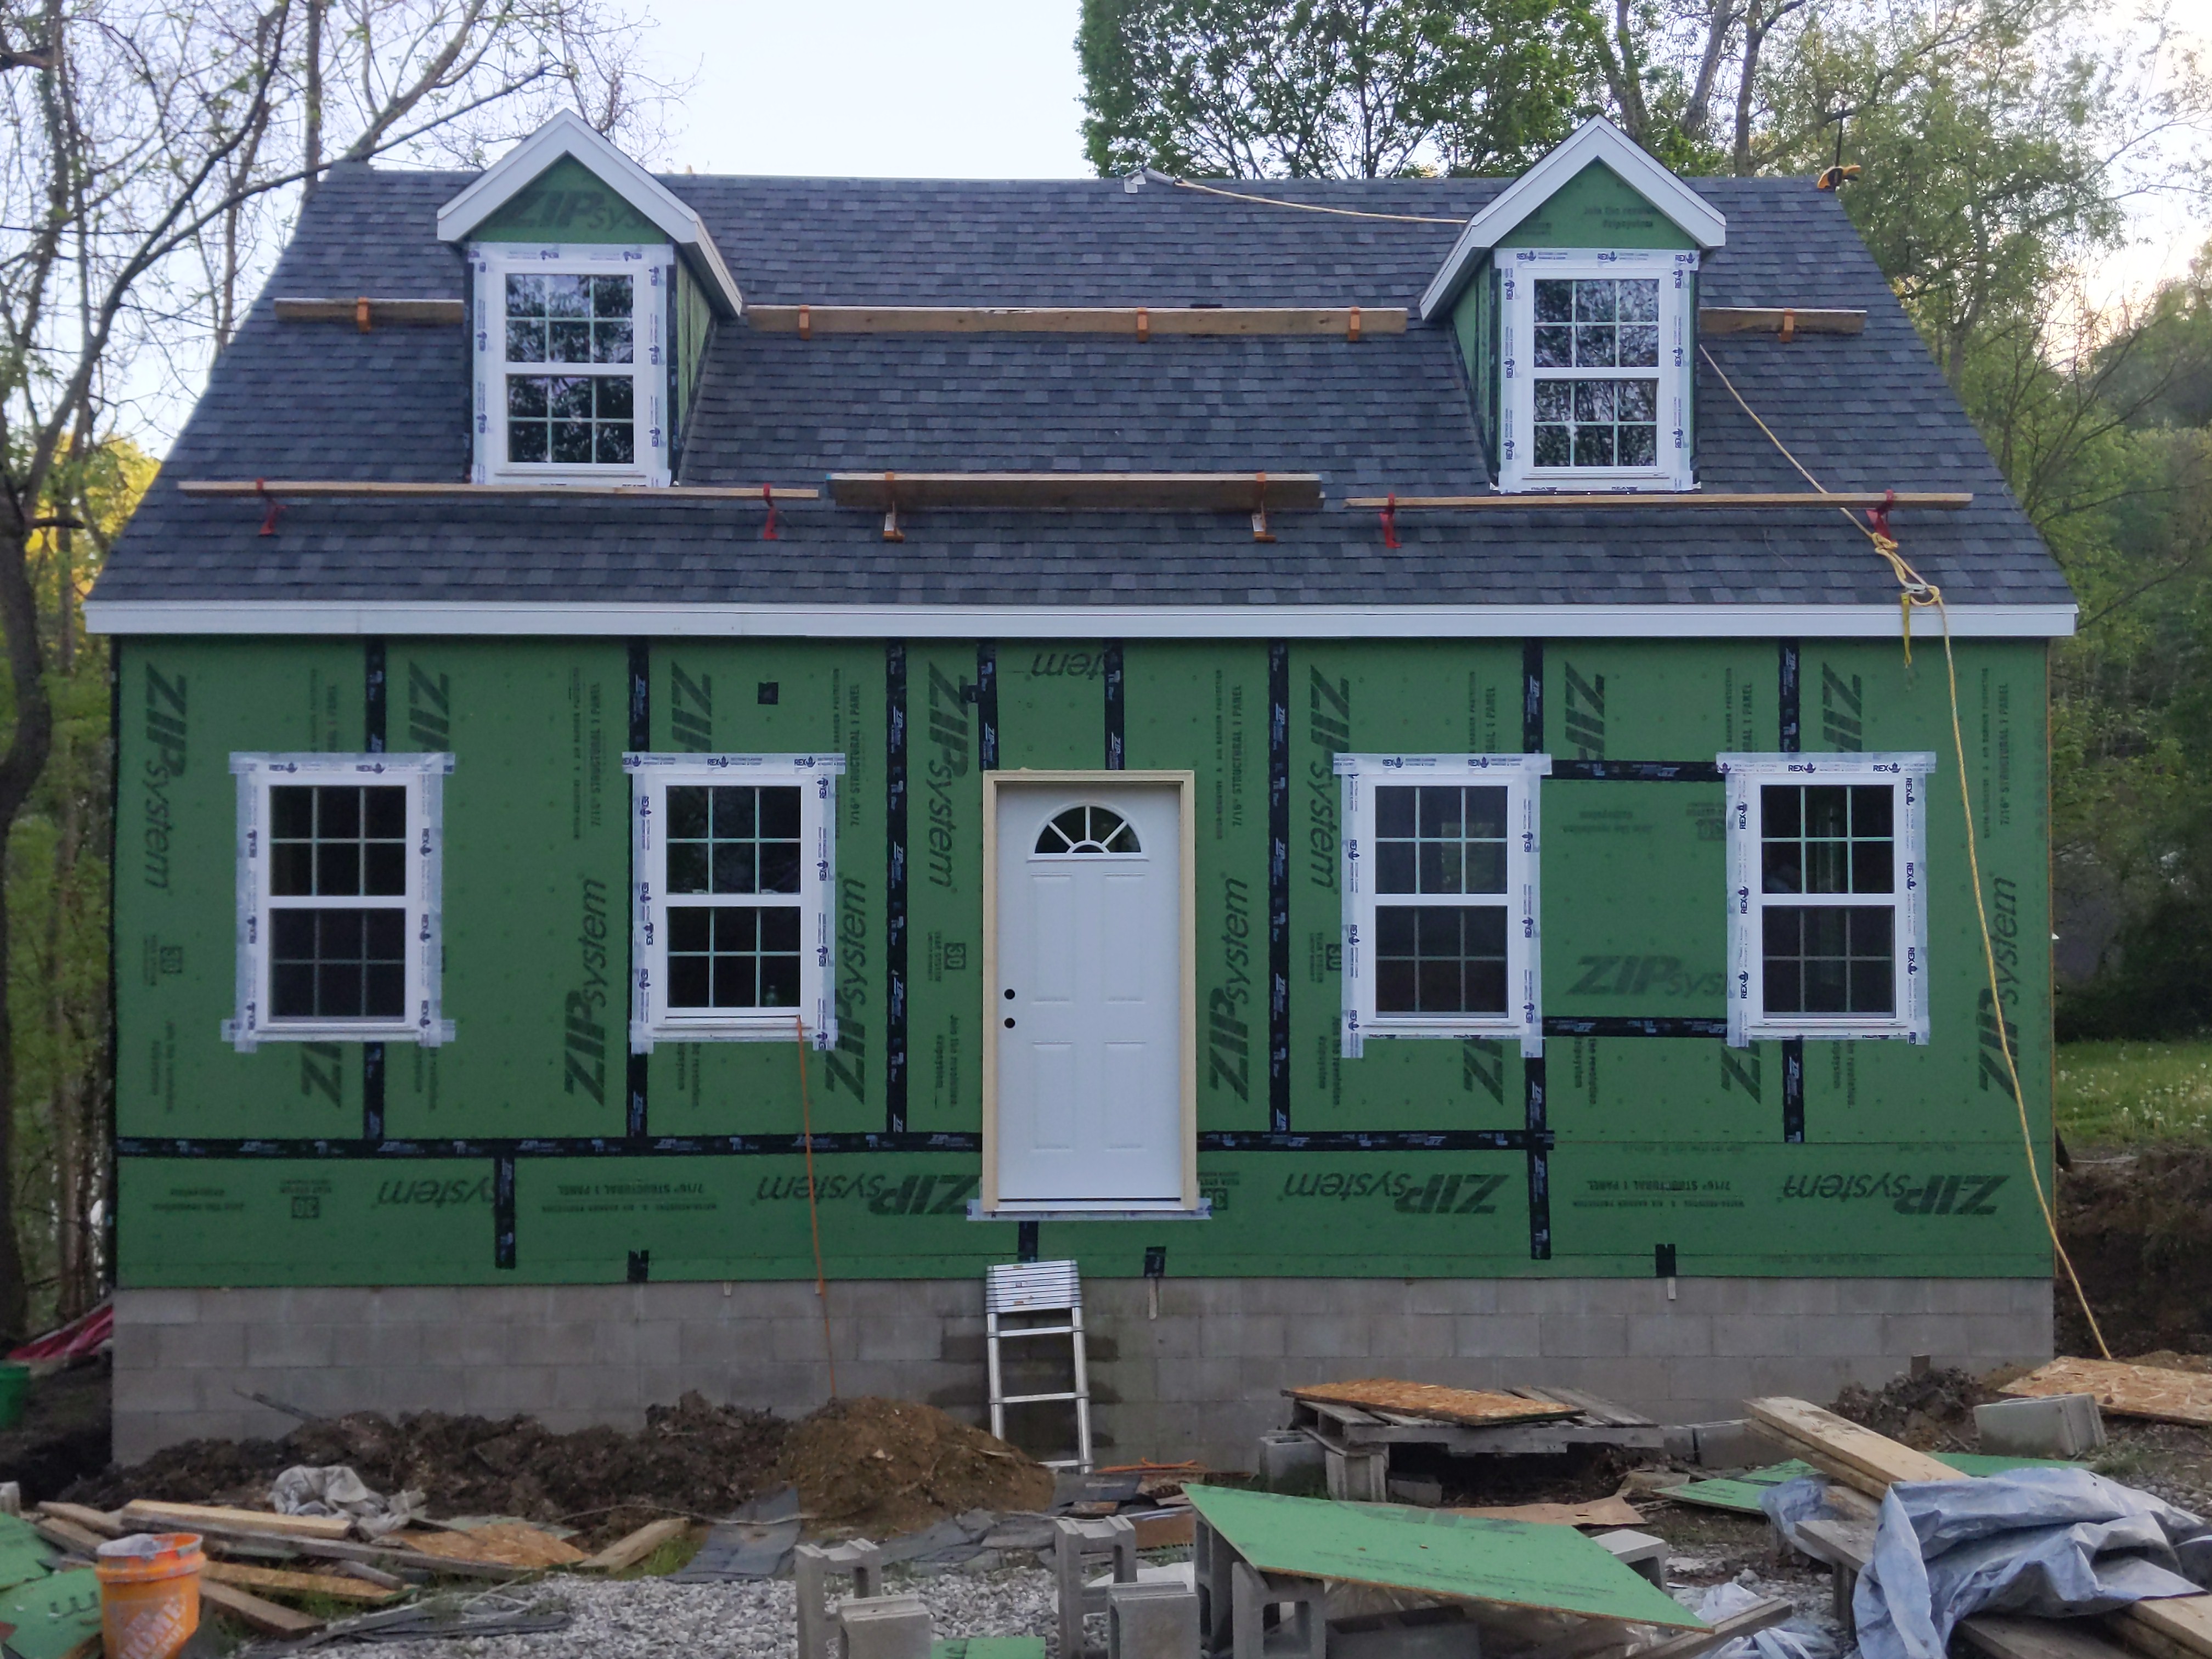
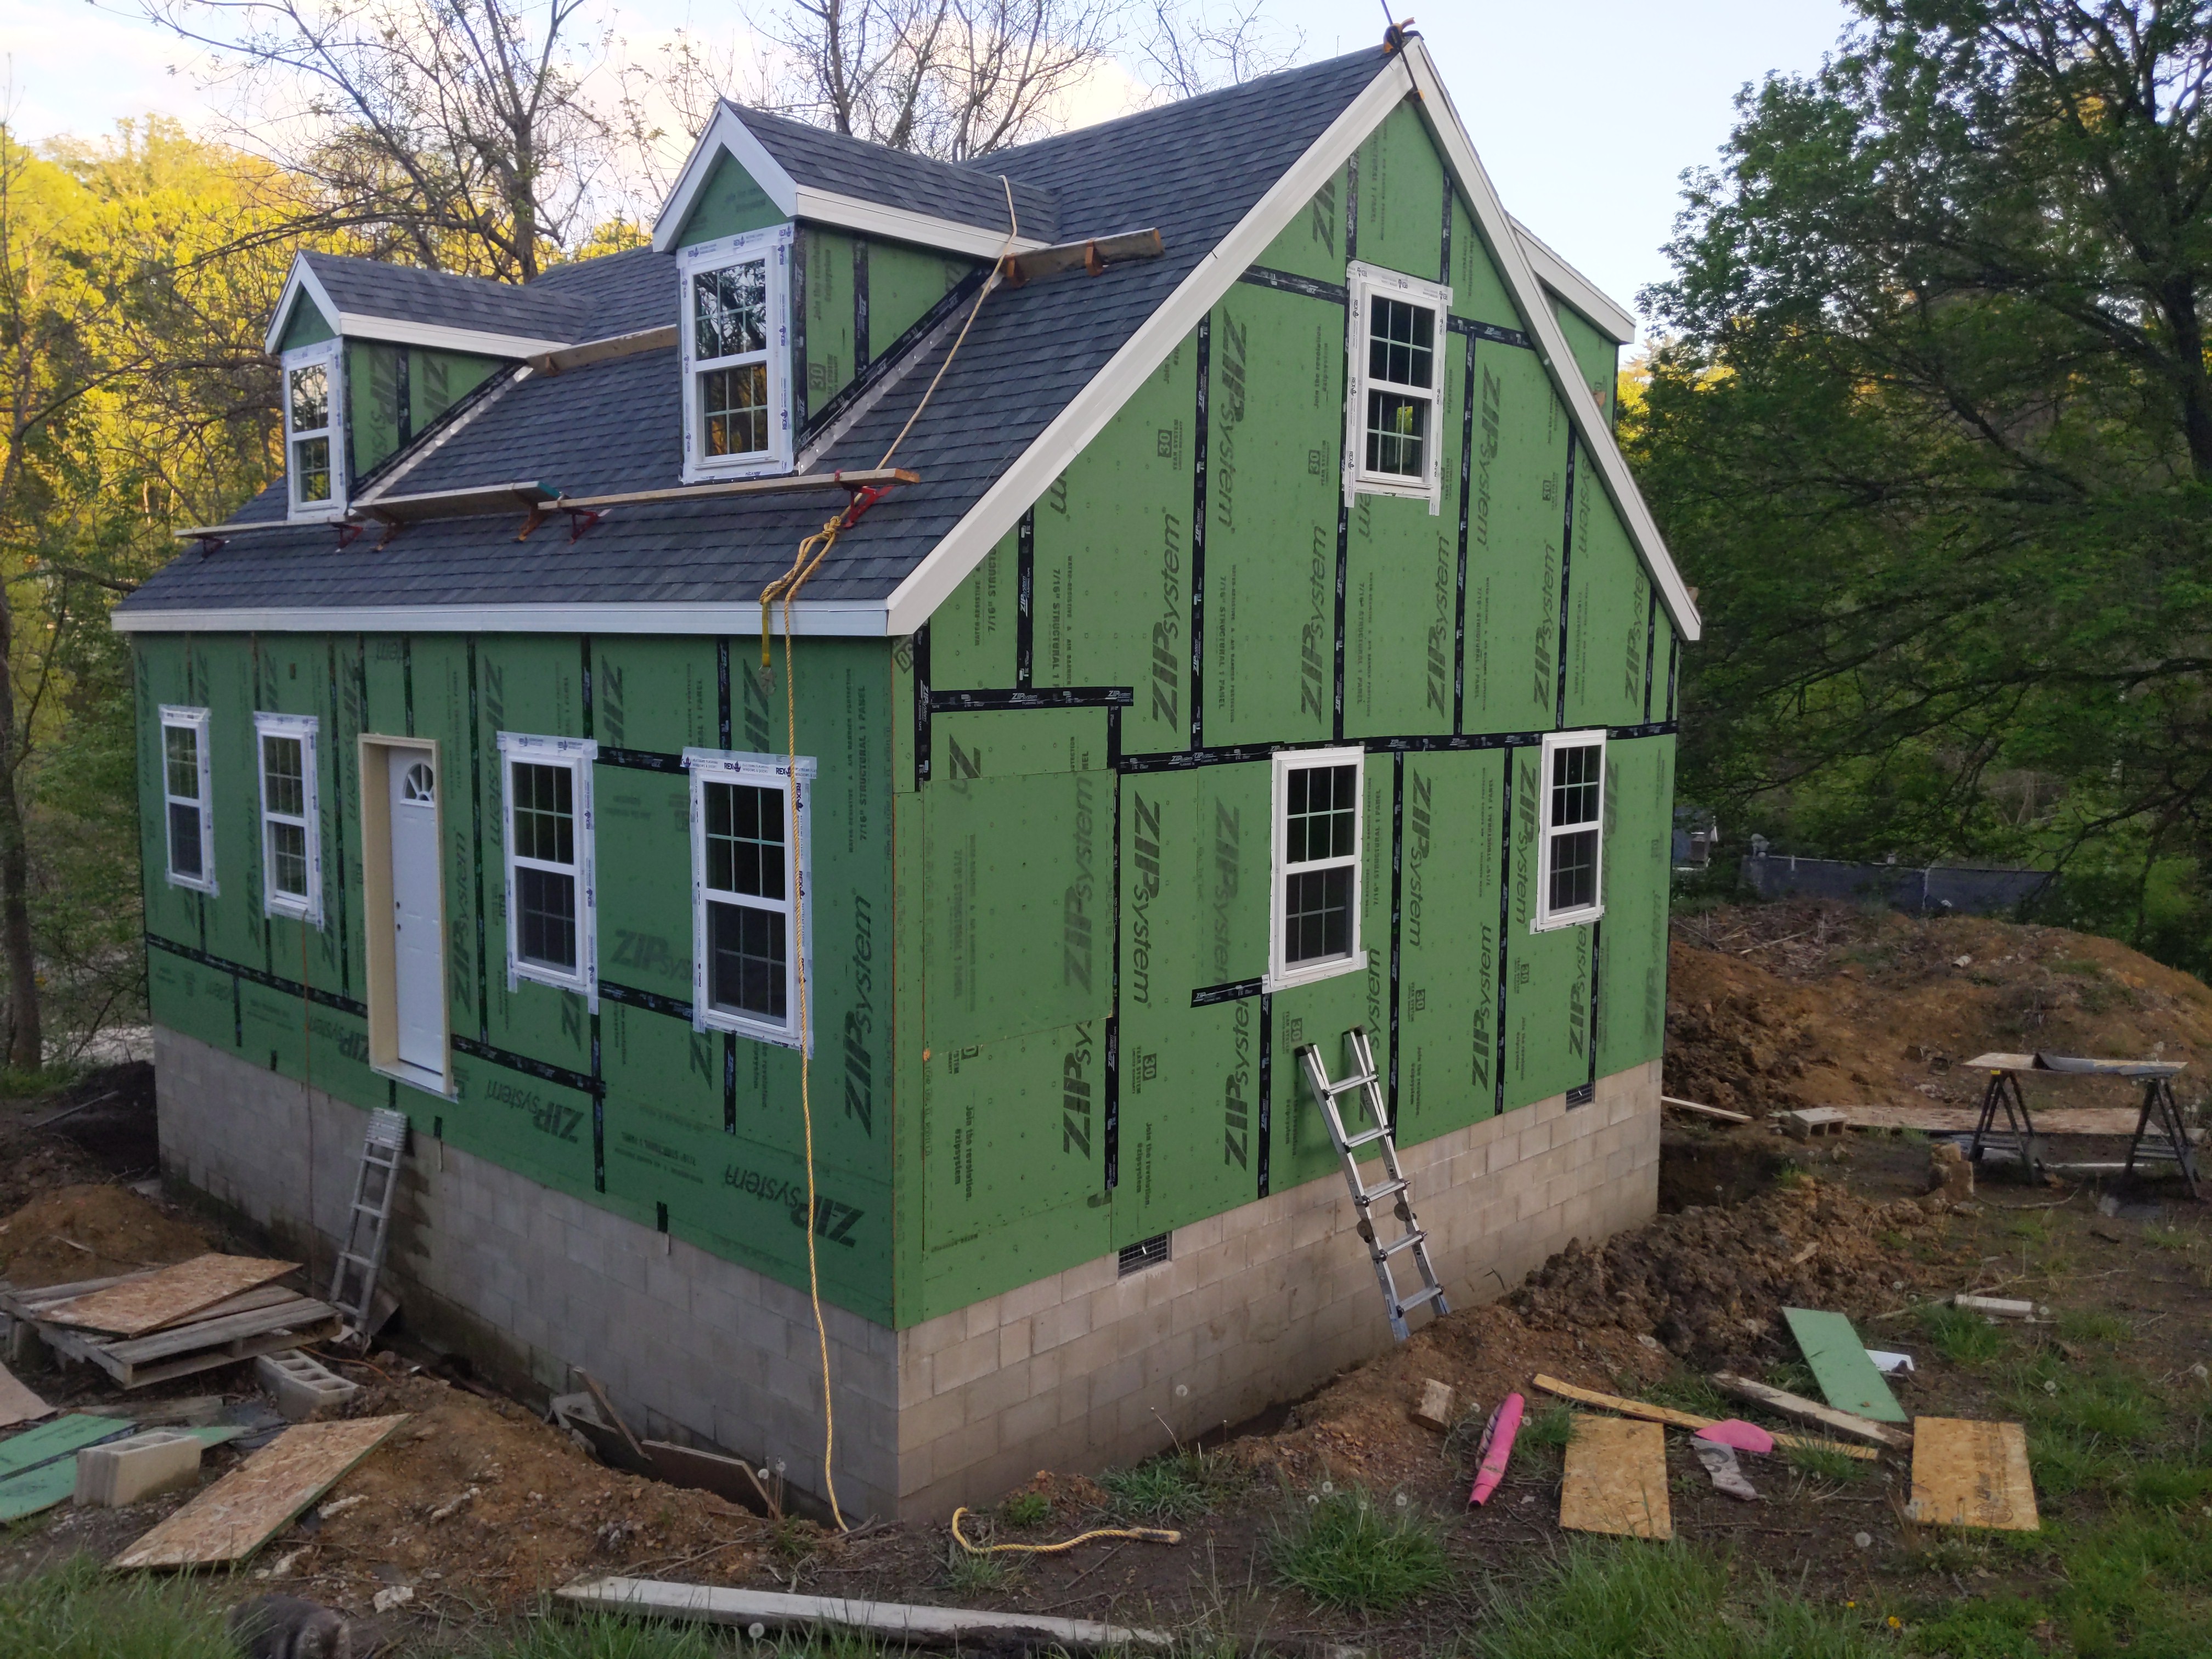
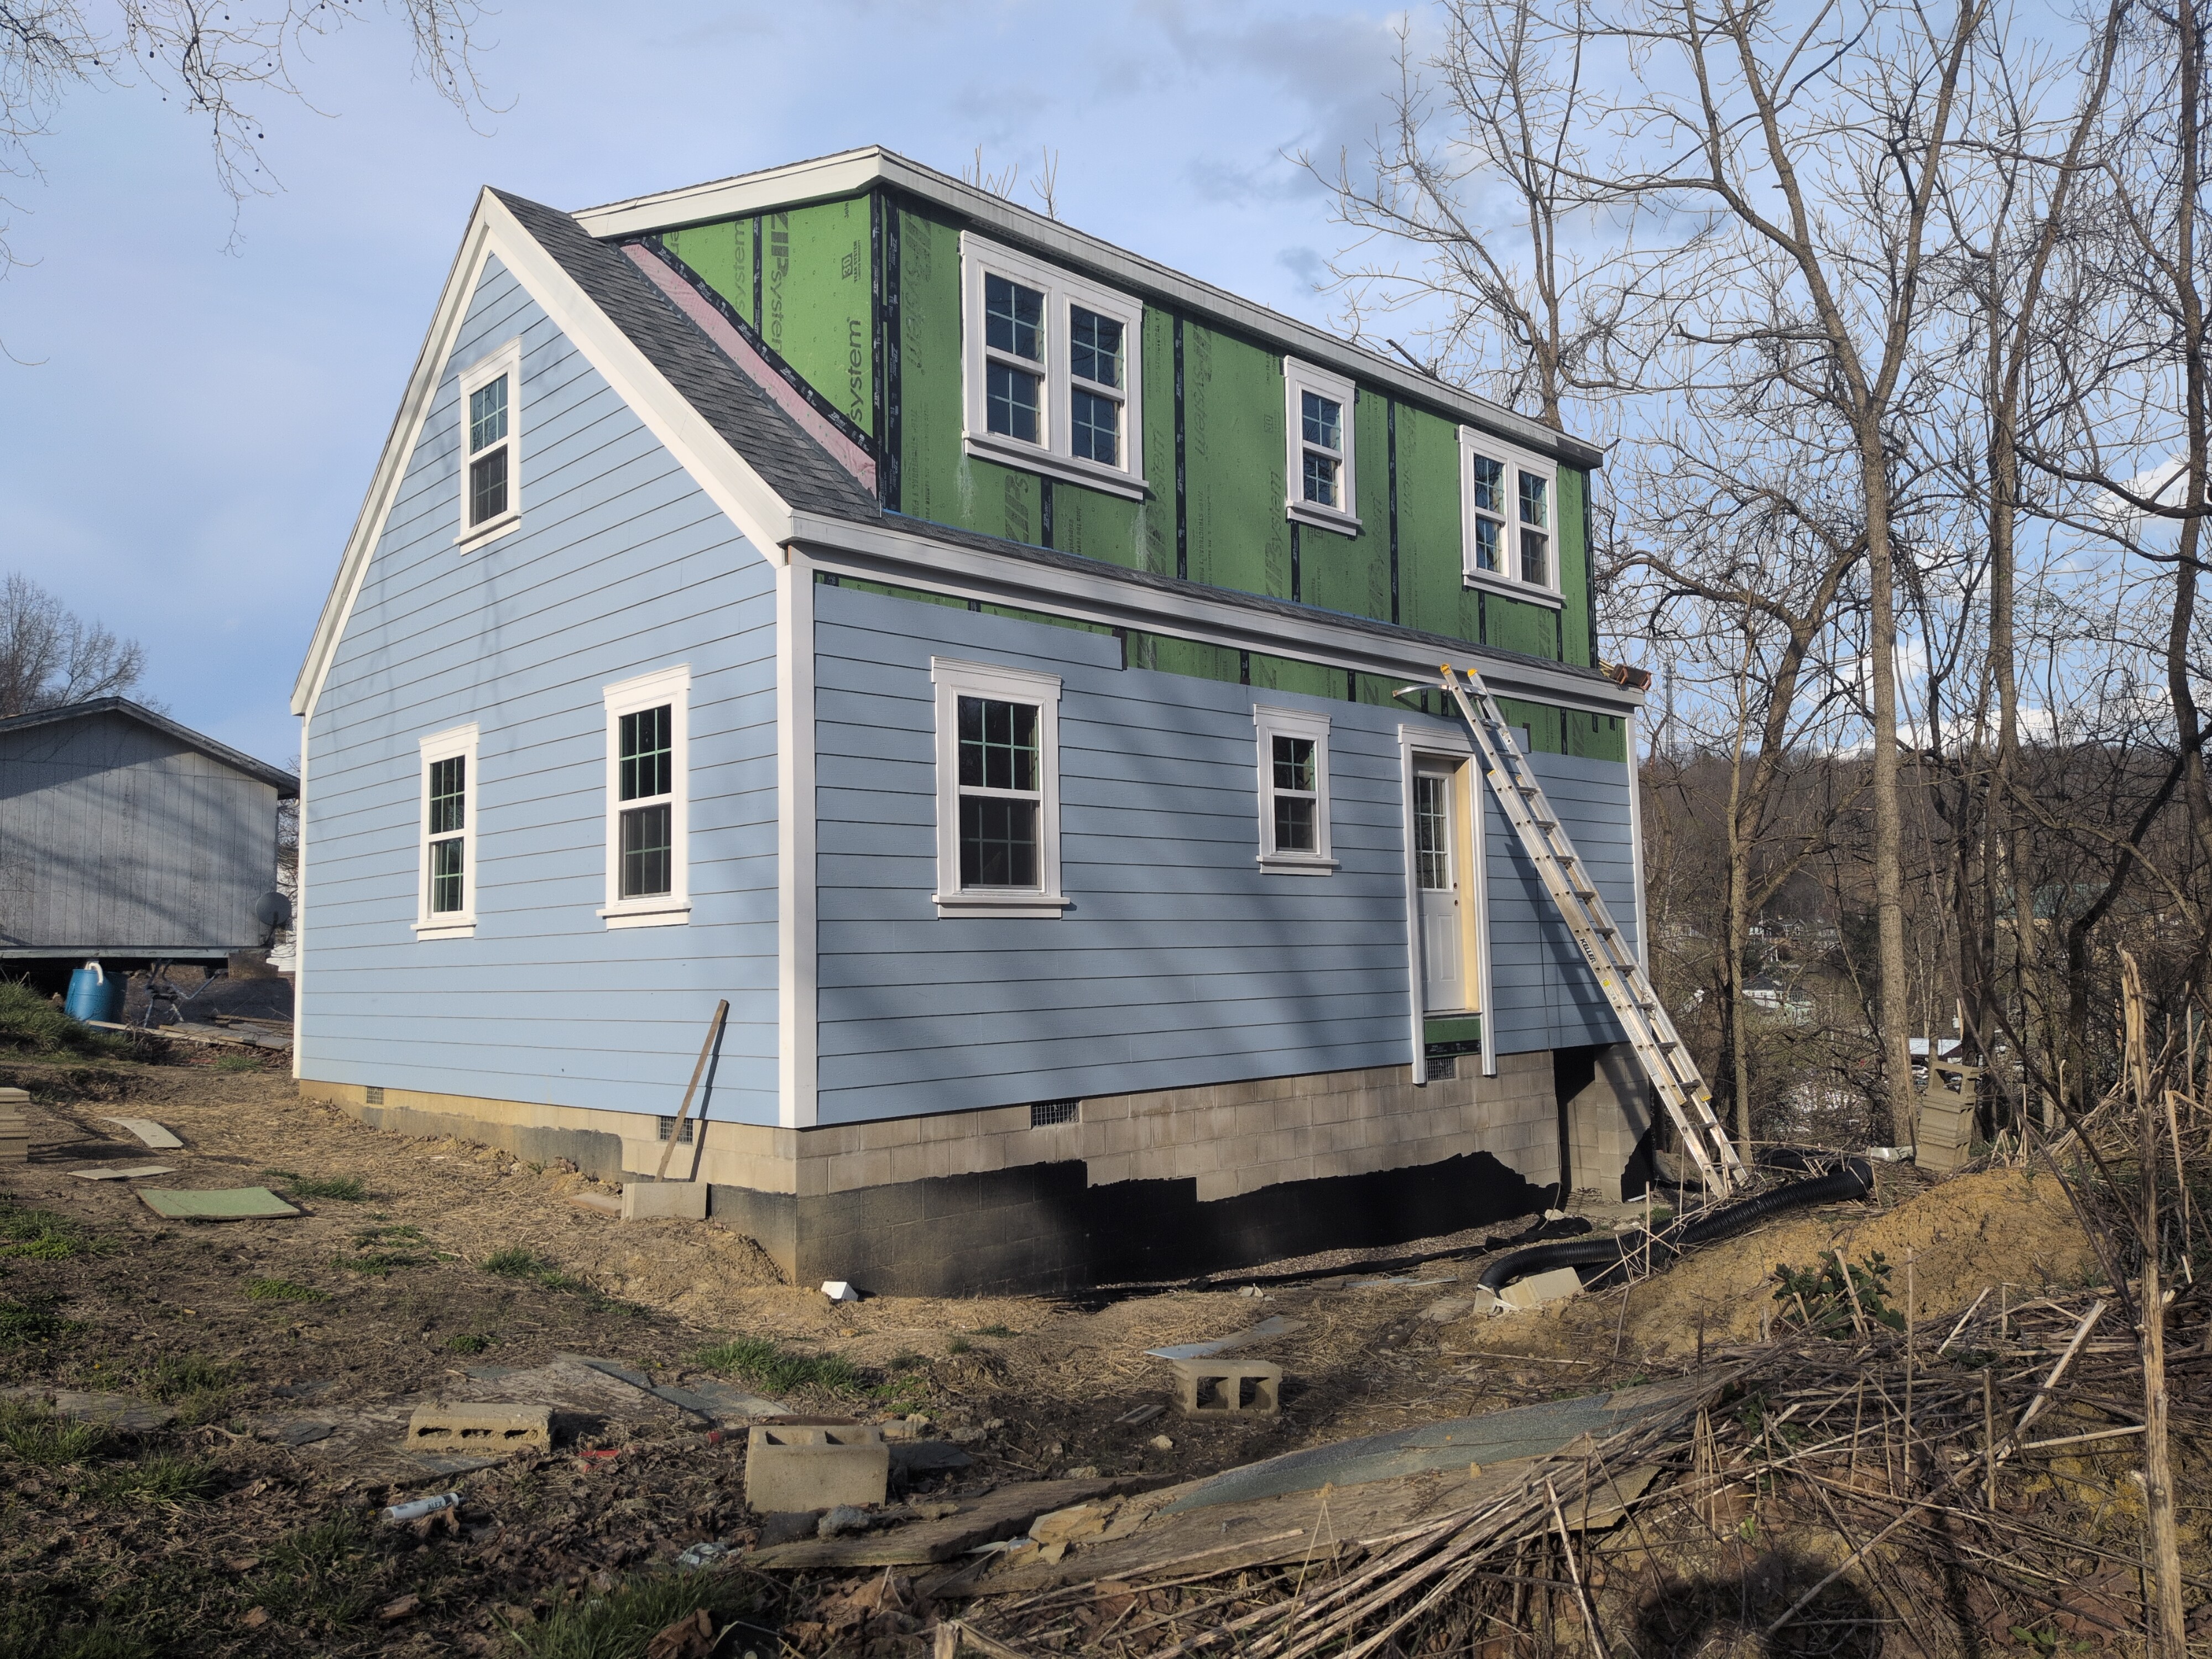
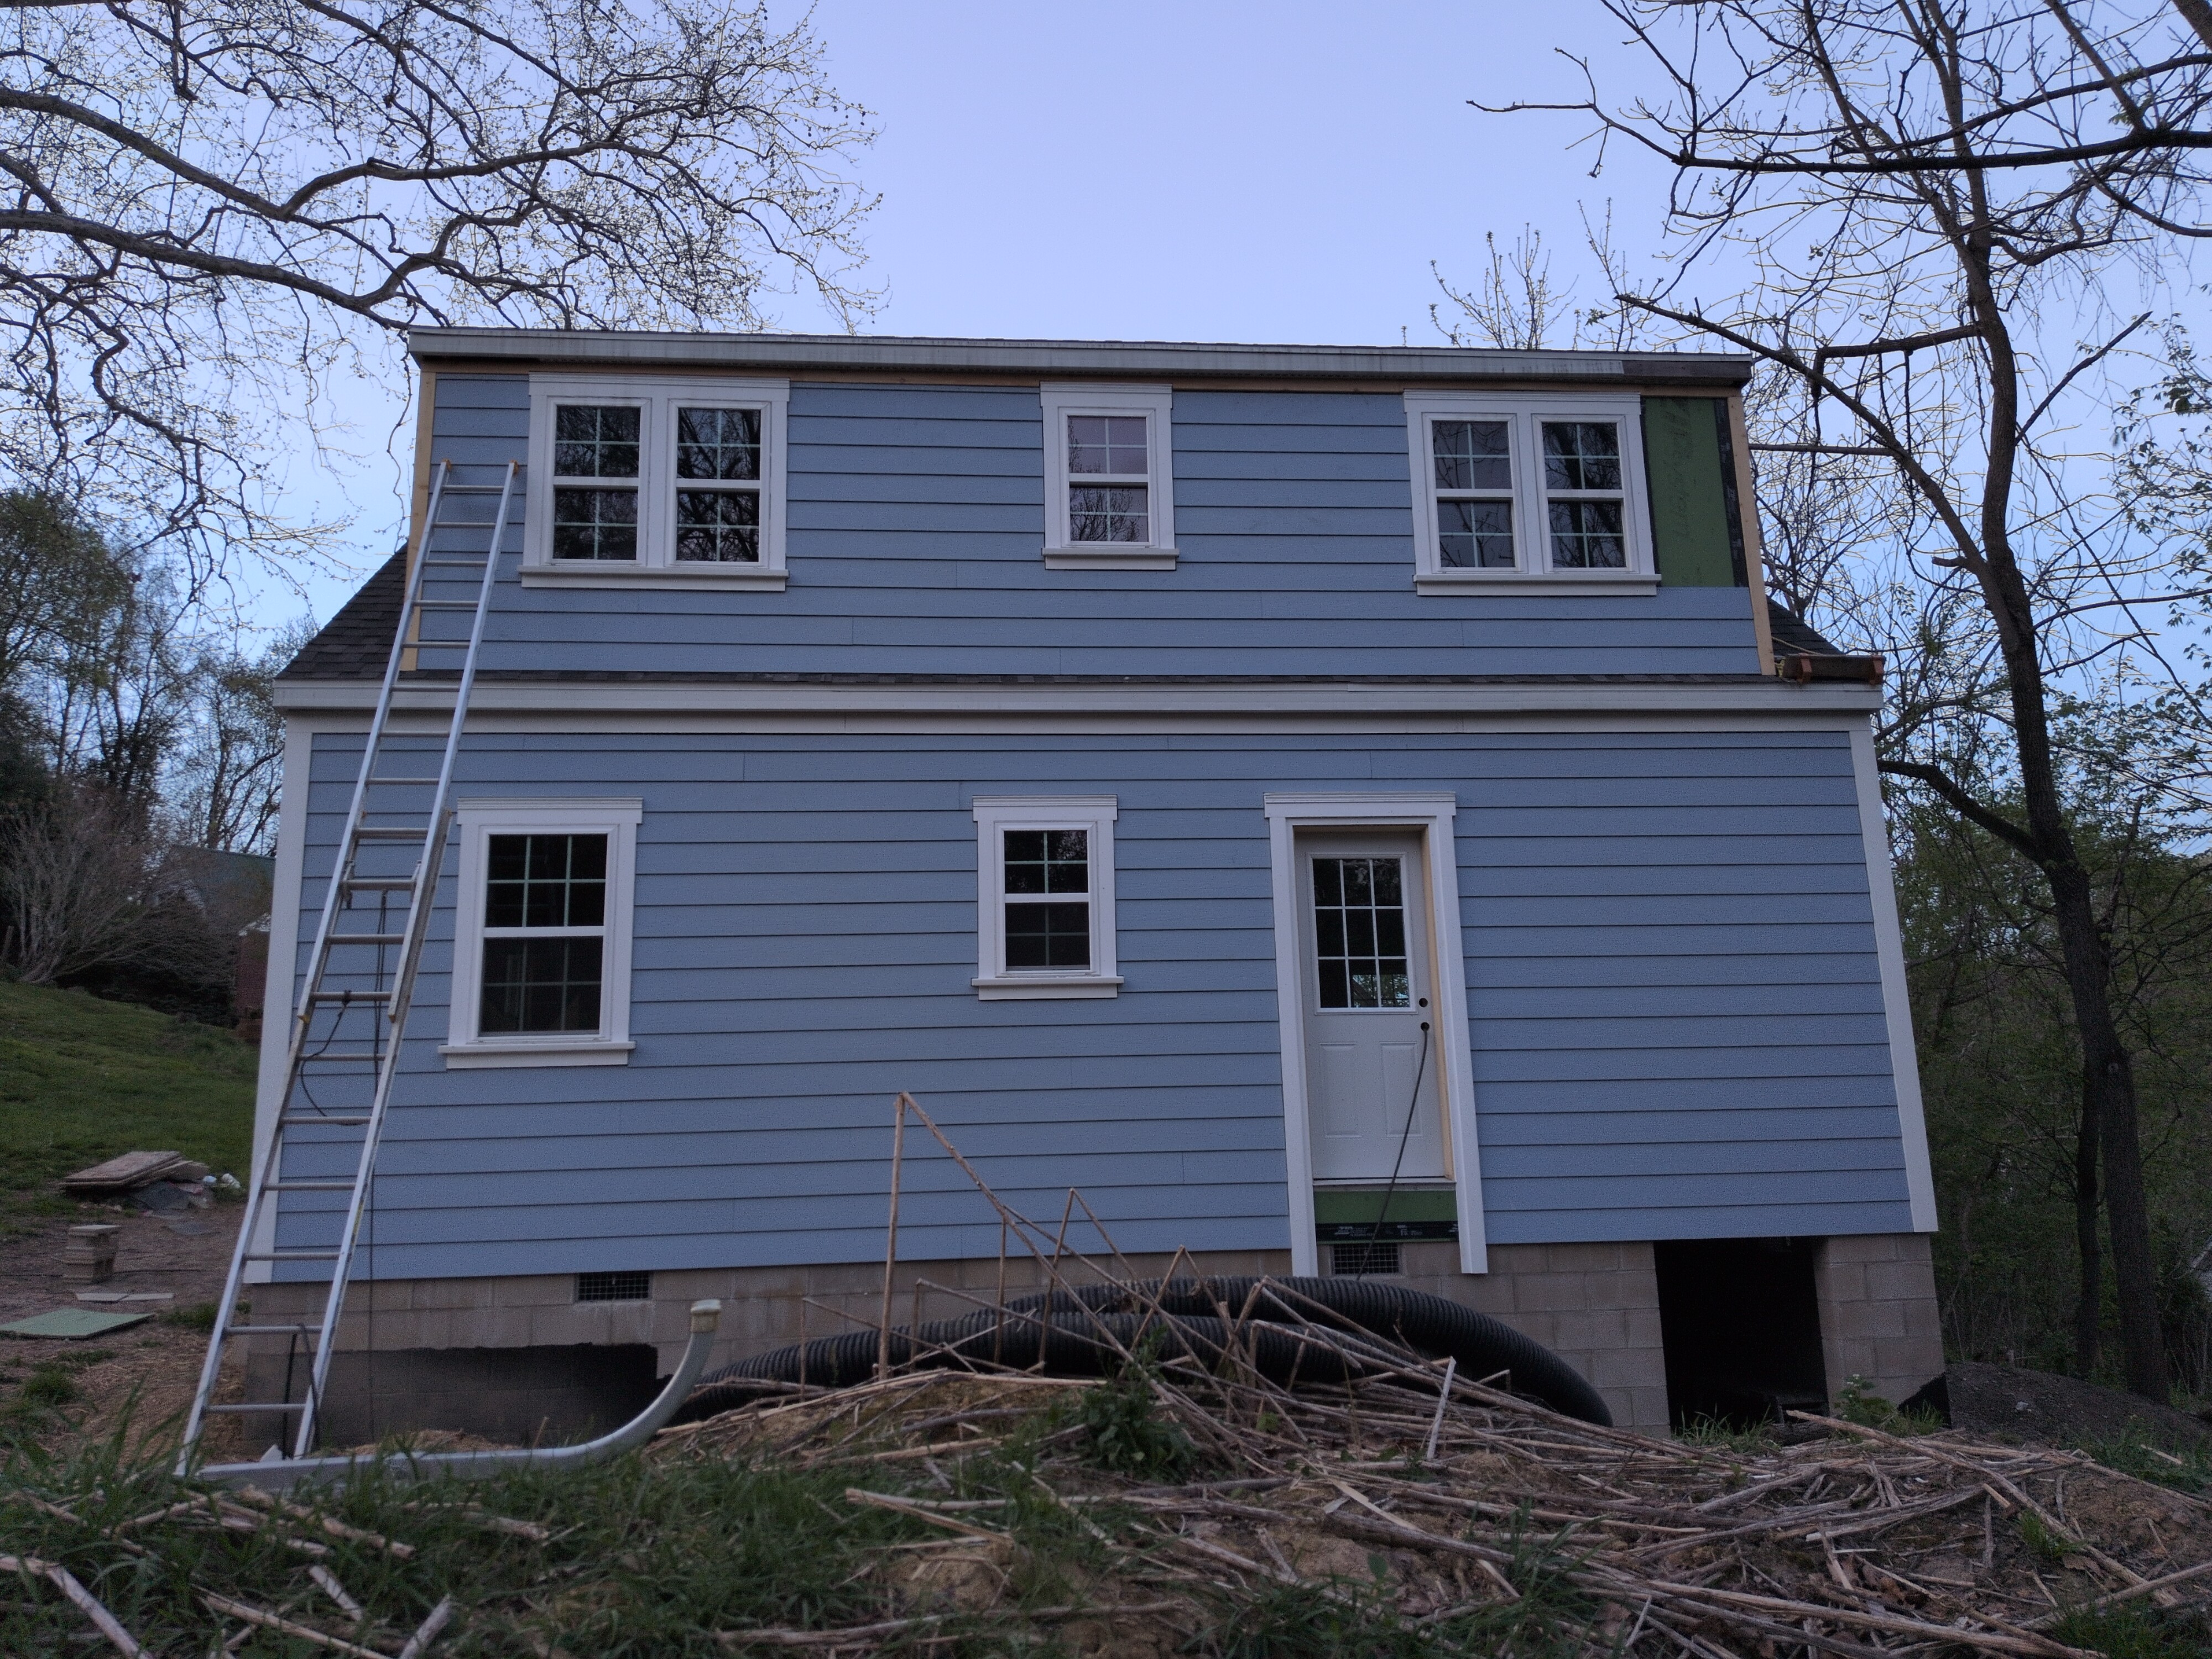
My dad helped me install windows and doors. The windows were pretty quick to install, but going around after and adding the flashing tape was tedious. You may notice I changed the layout of the windows on the front of the house. My mom first suggested it, and then popular opinion agreed that it would look better with 2 windows on each side of the door, and ultimately I agreed, as it's also more true to the Cape Cod architectural style. It took about a half day to move the window opening from the side of the house to the front. I'm glad I took the time to change it, and think the facade will look good with brickmould and shutters. I'm not a huge fan of how the windows look on the gable end of the house now, but it's something I can live with.
July 2025
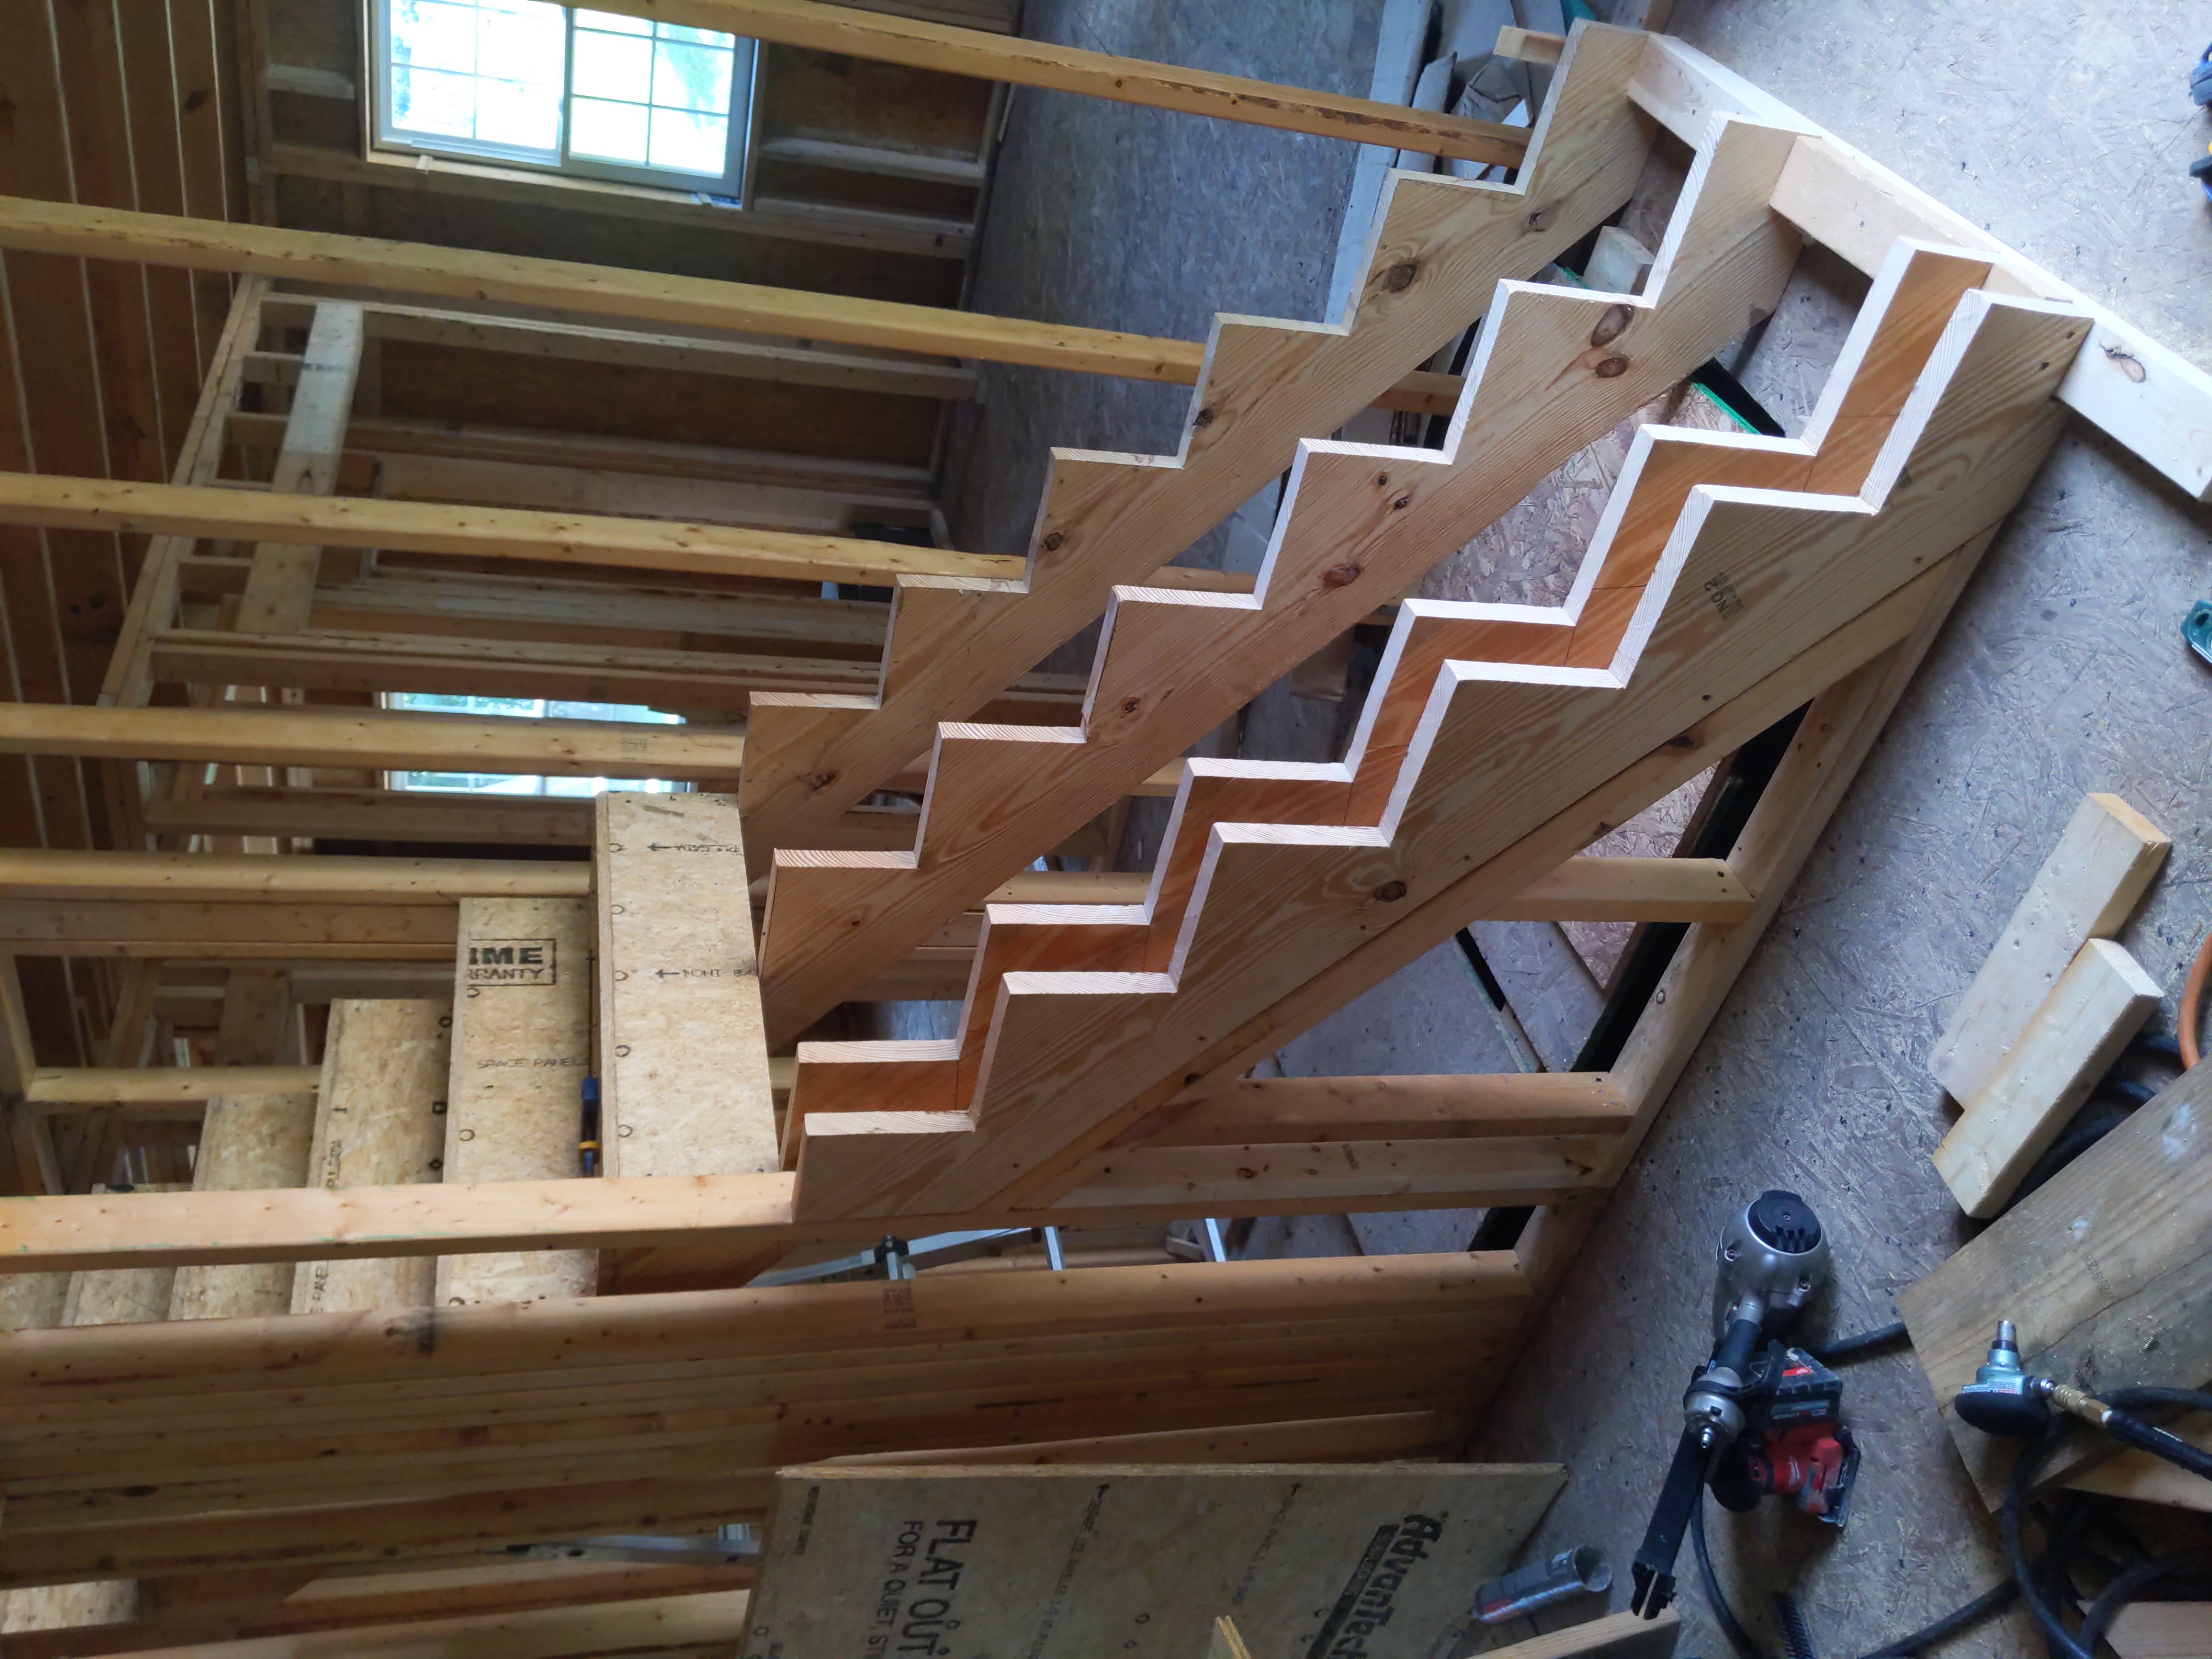
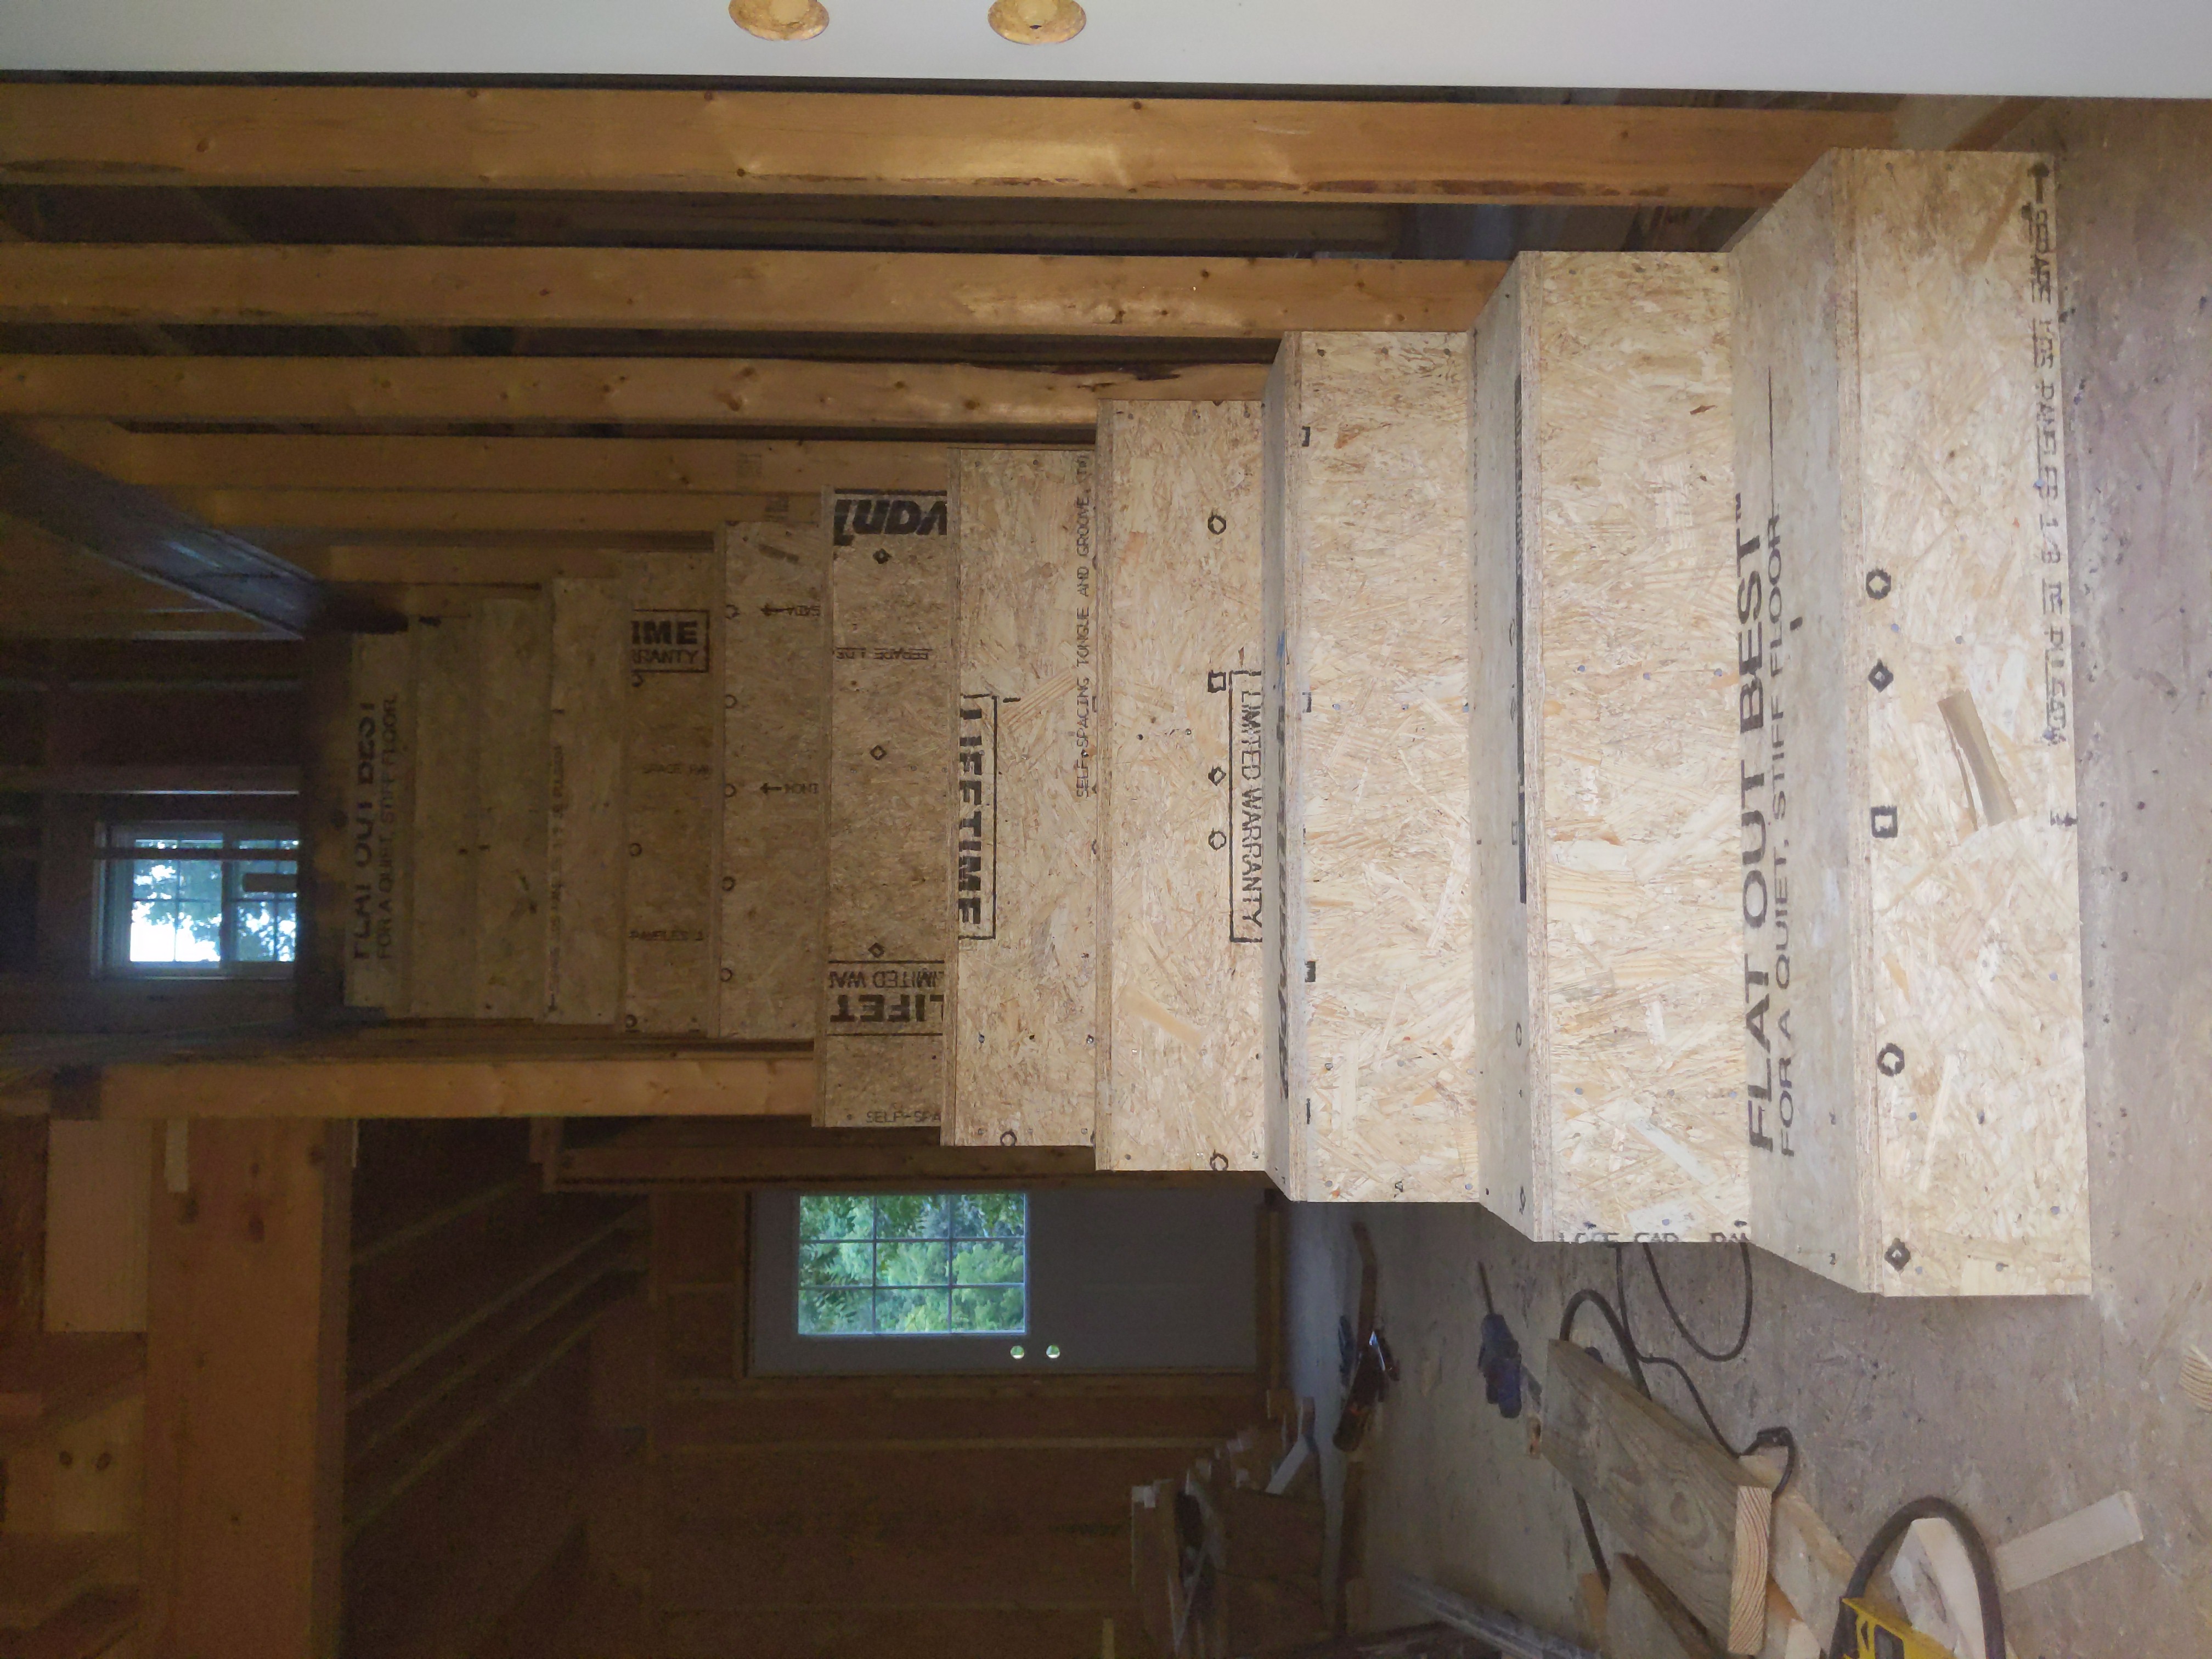
For far too long, I had been using a ladder to traverse between the ground floor and the attic, but I finally got around to building a proper set of stairs. I was nervous about needing to make so many precise cuts in my expensive 2x12 stringers, but everything worked out well.
September 2025 - December 2025
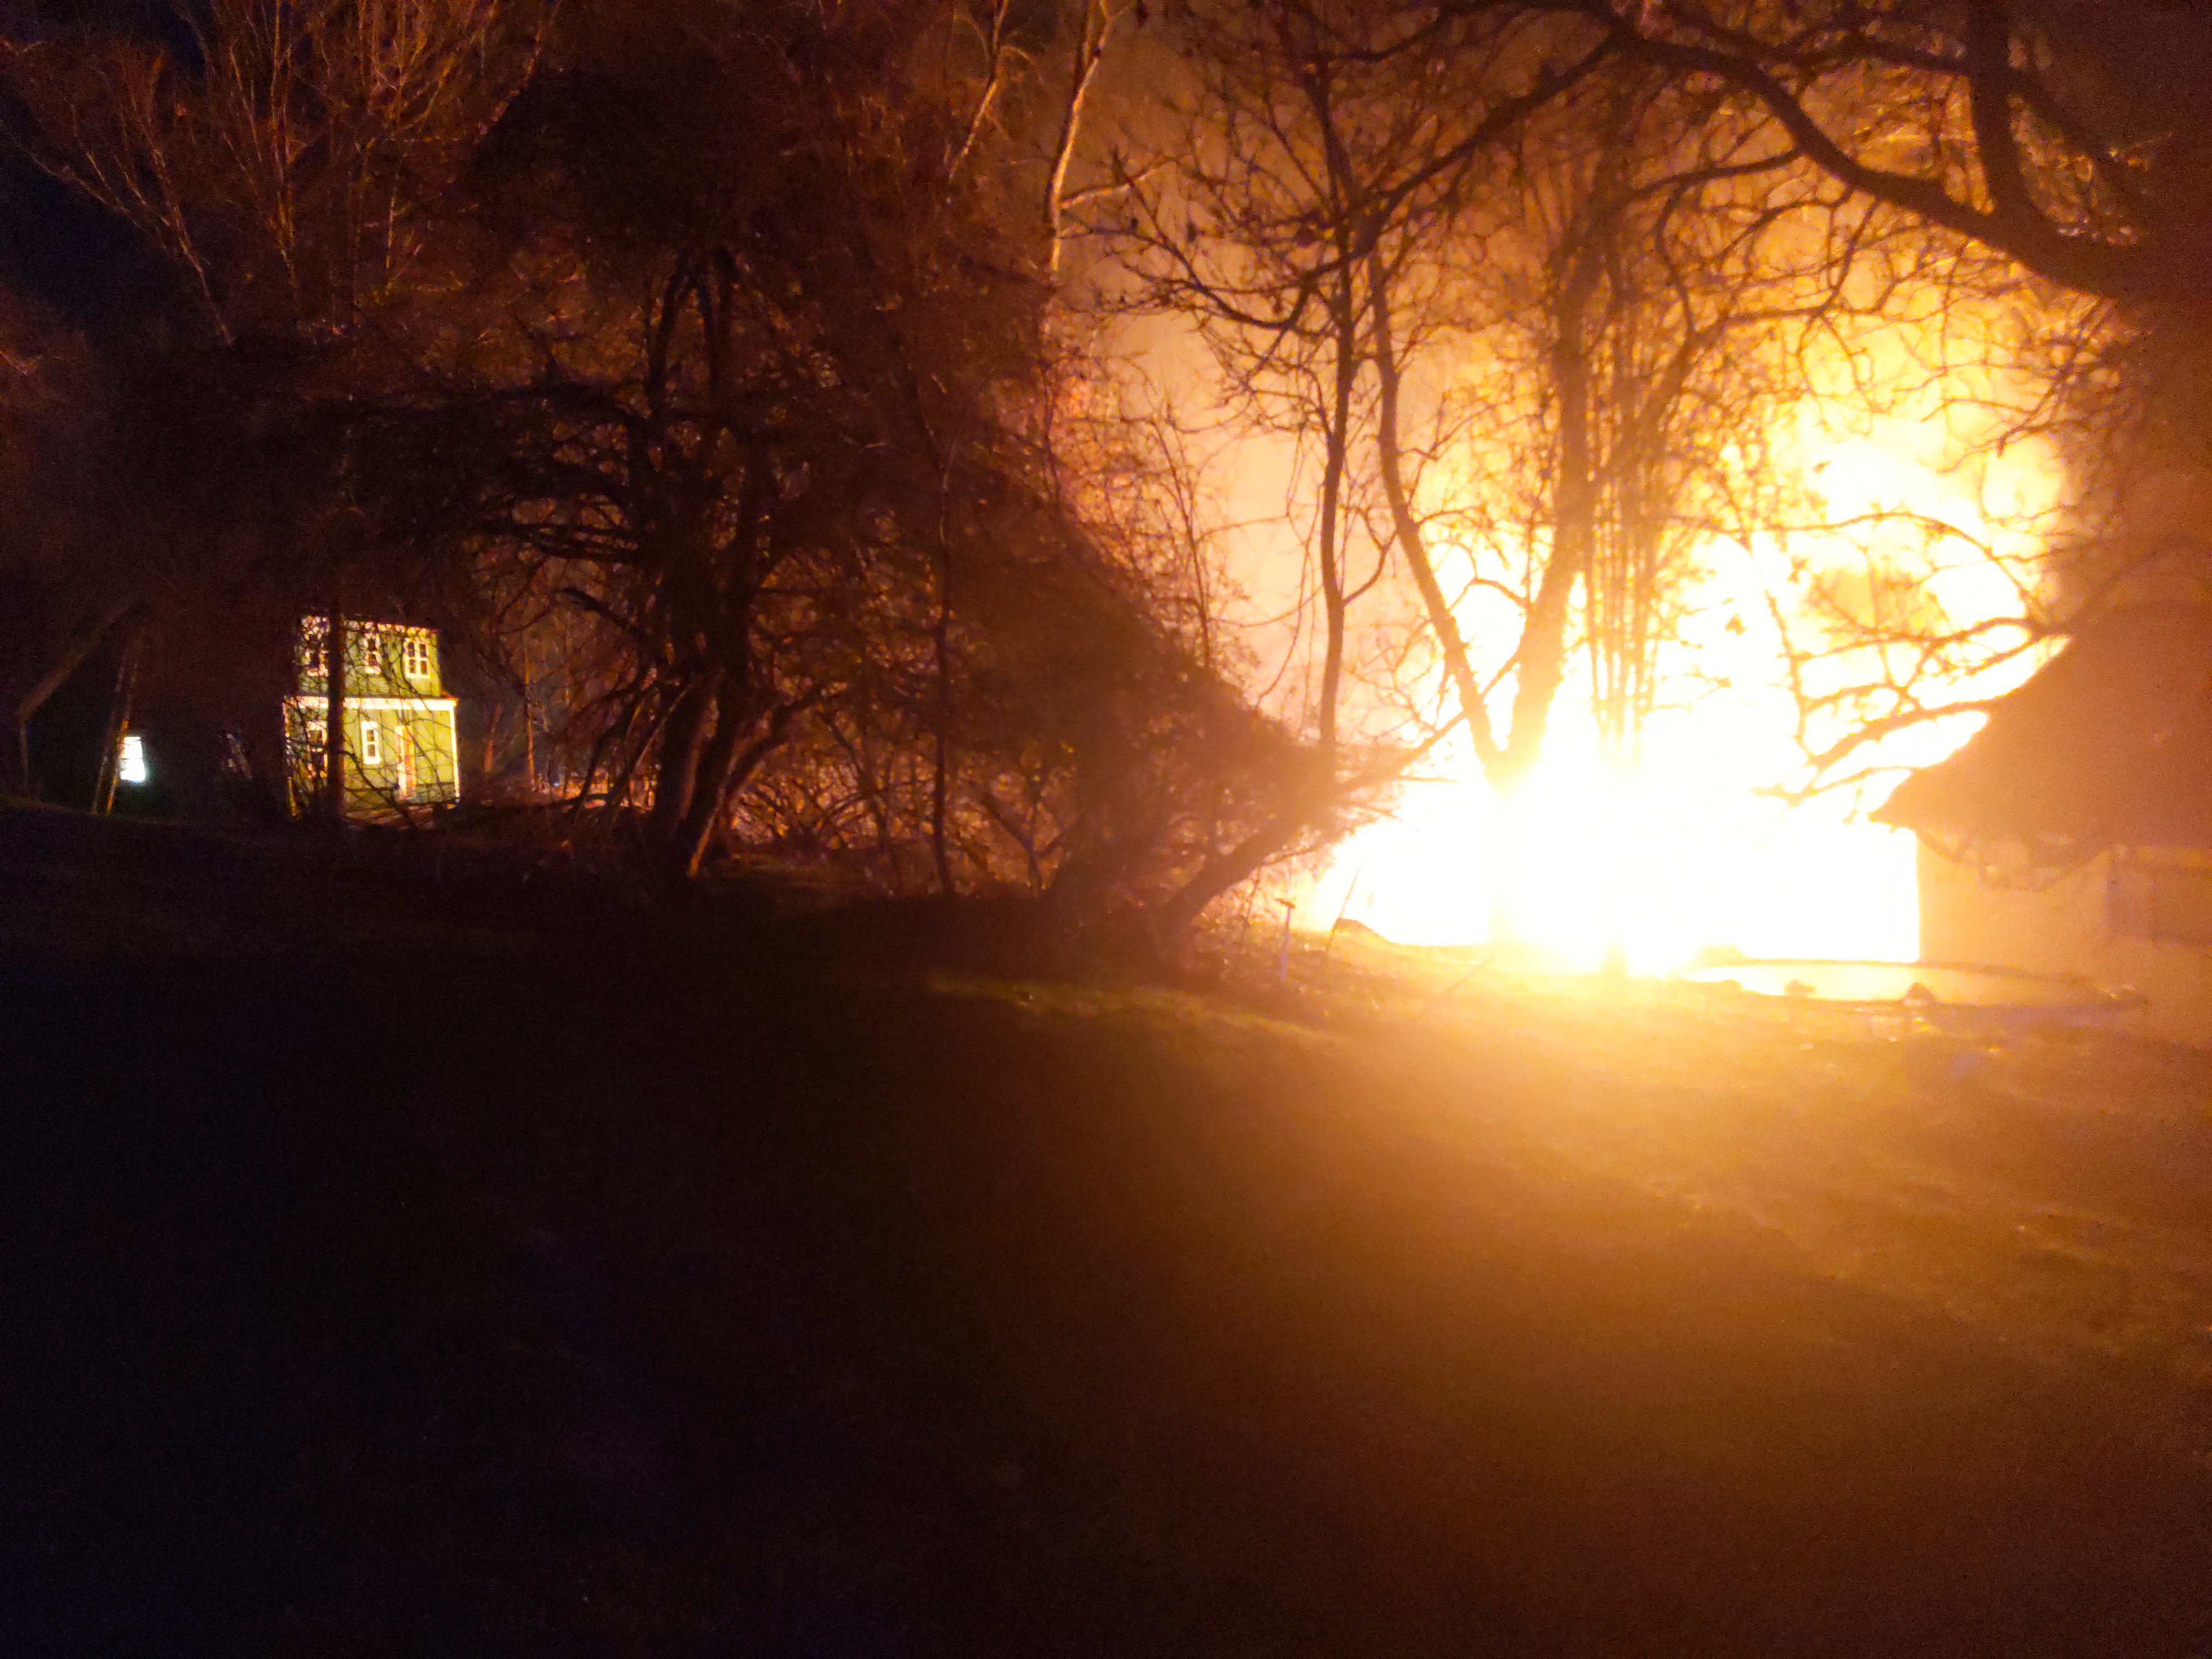
I have spent a long time working on siding and trim. One thing that I love about traditional homes (and I feel modern affordable homes ignore) is their emphasis on trim work. Many new modern vinyl windows include an integrated J-channel/brickmould that serves as the trim for the window. While this saves a lot of time, I have always disliked how they look. I ordered my windows without the integrated trim (and it actually increased the price 30%) with the intention of building my own trim. After doing so much with rough carpentry, it was nice to get some experience with fine carpentry, and I'm proud of how they turned out. During this time is when the 2 houses directly behind my house caught on fire. Everyone made it out okay and I was also lucky to escape any damage to my house. The fire was less than 100 feet away.
January 2025 - April 2026
After trusting the water resistance of my ZIP Sheathing for longer than I should have, I finally started on the siding. I was able to make some progress on the siding in January, but progress stopped when Winter weather arrived. With the warmer weather, I have been able to start working on it again but it still proves to be tedious since I have to make many cuts around windows and I end up having to move the ladder several times just to get one board up. It's been slow, but I can finally see the finish line. I was nervous about possibly picking the "wrong color" but I feel the light blue fits the home perfectly.